Owncast is a free open-source alternative to YouTube Live for streaming. It works on Linux and macOS and you can stream anything over it. It offers a chat window as well where participants can communicate with each other. From configuration to server management, it offers all the options to customize the settings of the live chat. You can control the video quality as well and use external storage to store the live stream video to optimize the bandwidth.
It offers a simple admin panel from where you can keep track of the hardware usage. The RTMP server that it creates for you can be connected through any streaming software, OBS Studio for example. The live video can be paused and can be played in delayed mode. But if you want to keep watching the liver version then you can do that as well.
If you want to deploy it on your own domain then you can configure that from the panel. But if your ISP allows port forwarding then you can use your own PC or MacBook to stream your own video on your own platform. And if you do decide to host it on your own server then it lets you customize the branding such as logo, name, server URL, and about section.
Main Features of Owncast:
- Can automatically connect to the server via OBS without any problem. It automatically generates a stream key for you and you can set a desired password as well.
- On the main dashboard, you can see live stats of the watching audience.
- It assigns a name to a participant in the chat automatically. But if participants want, they can customize their name easily. As a Owncast server administrator, you can blacklist certain names as well so people can’t use them.
- If your internet connection is not strong enough then it lets you choose a custom video quality for the stream. But if you want to stream in high quality then it allows you to do that as well.
- Since the video being streamed is fetched from OBS Studio, you are free to stream anything you want. For example, you can use your iPhone for streaming your vlog.
- For additional programming support, it offers webhooks and token support. You can build bots for chats or notification tools when you go live.
Installing and Running Owncast on a Server:
The binary releases of Owncast are available. You can either use those or you can simply use the Docker image to fetch it and deploy it. But for simplicity, in this post, I will be using the Linux binary that you can download and run directly from the terminal.
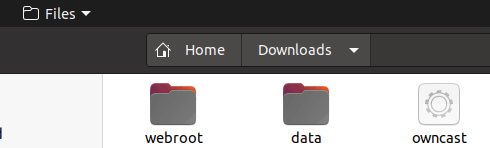
So, you just go ahead and download the latest Owncast binary and then extract it.
You have to make sure that you have FFmpeg installed.
Now, you just launch it like this and then you will see some logs on the Terminal. You can also run it on Windows through WSL.
./owncast
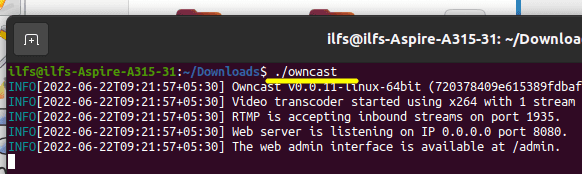
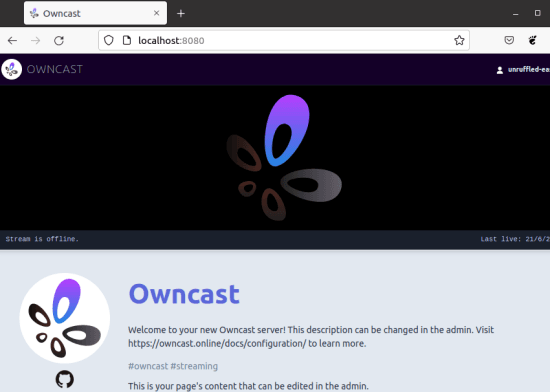
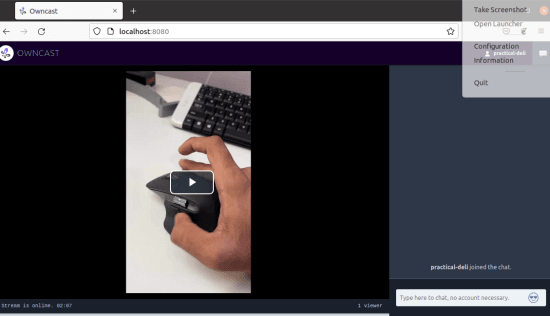
Open browser and then type localhost:8080 in the address bar. The main web UI of Owncast will appear. Here you will see the live video when you stream something.
To open the admin panel, type localhost:8080/admin and it will ask for the password. The default username and password are admin/abc123 so just type both and hit enter.
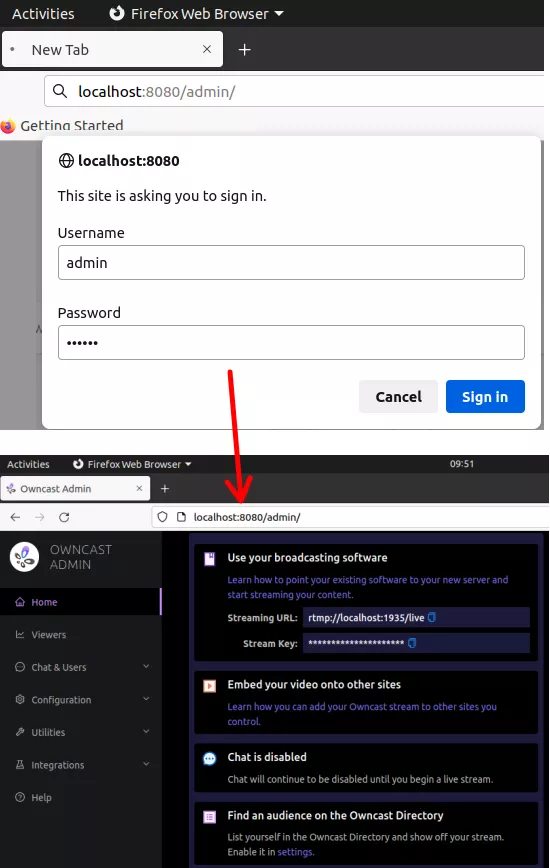
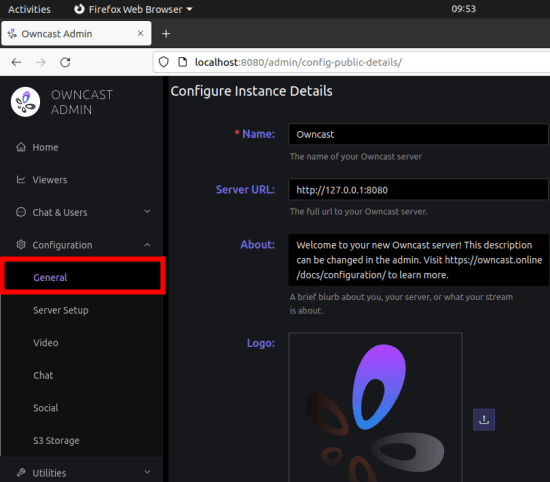
After going to the admin panel, you can configure many things such as change the branding. Go to the Configuration > General section and here upload a logo and give your Owncast instance a name and URL.
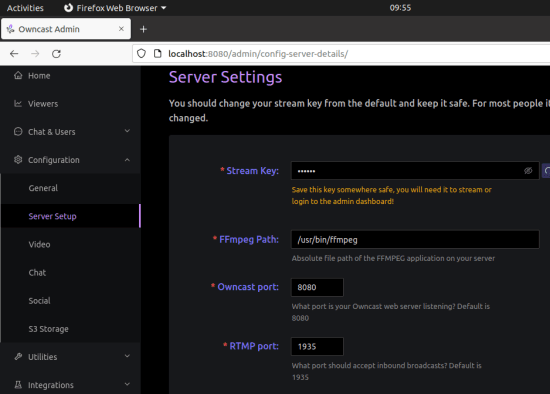
Next you go to the Server Setup section to configure the stream key, FFmpeg path, and RTMP port. And additionally, you can configure S3 for intermediate storage.
In this way, you will have to do configuration for the first time when you run Owncast. After all, setting up, you just now need to start streaming. You can stream anything and then the process to do that is mentioned below.
How to Live Stream using Owncast?
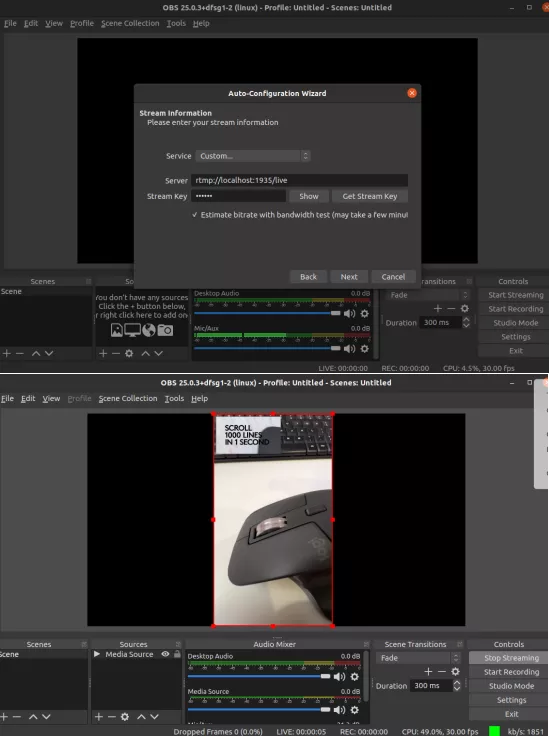
At this point, I am assuming that you have already configured the server configuration. To start streaming, you need software that you can do that. The best choice is OBS Studio.
Open OBS Studio and then start a stream. Use the stream key and URL from the admin panel of Owncast. Select a source in OBS which can be anything and then start the steam.
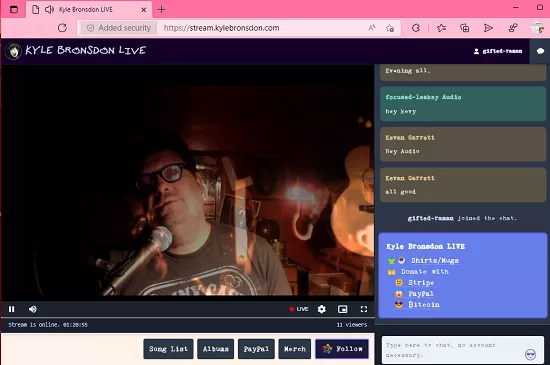
The live start stream which starts will be available on the homepage (localhost:8080). The live video doesn’t play automatically and you will have to hit the play button. There is an option beneath the video player to see the live video or see the delayed video.
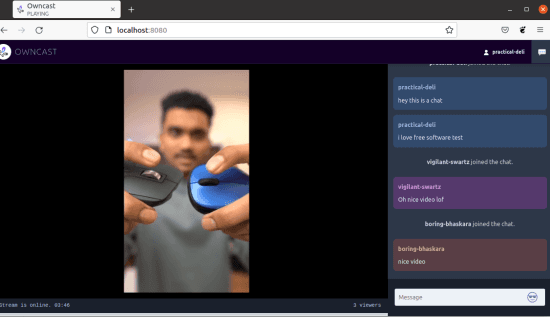
As soon as the live stream starts, people can use chat. Anybody can join the chat and right now there is no sign up or prior registration. It will assign you a random name but you can change that from the top right corner.

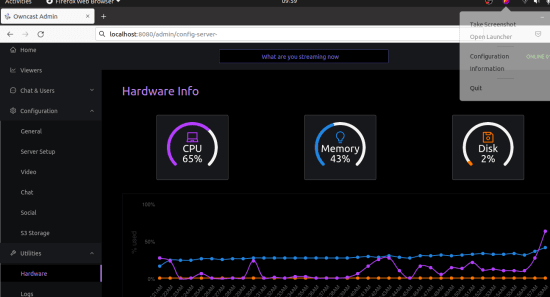
The live stream can be paused anytime and then you can continue watching that from where you left it off. On the streamer side, there are server stats that you can monitor. In the admin panel there is Hardware section from where you can track the CPU, Memory, and Disk usage.
So, this is all you can do with Owncast for now. Stream anything you want and on the other hand keep track of the status of your PC or server. If the hardware utilization is too high then you will have to shut it down and use it in a computer with good hardware configuration.
Final thoughts:
If you are looking for a free alternative to YouTube Live or Facebook Live then Owncast is a very good option. You can set this up on your own server and assign a domain name to it as well. Everything else is super easy to manage and just use OBS other software to send the stream from webcam, a file, or simply your screen recording.