Fastmac is a free GitHub and GitHub Actions based tool that lets you create free macOS shell. You can easily create the macOS shell in just a few seconds and use that for whatever reason you have. One of the best use case of having a macOS shell is to compile and build applications for macOS. The macOS shell that Fastmac helps you create stays alive for 6 hours. You get direct access to the macOS shell over SSH and do MAC specific stuff. You connect to macOS shell either from Windows or Linux terminal with simple SSH command. However, if you are on Windows, the WSL is encouraged.
A lot of individual developers and freelancers do not usually have Macbook to build and test their applications. Since MAC is paid and quite expensive as well for a generic developer. In that case, this Fastmac tools comes in handy. With the help of Fastmac, you can leverage GitHub Actions to create a macOS session for you. And not only the macOS session but you can also use Fastmac to create Linux shell as well in the same way. When you are finished, you can close the session that you created earlier.
How to Create Free macOS instance for Linux or Windows Shell?
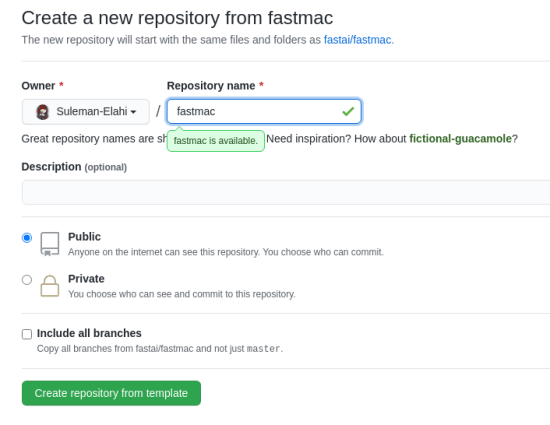
Although you can create Linux shell as well with Fastmac but for this specific post, I will be focusing on the macOS shell. The very first things that you have to do in the beginning is fork the Fastmac projects on GitHub from here. Click on the “Fork” button from top right and then fork it as a template in your GitHub account.
Now, when you have forked the repository in your account, you are ready to use. Just go the GitHub Actions workflow by clicking on the “click here” link in the repository. It will take you the workflow screen which looks like as shown in the screenshot below.
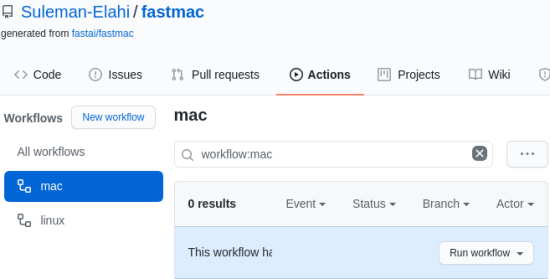
It is now time to run the workflow. You just select the “Run workflow” option from the dropdown and wait for it launch.

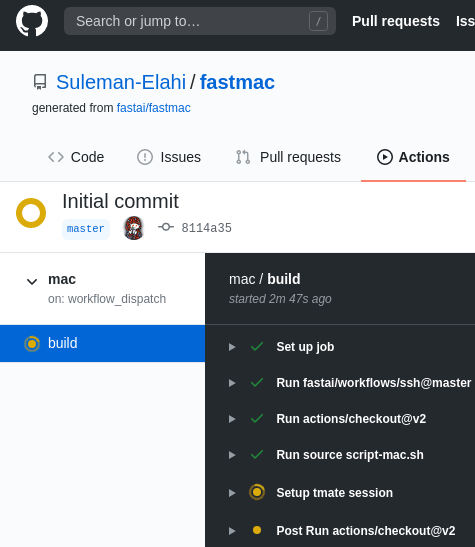
You have to give it a few seconds and when you’ll see a spinning orange circle, click the “mac” hyperlink next to it. On the next screen, you’ll see another spinning orange circle, this time with “build” text. Just click on it. You will see the workflow log as shown in the screenshot below.

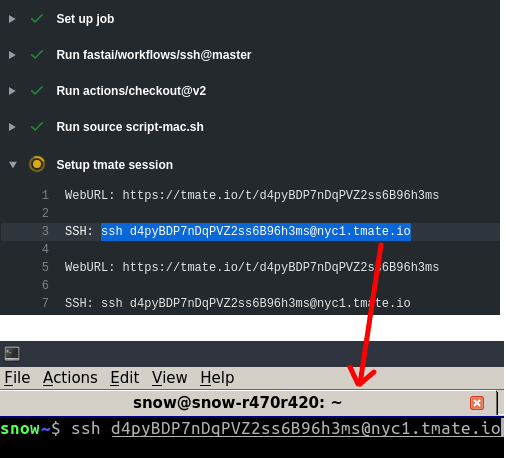
When the workflow has started, you can then simply copy the SSH command or online link to the tmate session. You just paste the SSH link in the terminal on your computer and then log in.
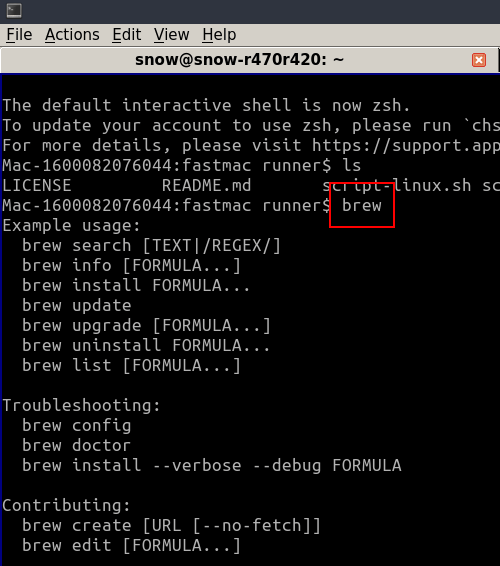
Now, you will be linked to the macOS shell and you can start doing whatever you want. You just test the session by running MAC specific commands such as “brew”. You can see that in the screenshot below.
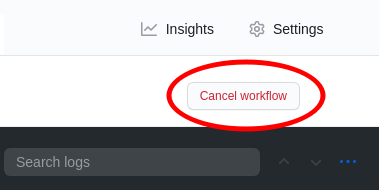
After you are done, it is wise thing to cancel the workflow. This way, the system can be assigned to some other user. To do that, you just click on the “Cancel workflow” button on the top right side. This is as simple as that.
In this way, you can use this simple and powerful tool create free macOS shell and access it. You can do anything that you want on the shell that you’ve just created. Also, you can use any macOS specific commands there to test and even build the applications for Mac platform.
Final thoughts
If you need quick access to a macOS shell then you can use Fastmac. The process is very simple and you can get a macOS session for you in just a few minutes if you follow the above steps carefully. You only need a valid GitHub account to make use of GitHub Actions to allocate yourself a Mac shell. And not only that but you can use the same process to get access to a Linux shell.