Moufette is a free and self-hosted feedback tool to get website feedback with screenshot and upvotes on upcoming features. Basically, what this tool does is add a simple widget on your website. The feedback can be about anything on the website that needs to be improved. It just asks for the email address and then submit the user feedback to the back and where it reaches the developers or makers of the website. It offers a simple dashboard where you can see all the feedback that you have received and from multiple websites. Alternatively, you are free to customize the widget based on your needs and host it anywhere you like.
There are many website feedback tools that you can use to integrate on your website. But the one I have mentioned here is this self-hosted and you can install it on your own server. The advantage here is that you will own all the data and it is good for privacy as well. You can generate the feedback widget for multiple websites and manage them all like a pro. It offers you a simple a widget builder interface where you can customize the look and feel of the feedback box along with the features list. You can run it locally or go for one click hosting option with Heroku.
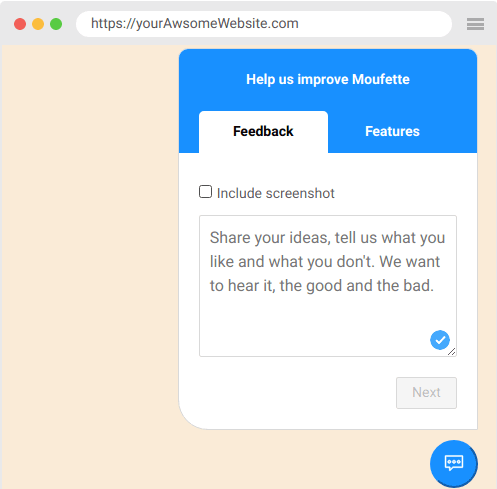
Self-hosted Feedback Tool to get Website Feedback with Screenshots, Votes:
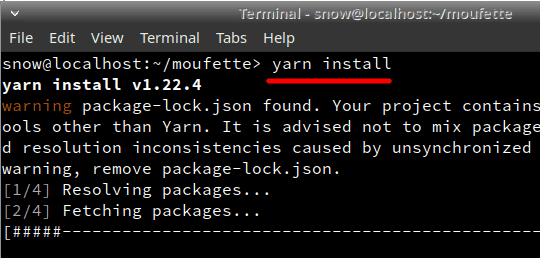
Getting started with moufette is very simple. For the sake of this post, I will be installing and running it locally on my computer. The first thing that you have to do is clone GitHub repository of Moufette here. Next you CD into the cloned directory and their run the following command. Before doing any of this, make sure that you have Node JS installed.
yarn install
Now, you have to edit the “.env.example” file and rename it to “.env”. Update it with the MongoDB connection URL. The MongoDB instance should be running locally or remotely and should be accessible. Otherwise, the entire tool will not work.
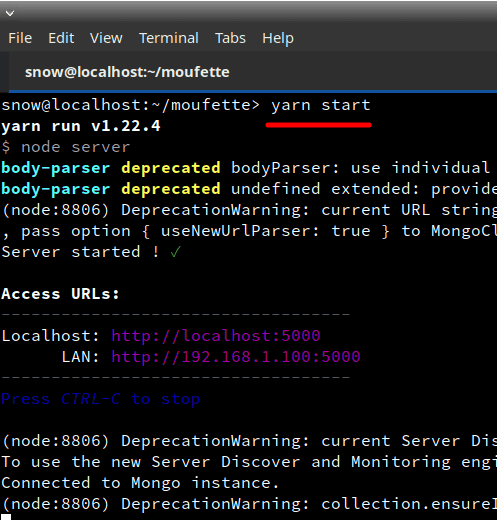
You have to run two commands in order to start the backend server as well as the front end server. Run the following command in the current terminal.
yarn start
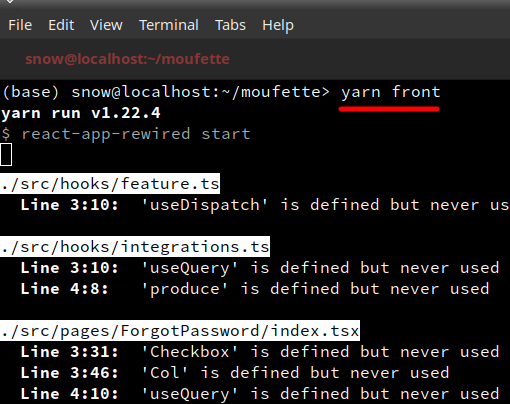
Open a new terminal tab, pointing to the same Moufette directory as above and run the following command to start the frontend server.
yarn front
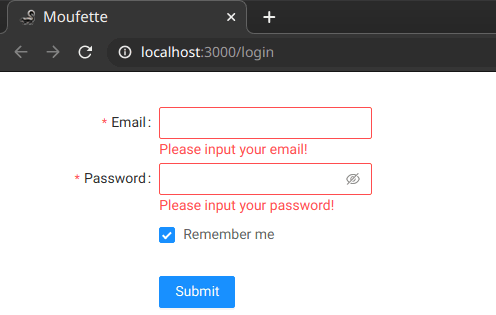
Go to the browser or it will open automatically to “localhost:3000”. The main login page of the tool will show up where you will have to register a free account.
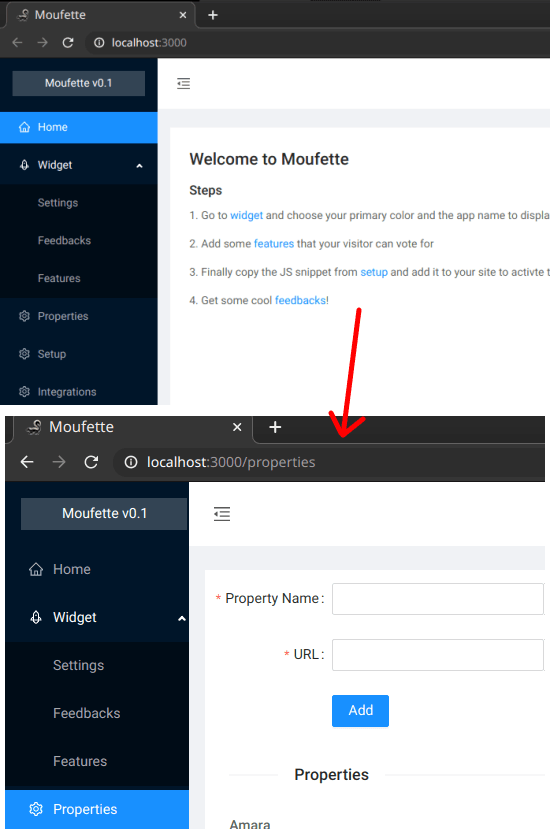
Now, just login with the account that you just created and you will reach the main dashboard of the feedback tool. The very first thing that you have to do if create a new property. A property is nothing but a website feedback widget for your website or other website.
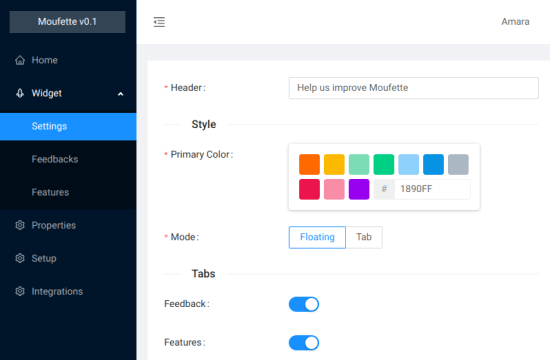
Next, you customize the feedback widget for your website. The different colors for the feedback box and adjust them according to your website theme. The preview of the final feedback box will be displayed the right-hand side.
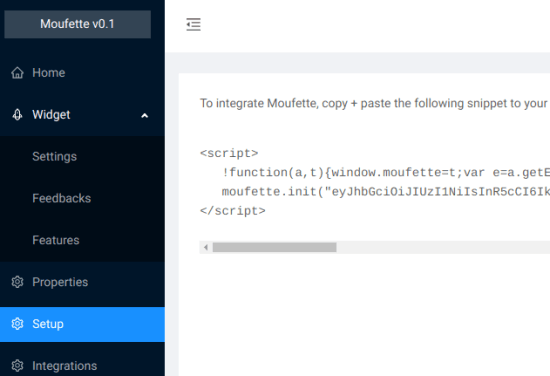
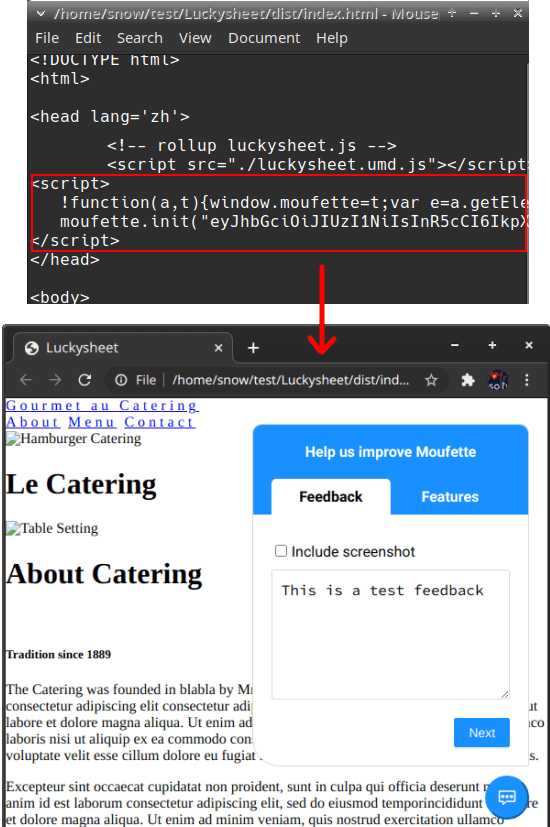
Now, it’s time to install the feedback widget on your website. To do that, just copy the code from the Setup section of the dashboard and paste that in the head section of your website. Simple as that.
Reload your website and the feedback widget should appear there.
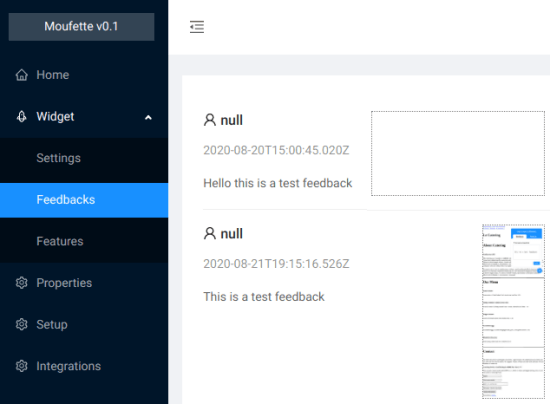
All the feedback that users submit on your website, will be available there in the admin dashboard. You can analyze them and then take further steps to improve your products.
In this way, you can make use of this simple and quite useful website feedback tool for all the websites that you have. It can even be multi-user many people can create an account on it and had their own property. You can even use it for your client’s project visible and it is completely free to use.
Closing thoughts
If you are looking for a self-hosted website feedback tool then you are at the right place. Just use the tool mentioned here and then you are all good to go. Also, this is simple and you can set up this phone any server with ease. This post should be enough to get you started and help you with all the installation. Still, if you get any problem then you can tell me in the comments down below