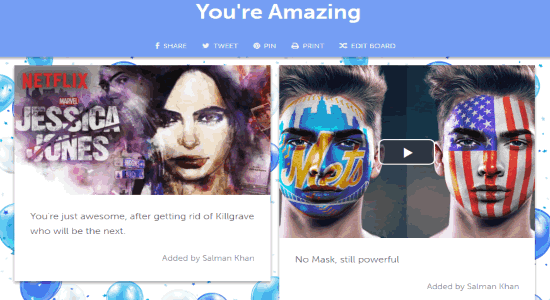
Kudoboard is a free online application to create greeting cards together with friends. Using this application, you’ll be able to collaboratively create greeting cards with your group and then send them to your loved ones like colleagues, friends, family members, and more in the form of boards. It provides a fun and interesting way of showing appreciation, sympathy, compliments, and best wishes to others from your group by creating greeting cards or Kudoboards (as they call it on the website). No more using complex greeting cards software or purchasing greetings cards for sending them to others, as this simple and amazing online application lets you do the same with ease and for free. So, start using Kudoboard to create greeting cards collaboratively for various purposes like birthdays, thank you cards, marriages, etc.
Kudoboard lets you create a board by assigning any individual (to whom you would like to send it) and then you can add text, photos, videos, and GIFs to the boards. These contents are called Kudos in the application and you can add as many of them as you want to a single board. After contributing your content to the group greeting card, you can also invite other contributors or group members to add their contributions on the Kudoboard. When your entire group is done adding content to the board, you can simply deliver it via email or schedule for sending it later.
Note: The free version of Kudoboard offers unlimited contributors, add text/photos/videos and GIFs to greeting cards, and more than 25 stunning themes for the greeting cards background. However, if you would like to use some additional features like admin tool, unlimited hardcopy print, access control, etc. then you need to purchase the premium version of Kudoboard.
How to Setup a Kudoboard Account:
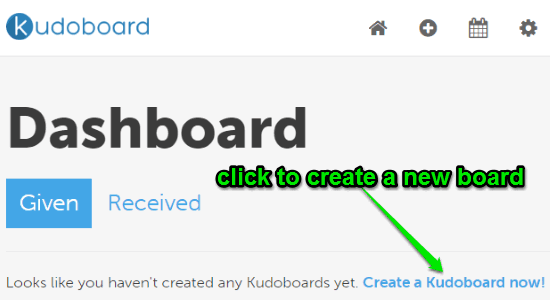
Simply visit the homepage of Kudoboard and register for your free account by entering your name, email, and password. Once you’re in, the dashboard will open up with two different tabs named, Given and Received. On the “Given” tab, all the greeting cards which you’ve sent to others will be visible, whereas, on the “Received” tab you can see the cards sent to you by others.
How to Create Greeting Cards:
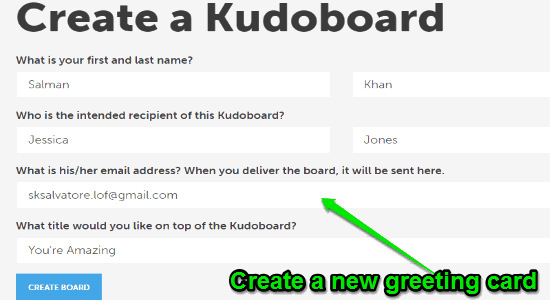
Step 1: At the bottom of the “Given” tab on the dashboard, there will be a link named, “Create a Kudoboard now”, as shown in the above image. You can click this link to start creating your new greeting card or Kudoboard. As soon as you click the link, it will ask you to enter the following information for the greeting card:
- What is your first and last name?
- Who is the intended recipient of this Kudoboard?
- What is his/her email address? (when you deliver the greeting card, it will be sent to this email)
- What title would you like on the top of the Kudoboard?
Step 2: After entering all the above information, simply hit the “Create Board” button at the bottom to proceed. Once you do that, the new Kudoboard (or greeting card) canvas will appear with a default background and the following options under the greeting card title:
- Theme
- Add Kudo/Image/Video
- Schedule Delivery
- Invite Contributors
- Print, and
- View Final
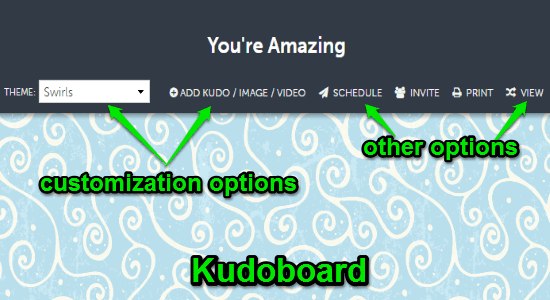
You can use these options to add content to the greeting cards, schedule greeting cards delivery, invite others for collaboration, print a hard copy of cards (in paid version), and preview the final greeting cards. Now, let use see how you can customize the board and add content to it.
How to Change Theme of the Greeting Cards:
Step 1: To change the theme of a greeting card or Kudoboard, simply click on the drop-down menu associated with the option “Theme”. After that, the list of themes will appear from which you can select any one theme for that particular greeting card you’re working on. It offers more than 25 stunning themes for the greeting cards including Balloons, Celebrations, Fabric, Feathers, Gifts, etc.
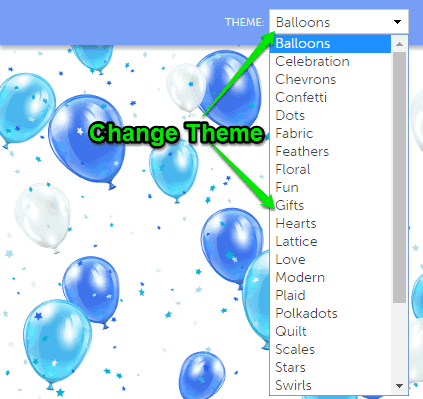
Step 2: To select a theme, simply click on it and it will get applied automatically to the greeting card. The background under the card title will change along with the greeting card canvas background.
How to Add Images, GIFs, Text, and Videos to the Greeting Cards:
Step 1: When you’re done with selecting a perfect theme, you can go ahead and start adding photos, GIFs, text, and videos to the greeting card. These contents are called “Kudos” in this application, and you can add as many Kudos as you want in a single greeting card. To add a Kudo, simply click on the option “Add Kudo/Image/Video” and then you’ll see two different options named, Add Image and Add Video which can be used to add Kudos.
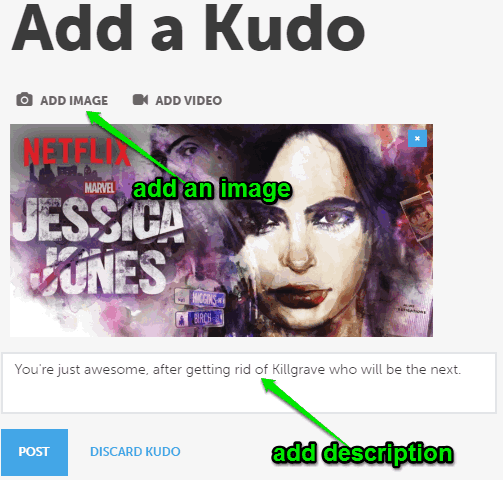
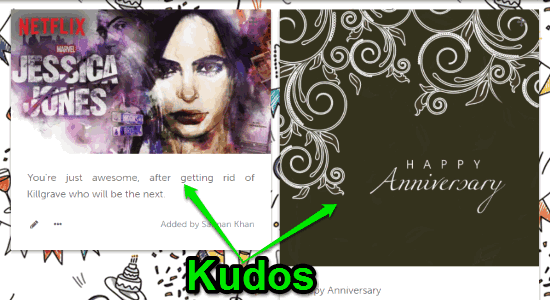
Step 2: Suppose, you want to add a photo to the greeting card then click on “Add Image” option to import a photo from your PC. Apart from importing photos from PC, you can also use the built-in database of Kudoboard to import images and GIFs for adding them to the greeting card. In the same manner, you can click on the option “Add Video” to add a video from PC or Youtube URL to the greeting card. Remember, you cannot add both image and video to a single Kudo. That means for images, GIFs, and videos you would need to add separate Kudos. The Kudos are added as tiles on the card canvas and you can drag them across the board to place them in a perfect location.
Apart from adding Kudos by yourself, this application also allows you to invite other contributors (your group members or friends) to collaboratively add content to the greeting cards. But, before you can go ahead and invite others for collaboration, you’ll need to schedule the card delivery first.
How to Schedule Cards Delivery or Send Cards:
Step 1: To schedule delivery, simply click on the option “Schedule” at the top of the card canvas. After that, the “Schedule Delivery” window will appear with two tabs named, Deliver Later and Deliver Now. You can use the “Deliver Now” button to send the greeting card to the recipient immediately after adding Kudos. However, if you would like to invite others for contribution on the greeting card, then you need to schedule delivery for later on the “Deliver Later” tab.

Step 2: To schedule a card delivery, you can choose the date, time, and the time zone as required. Apart from that, you can also select whether you want to send the card automatically using this application at the assigned time or you want to get reminded for sending it manually.
How to Invite Others for Collaboration on the Greeting Card Online:
Step 1: After you’re done scheduling the card delivery, you’ll be able to invite others for collaboration on the greeting card. To invite other contributors, simply click on the option “Invite Contributors” at the top of the canvas. After that, it will generate a unique URL which you can share for inviting or send an invitation via Email and Facebook.
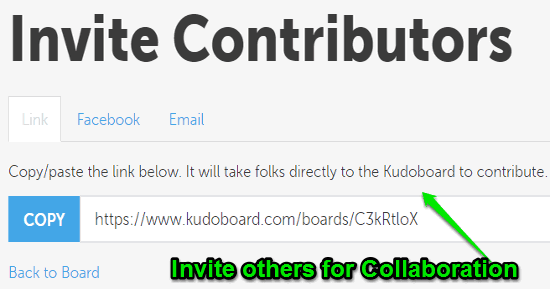
Step 2: When someone clicks on the shared URL, they will be redirected to the Kudoboard website instantly for contribution. They can start adding contents in the same way as you’ve added them after registering.
My Final Verdict:
Kudobaord is probably one of the best online greeting card makers as it lets you create greeting cards collaboratively with your friends. You can create visually appealing greeting cards with your friends using various themes and adding photos, video, and GIFs to the cards. After that, surprise your loved ones with a group card for appreciation, best wishes, and so on. No more passing a single card to all the group members for signing it as all of them can now collaboratively create an individual card and send it online to any friend, family member, or colleague.