Google Earth offers a free Flight Simulator that uses the satellite images of Google Earth as the ground for an extremely realistic experience. Just fasten your seatbelts because in this article we will be exploring the basic steps to use the free Google Flight Simulator in Windows.
Working:
1. Click on this link to install the latest version of Google Earth Pro application. You must remember that the Flight Simulator feature is not compatible with the browser version (Google Earth Web). Hence it is mandatory that you download and install the desktop version.
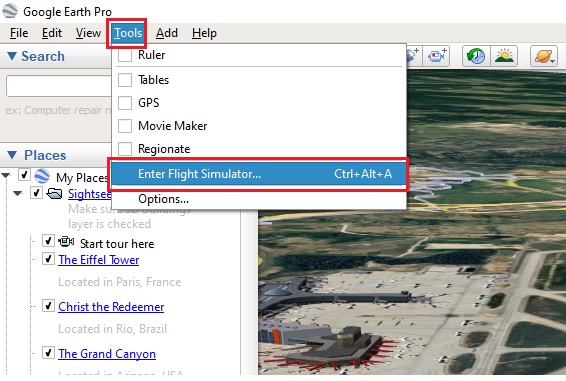
2. Launch the application and click on Tools | Enter Flight Simulator or use the keyboard shortcut Ctrl + Alt + A.
3. Next, you will be asked to select your aircraft for the simulation. Presently, you can choose between two different places, the F-16 jet or the SR22 propeller plane. The SR22 is a slower aircraft and is recommended for beginners, whereas the F-16, being very fast, is more suitable for intermediate to expert users.
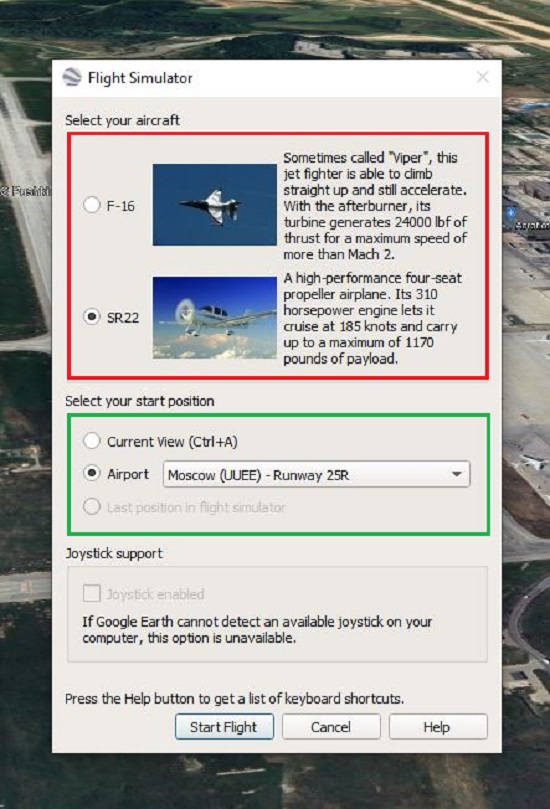
4. The next step will be to select your start position. You can choose to ‘Current View’ to begin from your current location. If you want to start from an airport, you can choose the desired one from the drop-down list.
5. If Google Earth can detect a joystick attached to your system, you can use it to fly your aircraft by enabling the corresponding checkbox otherwise you can use your keyboard and mouse by default.
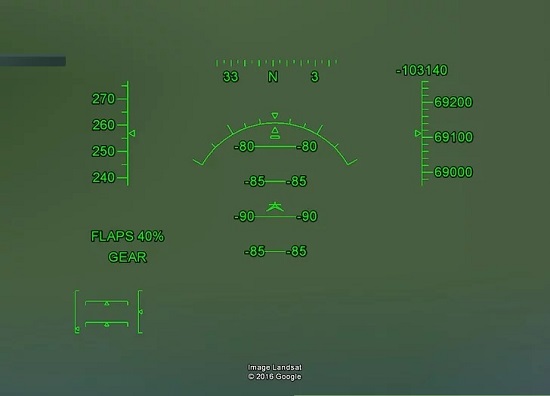
6. Now, click on ‘Start Flight’ to begin the journey. Once the Flight Simulation has started, you will see a bunch of green stuff on your screen which represents the Head Up Display (HUD).
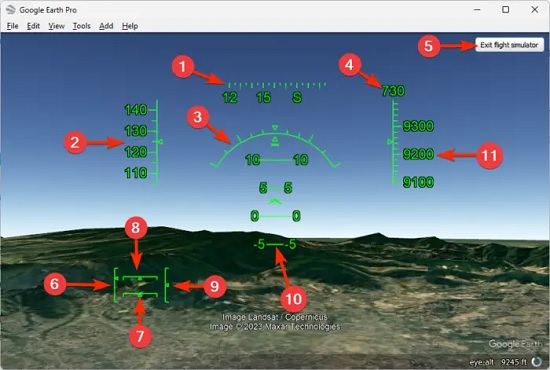
The following list explains all the signs and information on the HUD based on the screenshot below:
-
- Heading: The direction towards which the aircraft is headed.
- Speed: The present speed of the aircraft in knots. This is a unit of speed that is used in aviation.
- Bank angle: The angle by which you can turn the plane in a new direction.
- Vertical speed: The speed at which the aircraft is ascending or descending.
- Exit flight simulator: Use this button to exit from the Flight Simulator
- Throttle: This display shows the intensity of the engine’s power
- Rudder: This indicates the Vertical axis angle of the aircraft
- Aileron: The Rolling or banking angle of the plane
- Elevator: This depicts the angle and lift of the wings
- Pitch angle: The angle between the direction where the plane is headed and the horizon.
- Altitude: This shows the height at which the aircraft is flying
Joystick Controls: Use the following instructions to fly your aircraft using a Joystick
- To pick up speed for your aircraft, press the joystick forward.
- To take off, ensure that you have sufficient speed and then pull the joystick slightly back.
- Once your aircraft reaches the flight altitude, you must level your wings by centering your joystick.
- Move the joystick towards the right or left to fly in the desired direction.
Mouse Controls: If a joystick is not available, you can fly your aircraft using a keyboard mouse as follows:
- To catch up runway speed, press the Page Up key on your keyboard.
- Move the mouse slightly down once the speed is appropriate for take off.
- Once the plane reaches the flight altitude, centre your mouse so that the wings get levelled off.
- To change the direction of your flight and the flight path, use the left / right arrow keys on the keyboard.
- To turn slowly, press Alt along with the corresponding arrow key. If you wish to make a sharp turn, use the key combination Alt + Control along with the corresponding arrow key.
You must remember that the aircraft controls are very sensitive and hence a joystick is recommended. It is advisable to make small movements lest your aircraft goes out of control and completely loses its direction or crashes to the ground.
Closing Comments:
The Google Earth Flight Simulator is completely free for use and does not require any subscriptions or hidden fees. Go ahead and learn the controls to fly your aircraft, appreciate the work of real-life pilots and embrace the mighty skies.
Click here to download Google Earth Pro for Windows.