Geometry Visualizer 3D is a free software that can be used to create 3D geometry models consisting of points and lines. There are 3 axes in the application corresponding to X-axis, Y-axis and Z-axis. The diagrams are mainly made around these three axes. The software can be used to teach students who are studying 2D and 3D models for the first time.
Addition to teaching simply about mathematical models, it can be of great help while teaching various transformation techniques in Computer Graphics. Transformations like shearing, scaling can be made easily understandable with the aid of the software.
The software is very small in size (around 600KB) and has a very clean and easy to understand user interface.
Also check out other interesting geometry software, like, Solid Geometry and GeoOnzo.
How to create 3D Models using Geometry Visualizer 3D:
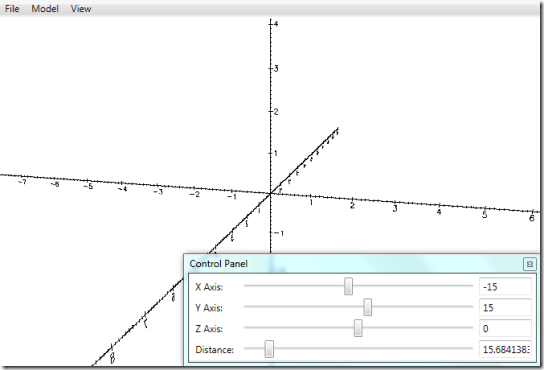
The software can be downloaded using the link at the end of the article. When you download, you will get a .ZIP file. On extracting the .ZIP file you’ll see a “setup.exe”. Use the .EXE file to install the software. Once the installation is over, the application named GeometryViz3D can be accessed through the start menu. When started you will get a screen like the one below.
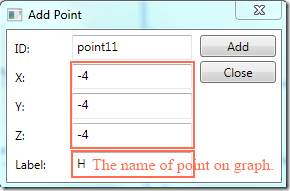
Before creating lines of the 3D model you have to create points. To create a point click “Add Point” under “Model” in the menu bar. You will get a dialog box like the one below:
The dialog box does not close after you add a singe point, so you can keep on adding as many points as you want in one go. The points appear on the 3 dimensional graph as you add them.
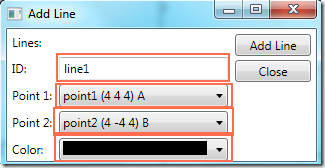
Now when the points have been plotted, you can start creating the lines. To draw a line, click on “Add Line..” under the Model in the menu bar. You will get a dialog box like the one below:
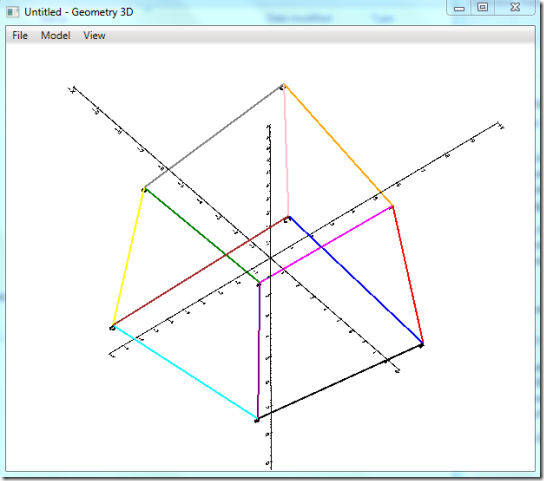
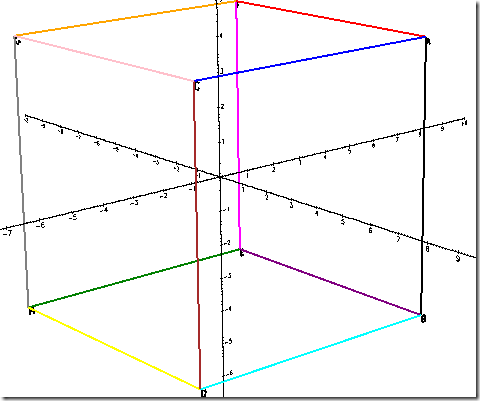
The Point 1 and Point 2 are the points between which the line will be drawn and you can select from a range of colors to make the 3D model more understandable. I made 8 points on the graph and using them I made a cube. Here is the image.
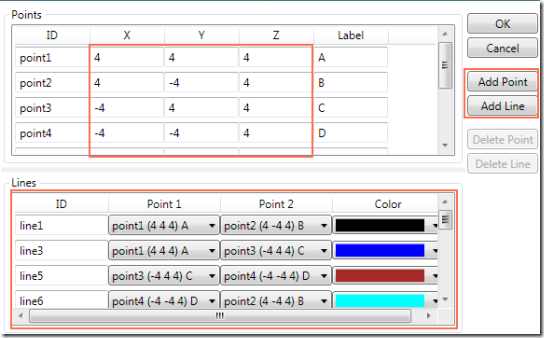
You can edit the model according to your wish. To edit a model, got to “Edit Model” under Model in Menu bar. It opens up a dialog box like the one below.
Here you can add new points/ line and change the coordinates of the existing point.
One of the best features of this application is the ability to rotate the whole model along any of the 3 axis. You can also zoom in and zoom out to make the model more descriptive.
Sliding the bar will rotate the model along the respective axis.
Once you are done with the diagram, you can save the diagram. To save the model, go to “Save Model” under the file menu. It also has options to load previously created models.
Demerit:
The only demerit in the software that I found was it does not support any other models which do not have straight lines. Models of cone, sphere, etc. cannot be represented using this application.
Conclusion:
Geometry Visualizer 3D is a great software for learning and making others understand the basics of 3D and 2D models. It can also be used to teach the transformation aspects used in computer graphics.
