This article covers how to create desktop shortcut to switch WiFi network in Windows 10. In the way of the world, we usually connect to the same network for net surfing and other work. However, in some cases for other users, they need to connect to multiple networks constantly. The only way that can be done is go to internet access icon in the system tray and switch from there manually. In order to reduce the problems, there is a tool that can create a desktop shortcut and let you switch WiFi network with a single click.
The software supports other languages as well and allows you to change it. It also shows the signal intensity. It means you can decide which network would be more relevant and a better choice for you. One thing here you should note that sometimes the Windows manager doesn’t connect and might fail. It generally happens if you have multiple networks with the same name. Let’s explore it more in the below section.
Create desktop shortcut to switch WiFi network in Windows 10
To create a desktop shortcut to switch WiFi network, you need to follow the steps given below:
Step 1: First, you need to open this link. On the next page, click on the link named Download WifiInfoView.
Step 2: Open your file explorer (Window+E) and move to your Downloads folder. Unzip the downloaded file and click on the WifiInfoView file.
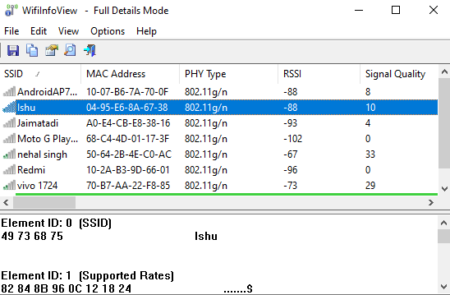
Step 3: At this time, a new application opens with a list of all the available WiFi networks which your computer can detect.
Step 4: Make a right-click on the WiFi name which you need to access usually. From the context menu, select “Create Desktop Shortcut” and then click on “Connect Access Point By Name”.

Step 5: A popup prompts on the screen and asks for your confirmation. Click on the Yes button. A shortcut like the one seen in the above screenshot will appear on your desktop. Repeat the same procedure if you want to create more desktop shortcuts of other WiFi networks.
Step 6: Move to your desktop screen (Window+D) and double-click on the shortcut. This will execute the code to connect to the WiFi network.
Closing words:
Sometimes, you may need to change the WiFi networks in the working place. This is really an amazing application that is helpful especially for IT admin or a pro user. It can also be used while struggling with troubleshooting network problems.