Adobe Capture CC is a free iPhone app to capture and turn photos into usable assets for various Creative Cloud applications like Photoshop CC, Illustrator CC, InDesign CC, Photoshop Sketch, and more. That means using this app, you can just capture a photo and then select parts of the screenshot to create various usable assets like Shapes, Patterns, Colors, Brushes, and Looks which you can directly use with other Adobe CC applications from your Creative Cloud library.
For creating an asset, all you got to do is choose the asset type, and use the built-in camera to capture a photo. You can also choose to import the photo fromcamera roll, Creative Cloud account, Market, or Stock. After that, the app will automatically process the photo and transform it into an asset. You can customize the asset as required and then save it on your Creative Cloud library.
If you love using other iPhone apps by Adobe such as Adobe Voice, Adobe Fill & Sign, Premiere Clip, etc. then you got to try Adobe Capture CC right away. You will love it, trust me on that.
How to Capture Photos on iPhone and Turn them into Shapes for Adobe Creative Cloud:
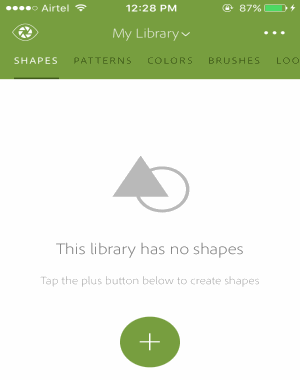
Step 1: As soon as you install and open the app, it will ask you to sign in using your Adobe credentials. When you’re in, you’ll see separate tabs for each asset named, Shapes, Patterns, Colors, Brushes, and Looks along with a “+” button at the bottom of each tab.
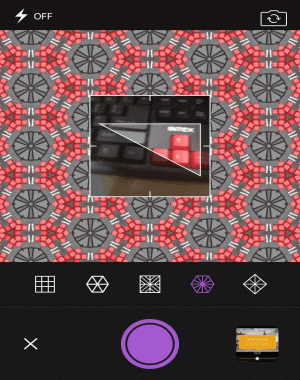
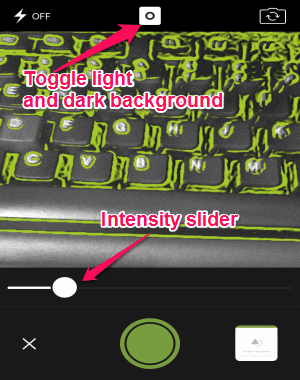
Now, let us start with Shapes and see how to capture photos and turn them into usable Shapes asset. To get started, simply tap the “+” button at the bottom of the “Shapes” tab. After that, the built-in camera will open up where you can either capture a photo or import one from your camera roll, CC account, etc. While capturing a photo, you can see the live preview of the shapes, toggle dark or light background, and use the intensity slider to increase or decrease the shape tone intensity.
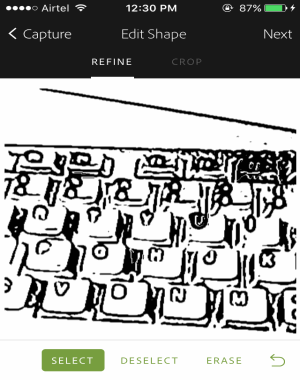
Step 2: Once you’re done capturing a photo, the app will automatically filter out all the colors from the photos and keep only the shapes detected while capturing the photo. The shapes will be colored as black with white background, as shown below. In the “Edit” screen, you will be able to refine and crop the shape asset as you want.
Step 4: After that, the “Preview” screen will appear where the app will automatically draw smooth curves for the selected shape and then you can save it as a usable asset in your CC library. Now, the shape asset will be ready to be used with various Creative Cloud applications.
You can use Shape asset with following applications: Premiere Pro CC, Illustrator CC, Illustrator Draw, After Effects CC, Comp CC, Dreamweaver, InDesign CC, Animate CC (formerly Flash Professional CC), Muse, Photoshop CC, and Photoshop Sketch.
How to Take Photos and Turn them into Patterns:
Step 1: First, simply go to the “Patterns” tab and press the “+” button to open up the built-in camera. After that, you can import a photo from Market, Stock, camera roll, or from Creative Cloud or else use the camera to capture a fresh one.
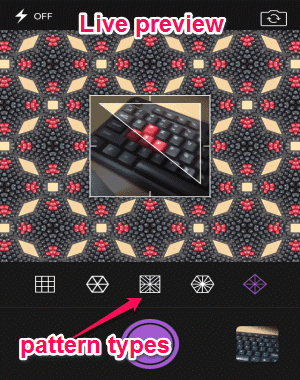
Step 2: Before you capture the photo, you can choose between 5 different pattern types and then see the live preview of how the pattern will look like on the camera screen. You can simply move your phone to change the pattern design as it will fetch and include all the colors of your surrounding visible on the camera screen automatically. When you find the perfect pattern preview, simply press the round button to capture a photo. Then the “Edit” screen will appear where you can change the pattern design by rotating the photo, zooming the photo, and also by cropping it.
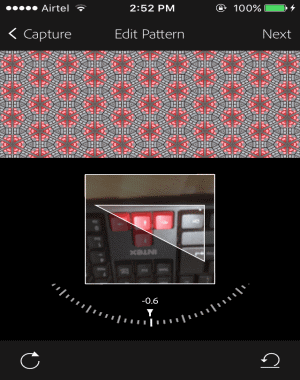
Step 3: After you’re done, hit the “Next” button to open up the Preview ” screen and then save it to your CC library. The added patterns will become a usable asset and can be used directly on Adobe CC applications.
Supported Creative Cloud Applications: Photoshop CC.
How to Capture and Turn Photos into Colors Asset:
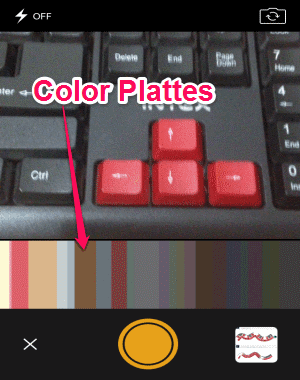
Step 1: To create Colors asset, go to the “Colors” tab and tap on the “+” button for launching the built-in camera. After that, you can simply point your camera anywhere you want and the app will start fetching 5 different colors from the objects visible in the camera. The colors will be shown as circular bubbles which you can freeze anytime you want with a single tap on the screen. Apart from capturing photos, you can also import them from camera roll, CC library, etc.
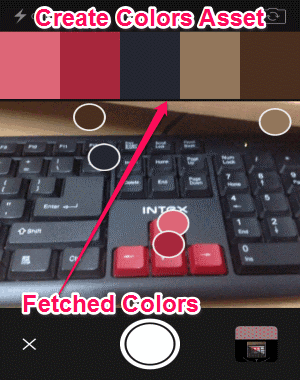
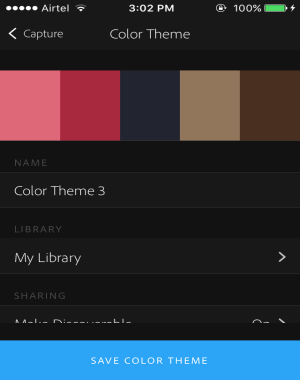
Step 2: Once you freeze the color bubbles, the colors inside the bubbles will be fetched and will be visible at the top of the screen. After that, you can simply hit the “Next” button to proceed and save the color themes (as they call it in the app) in the CC library. The saved color themes can later be used directly from the library in different Creative Cloud applications mentioned below.
Supported Creative Cloud Applications: InDesign CC, Photoshop Sketch, After Effects CC, Photoshop CC, Comp CC, Animate CC (formerly Flash Professional CC), Muse, Illustrator CC, Illustrator Draw, Premiere Pro CC, and Dreamweaver.
How to Take Photos and Convert them into Usable Brushes:
Step 1: To take photos and then convert them into usable brushes asset, browse the “Brushes” tab and then hit the “+” button. After that, the camera screen will appear where you’ll be able to capture or import a photo. On the camera screen, you can drag the circular icon or tap anywhere on the screen to remove a specific color from that particular area. You can also drag the slider to adjust the object’s color intensity visible on the screen, before capturing a photo.
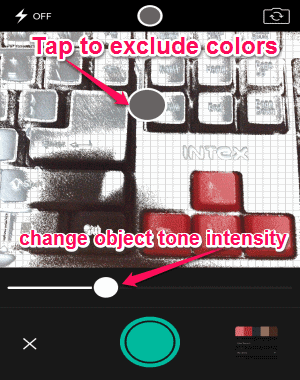
Step 2: When you’re done excluding colors and adjusting intensity, press the round button to take a photo. After that, it will ask you to crop the captured photo such that the colors in the cropped area will be included in the brushes.

Step 3: Once you’ve cropped the photo, simply tap the Next button and the app will automatically generate various brush styles with all the colors fetched from the cropped area of the photo. It will also show some example brush styles for Photoshop Sketch Brushes, Photoshop CC Brushes, and Illustrator CC Brushes. However, after saving the brushes asset, you’ll be able to use them on various CC applications.

Supported Creative Cloud Applications: Animate CC (formerly Flash Professional CC), Dreamweaver, Illustrator CC, Photoshop CC, Photoshop Sketch, and Muse.
How to Turn Photos into Different Adobe CC Looks:
Step 1: The last asset which you can create using Adobe Capture CC is the Looks. The Looks are actually color palettes (which are later converted into photo filters) that are fetched from different color combinations from the photo which you capture in the “Looks” tab. To start creating Looks asset, tap the “+” button in the “Looks” tab and similar to other tabs, the built-in camera will launch with the options to capture new photos or import existing ones. While capturing a photo, it will show you the live preview of the color palettes which can be extracted from the objects visible in the camera.
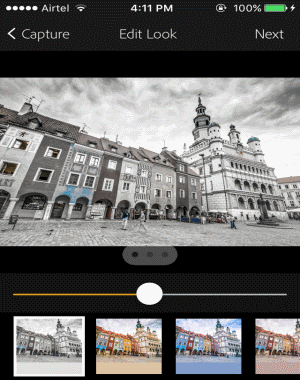
Step 2: Once you think that you have found the desired color palettes, simply tap the round button to capture a photo. After that, the preview screen will appear where all the color palettes will be converted into filters which you can apply to photos and videos. Initially, there will be a sample photo and a video, however, you can also import your own photos or videos to try out the generated photo filters. You can also drag the slider above the photo filters to change the color tone of the filters.
Step 4: After that, you can go ahead and save the Looks in your Creative Cloud account. All the saved Looks will be usable asset which means you can use them in various applications of Adobe.
Supported Creative Cloud Applications: Dreamweaver, Muse, Premiere Clip, Animate CC (formerly Flash Professional CC), Premiere Pro CC, and After Effects CC.
My Final Verdict:
Adobe Capture CC is an amazing app for iPhone which can be used to capture photos and then transform them into usable assets for Creative Cloud applications. The supported Adobe CC assets which you can create using this app are Shapes, Brushes, Patterns, Looks, and Colors. All the assets will be stored and can be accessed from your personal Creative Cloud library at a glance.