Here is a short tutorial that explains how to turn on or off internet time synchronization in Windows 8.
When the system clock is synchronized with the internet time server, the time of your Windows 8 PC is automatically updated to match the device time with the time server. It ensures that your Windows 8 PC is showing you accurate time. By default, Windows uses Windows time service.
This tutorial lets you learn to turn on/off internet time synchronization in your Windows 8 PC.
Method 1- Turn On/Off Internet Time Synchronization In Windows 8 Using PC Settings:
To turn on/off internet time synchronization in your Windows 8 PC using PC settings, follow the steps below:
Step 1: Open Windows 8 Settings Charm Bar by pressing Windows Key + I. Then, click on “Change PC settings”. In PC settings, click on Time and Language.
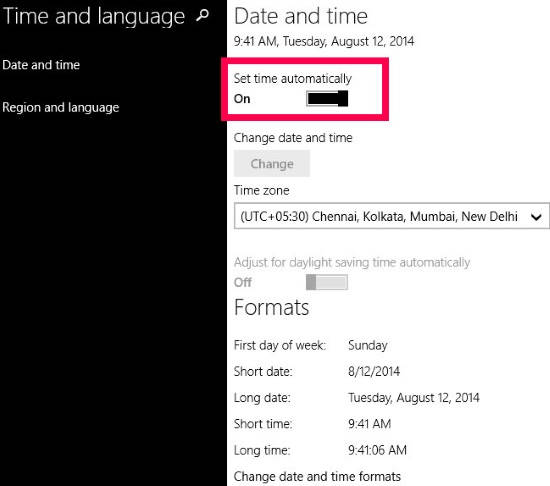
Step 2: In Time and Language, you will find various options. Make sure that you have set correct time zone.
Step 3: Within Date and Time, you will find a switch that says “Set time automatically”. Toggle the switch ON to turn on the time synchronization, or toggle the switch OFF to turn off the synchronization.
That’s it.
This method is quite simple, but it doesn’t let you change the internet time server, with which your system’s clock will sync.
Method 2-Turn On/Off Internet Time Synchronization In Windows 8 Using Control Panel:
Step 1: Open Control Panel (Icon View). To open, press Windows Key + X, and click on Control Panel from the popped Power User Menu (else, you can add Control Panel Right Menu in Windows 8). In Control Panel, click on Date and Time.
It will open Date and Time setting in a new window.
Step 2: In Date and Time setting, click on “Internet Time” tab, and then on Change settings.

Step 3: To turn on the internet time synchronization, make sure that the box that says “Synchronize with an internet time server” is checked. To turn off, uncheck it.
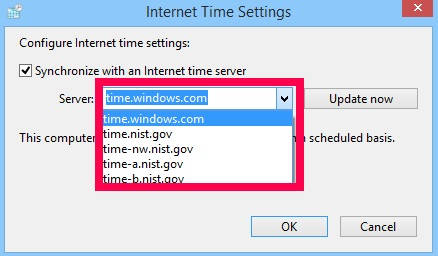
This settings window also lets you sync with another internet time server, instead of the default time.windows.com. For that, just click on any available server in the list. Additionally, you can add URL of any other time service as well. Click on OK to save the setting. Of course, if you are just changing the internet time server, make sure the option of “Synchronize with an Internet Time Server”.
Method 3-Turn On/Off Internet Time Synchronization In Windows 8 Using Registry Editor:
Step 1: Open Registry editor. To Open the editor, Type regedit in Run.
Step 2: Navigate to Parameters key, by using the path below:
HKEY_LOCAL_MACHINE\SYSTEM\CurrentControlSet\Services\W32Time\Parameters
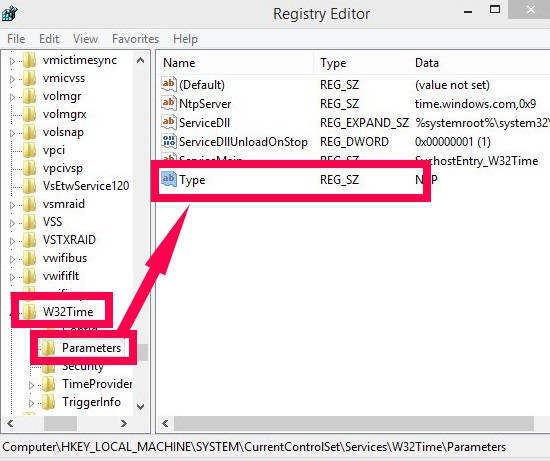
Step 3: Click on Parameters. On the right panel, you will find a String value, named “Type”. Double Click on it.
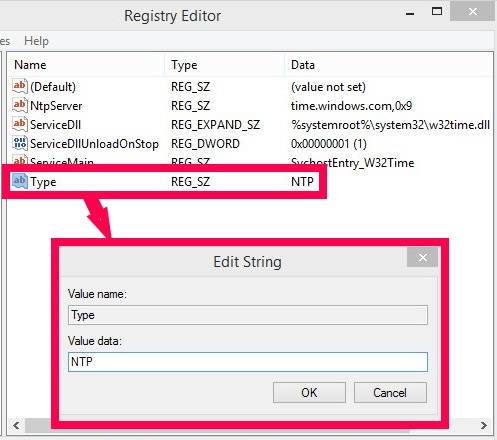
- To turn on the internet time synchronization, change its value data to “NTP”.
- To turn off the internet time synchronization, change its value data to “NoSync”.
Click on OK to save the changes. Close the Editor.
All the above mentioned methods are easy to go. But among all, I like the second one most.