This tutorial explains how to use Airtable Interface Designer. Airtable just launched a brand new feature which is going to be an absolute game changer for anyone working with Airtable at the moment. Airtable Interface Designer is that new feature which is going to change the behaviors of the Airtable database when it comes to collaborating with others.
The Airtable Interface Designer will allow you to turn your Airtable bases into dashboards that your team members can view and control, making it a lot easier for people who are unfamiliar with Airtable to make changes to records without breaking things.
In the past, if you wanted to work with someone on your Airtable base, you would have to share your entire base with them. As a collaborator, they could then jump in and make changes to records. This is typically not an issue for anyone who is already familiar with Airtable, but if you are working with someone who is not familiar with how Airtable works, it can be quite overwhelming.
Now, Airtable has addressed this issue with the Interface Designer. So at a high level, the way that it works is that you as the database owner can turn your Airtable tables into individual dashboards to display information that you feel your collaborators need access to. You can make dashboard fields both viewable or editable.
However, this new feature does come with a caveat. Right now, Airtable Interface Designer is in beta and they have mentioned that once they are out of the beta phase, they will remove this feature, maybe to have it in pro plans only.
How to use Airtable Interface Designer?
In this post, I want to go through the process of setting up the first dashboard using Airtable Interfaces. Right now, the interface designer is available to all Airtable users, even free ones. For now, you can convert your Airtable databases to following type of interfaces.
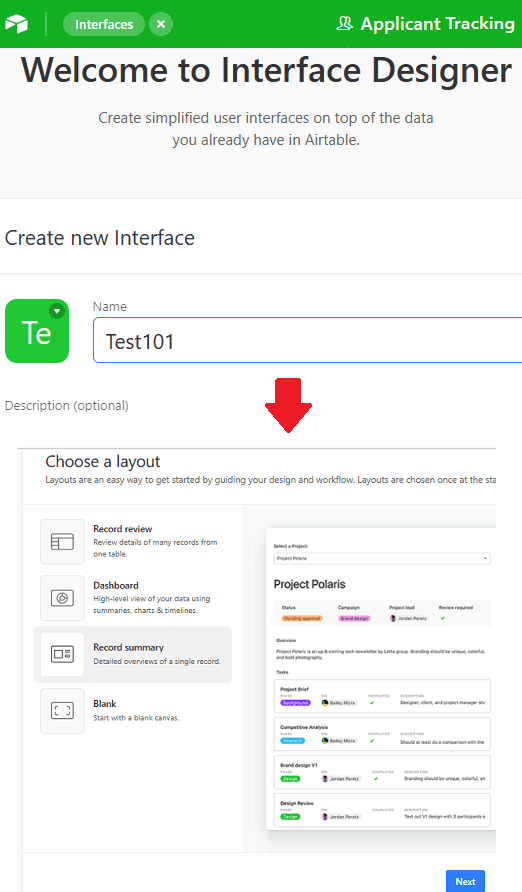
- Record Review: Here this interface will show many records from one table. This will help your teammates get a better understanding of the tabular data from the shared base.
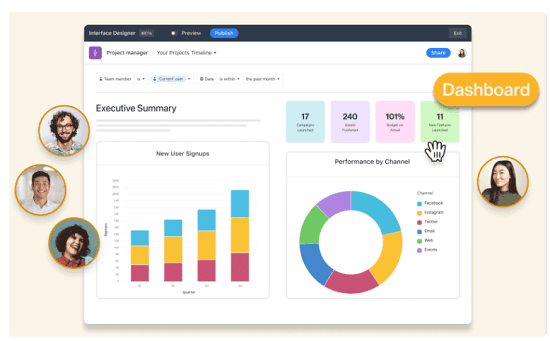
- Dashboard: This interface type will create an interactive dashboard with charts and graphs. For sharing data for analytics or summarizing some data, this will be a good option. You just select the fields and tables and the dashboard will be created as an interface that you can share with your teammates on the fly.
- Record Summary: This is one of the simplest interfaces that you can create here. Here it will summarize a single record from the table, and then you or your teammates can choose what to do with the linked fields.
Create your First Interface:
You can turn any database from your Airtable account to an interface using the interface designer. All the interfaces that you create will be accessible from the homepage. You can see the one I created earlier in the screenshot below.
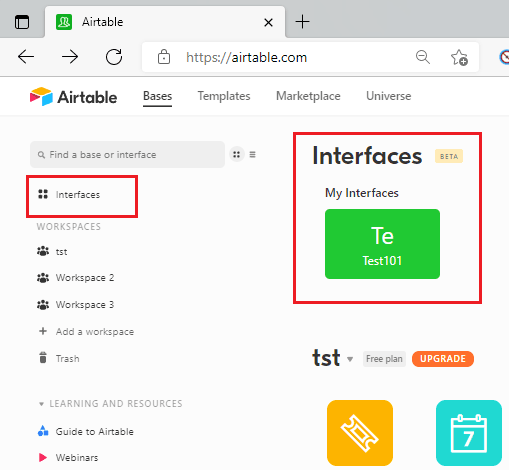
Now, let’s start creating another interface from scratch. So, you basically start by opening a base from your account. After that, Interface option will appear on the top right side.
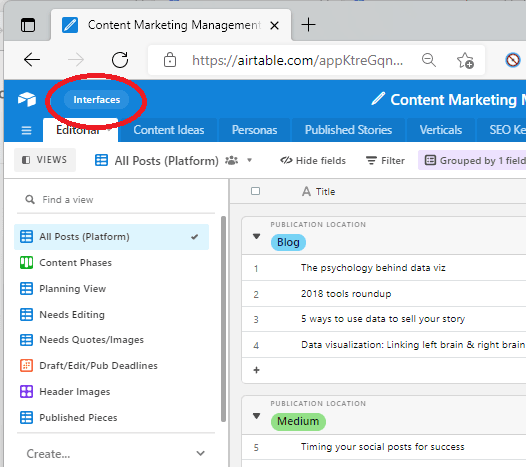
Select the interface option and then proceed to create one. Start by giving it a name and then select what type of interface you want to design.
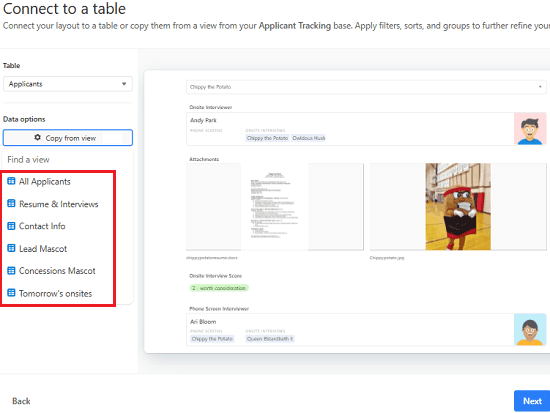
Now, you connect to a table in your base. Here it will show you list of all the tables in the current base. Select the table from the list and you can select a corresponding view as well if you have created any in the base. Views will help you share only the information that you want to share with others.
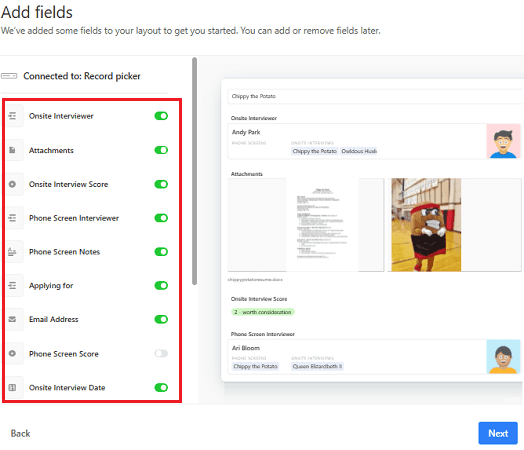
You can further control what fields to show on the interface by tuning some fields off or on. All the field names will appear there with a switch that you can slide to enable if you want to include that in the final interface design. The corresponding live preview of the interface will appear as you slide the switches.
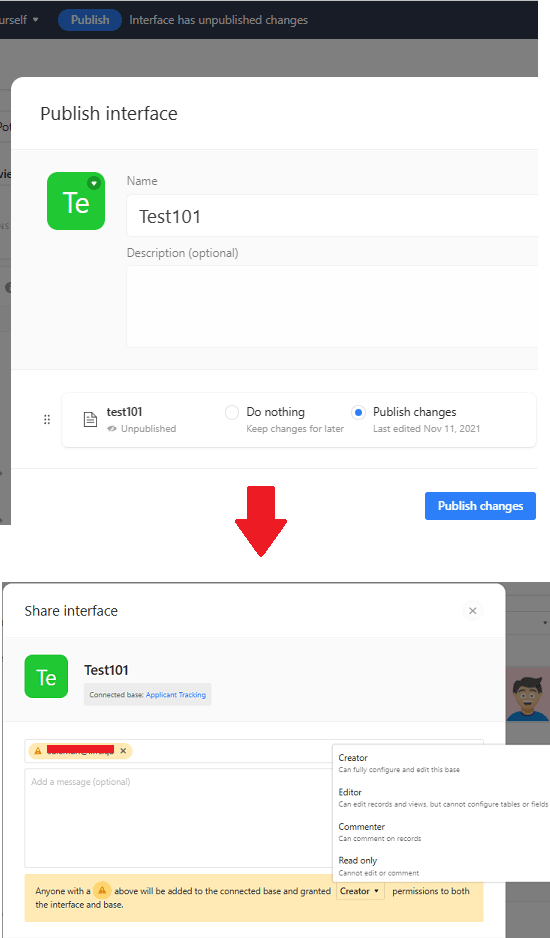
Finally, it is time to publish the interface. Just finalize the design and then hit the Publish button. After publishing, it will ask you to enter emails of your teammates who will have access to the interface. Just specify the 2 or more collaborators and then publish the interface.
The final interface will look something like this.
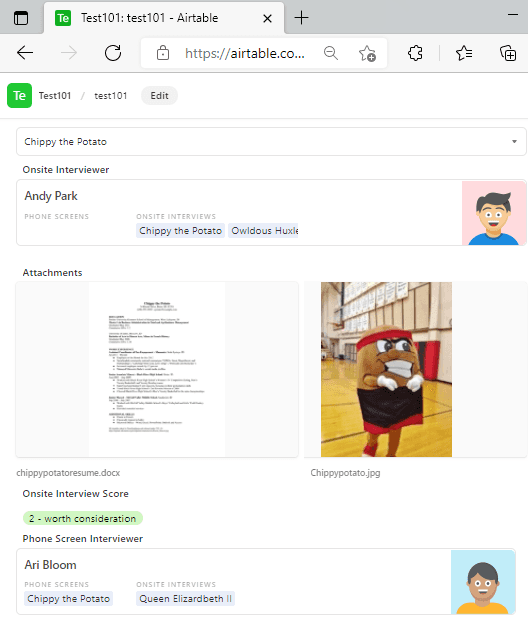
In this way, you can use the Interface Designer of Airtable. Create as many interfaces as you want and save them in your account. Based on the access control settings you have specified, collaborators will be able to interact with it. Above, I have used the “Record Summary” type of interface, but you can select others as well depending on your needs.
Final thoughts:
You can now create interfaces for your bases using the Interface Designer of Airtable. I think it is a very nice feature that they have introduced, as it will take the collaboration to a whole next level. The best part is that you can now share your bases with anyone in a controlled manner by only allowing what they need to see or edit. While it is a good feature to have, I would remind you to keep the beta notice in mind. So, if you are on free plan of Airtable, create as many interfaces as you want, as you may not get to create them anymore once it is out of the beta phase.