Google docs has an important feature using which you can set an expiration date or a limited view time to a document that you are sharing with someone. This feature, although very handy, is often overlooked by users. You can set an expiration date and grant access to specific users for as little as an hour or as much as a year. Once the expiration date is crossed, the Google document will not longer be accessible to the users.
In this article we will be explaining the steps to set an expiration date to Google Documents likes Docs, Sheets and Slides.
How it Works:
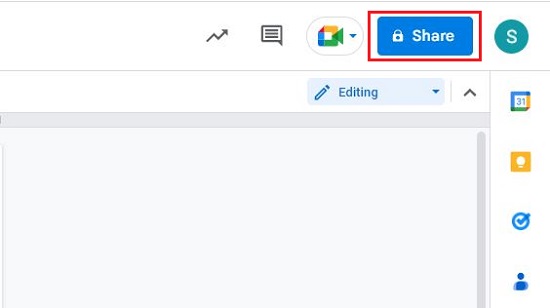
1. Open any Google document and click on the ‘Share’ button at the top right of the interface.
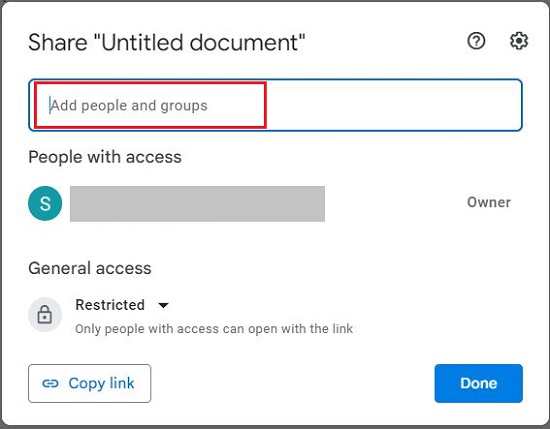
2. Click on the field ‘Add people and groups’ and choose the person with whom you wish to share the document.
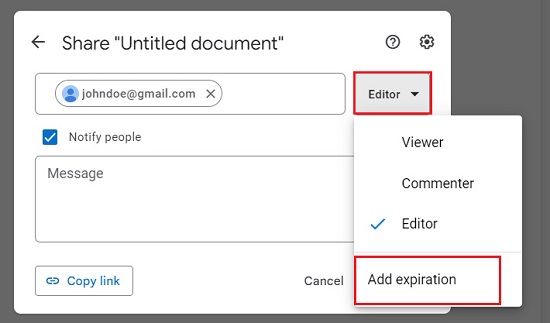
3. Next, click on the pull-down menu to the right that assigns the permission levels and choose ‘Add Expiration’.
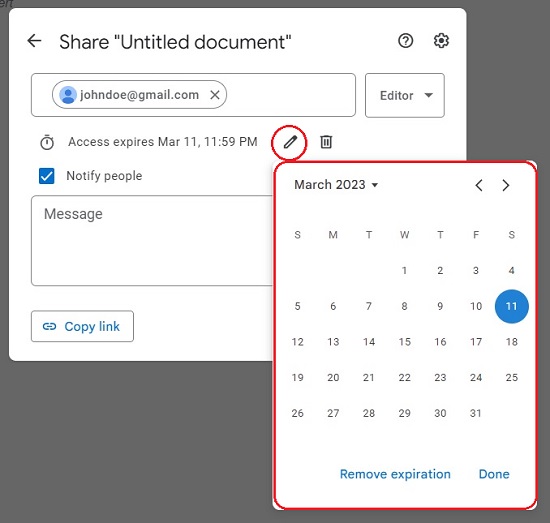
4. Click on the ‘Pen’ icon to edit the Expiration date and click on ‘Done’ to save the date.
5. Finally’ click on the ‘Send’ button to the bottom right. This will share the document with the chosen people, grant them the permission that you have selected and will set the expiration date of the document as specified by you.
Closing Words:
Setting an expiration date on a shared document is extremely important especially if you are working with users outside your organization. It becomes very crucial to restrict their access to sensitive and important files once the projects are complete. An expiration date on such documents ends the access to them and thereby protects vital information. You can follow the steps described above to set the expiration dates on your shared Google documents.