Here is a short tutorial that explains how to create virtual private network profile in Windows 8.
Virtual Private Network Connection is actually a point to point connection, which enables your Windows 8 PC to send and receive files/data on a public or shared network, as if it is connected to the private network. It extends a private network across a public network, like an internet.
Creating a virtual private network profile in Windows 8 is quite easy. Windows 8 has introduced a new feature which easily lets you create virtual private network in your Windows 8 PC.
Creating Virtual Private Network Profile In Windows 8:
To create a virtual private network profile in Windows 8, follow the steps below:
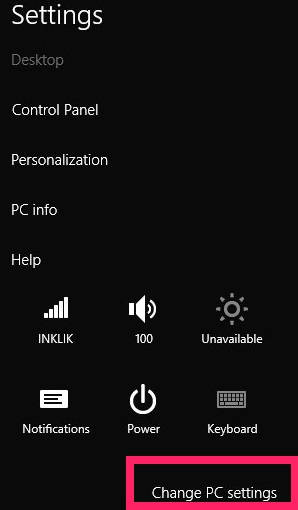
Step 1: Open PC settings. To open, press Windows Key + I. It will open Settings Charm Bar. In Settings Charm Bar, click on “Change PC settings”. It will open PC settings.
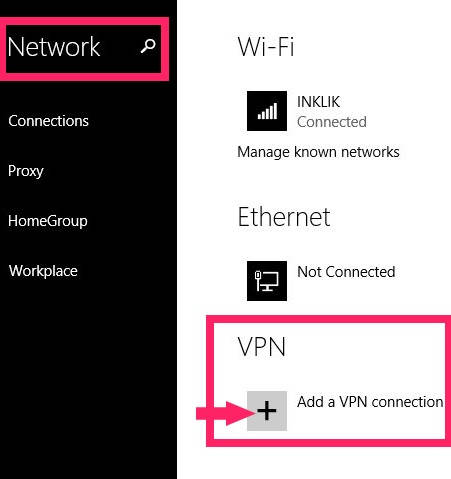
Step 2: In PC settings, click on Networks. In networks, you will find three options: Wi-Fi, Ethernet, and VPN. Click on “+” sign that says “Add a VPN connection”.
Step 3: To add a VPN connection, it will ask you a few details regarding the same.
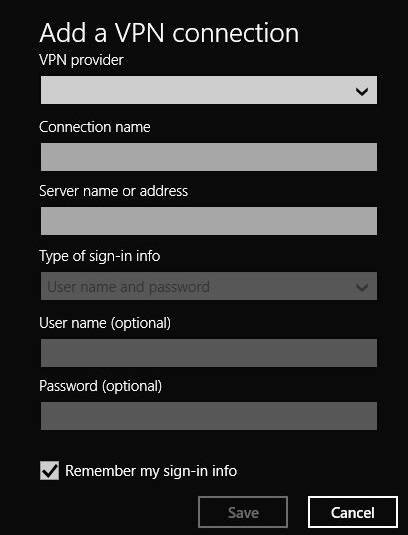
- VPN provider: It will give you five options to choose from.
- Connection name: Give a name to the VPN connection as per your choice.
- Server name or address: In this, give the IP address and domain address of the remote access VPN server to which you want to connect to.
- Type of Sign-in info: It gives you option to select how you want to connect to the VPN.
Click on Save to save the VPN profile that you created.
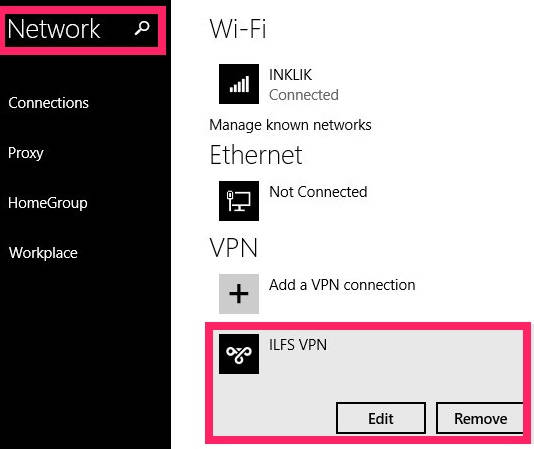
You will find that VPN profile has been successfully created. To delete this VPN profile, click on it, and then click on Remove option.
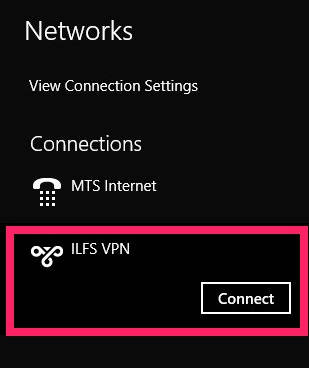
To connect to this VPN connection, go to your Windows 8 Desktop. Click on network symbol. Under Connections, you will find the VPN profile that you have created. Click on it, and then click on connect.
Also learn, how to make Windows 8 PC a wifi hotspot to share internet.