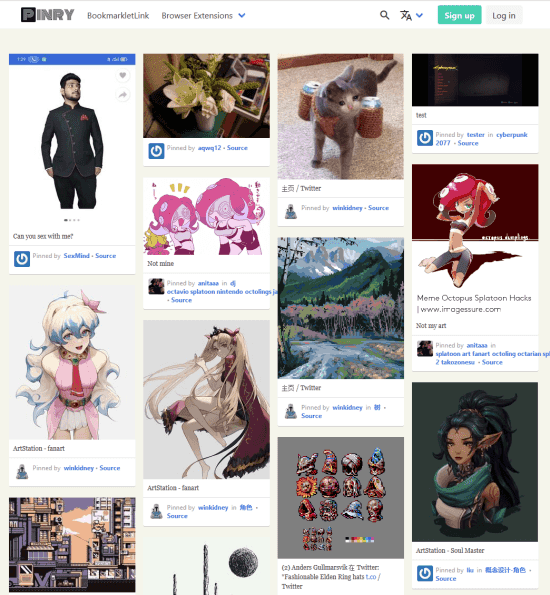
Pinry is a free self-hosted alternative to Pinterest. You can install it locally or on a VPS and then start saving images in a board which can be set public or private. Here it even offers you a helper Chrome and Firefox addon which you can use to save images from pages using the right click menu. So, to collect images, you will not have to keep the Pinry homepage open.
One good thing about it is that it supports quick and easy installation. You can easily setup it on a server and add domain to it as well. You can create unlimited public and private boards. Each board has a unique link and you can share any public Pinry board via URL as well. You can pin images from one board to other in easy way and even edit their details later in a few clicks.
While Pinry claims to be an open-source alternative to Pinterest, it misses some features as well. Basically, it has the basic functionality of Pinterest, that is creating boards and pinning images in them. But some advanced Pinterest features related to marketing and integration are missing. So, when you use Pinry, you will have the basic pinning functionality just like Pinterest and it does that beautifully.
Installing Pinry on a Server:
Installing Pinry is very simple. All you need a server that can run Docker. Most servers are based on Linux so, you may have Docker installed there already such as Digital Ocean Droplets. But you can install it locally on Debian or Ubuntu like operating systems. The complete installation guide is mentioned here.
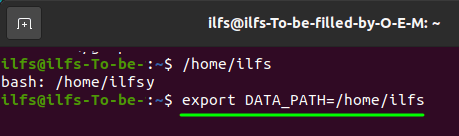
For this post, I will install it locally. But the process is same if you want to deploy it on a server. So, fire up the terminal and make sure Docker is installed. After that, you run the following command to set an environment variable to define a data folder. This environment variable can be set to any folder. And make sure that you include the full path.
export DATA_PATH=/abs/path/to/your/data/directory
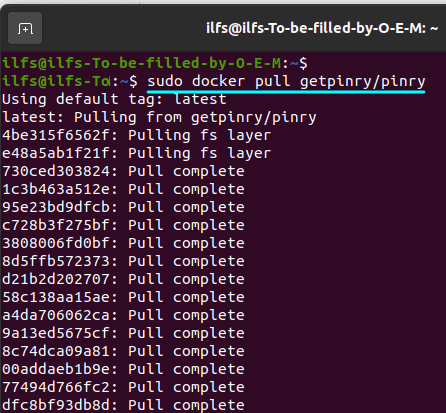
Now, run the following command to pull Docker image of Pinry. If you want then you can build this image by yourself by getting its source code form its GitHub repository. In case you want to use the pre-built image, just run the command below.
docker pull getpinry/pinry
It is now finally the time to run Pinry. In the same terminal, you issue the following command and then it will start running on HTTP port 80.
docker run -d=true -p=80:80 \

-v=${DATA_PATH}:/data \

getpinry/pinry
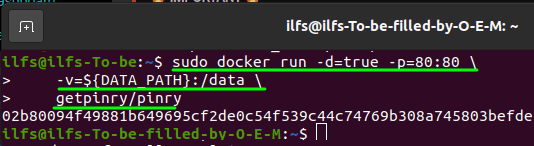
If the above commands fail then you may have to add sudo in the beginning. You can read more documentation here.
After Pinry is running, you just type 127.0.0.1 in address bar of the browser and the main homepage of Pinry will show up. From here, you can sign up and create an account to start using it.

After creating an account, you will reach the main dashboard. From there, you will be able to create pins and install the Pinry Chrome and Firefox extensions. So, to do that and then proceed further. In the next section, I will show how to use Pinry to create pins and boards.
Using Pinry to Create Boards and Pins:
After you are on the main Pinry dashboard, the first thing you have to create is a board. The option is there as dropdown. So, create a board from there and give it a name. Also, from here, you can opt to make this board public or private. By default, all bards that you create will be public. To make them private, you will have to check “is private” option.
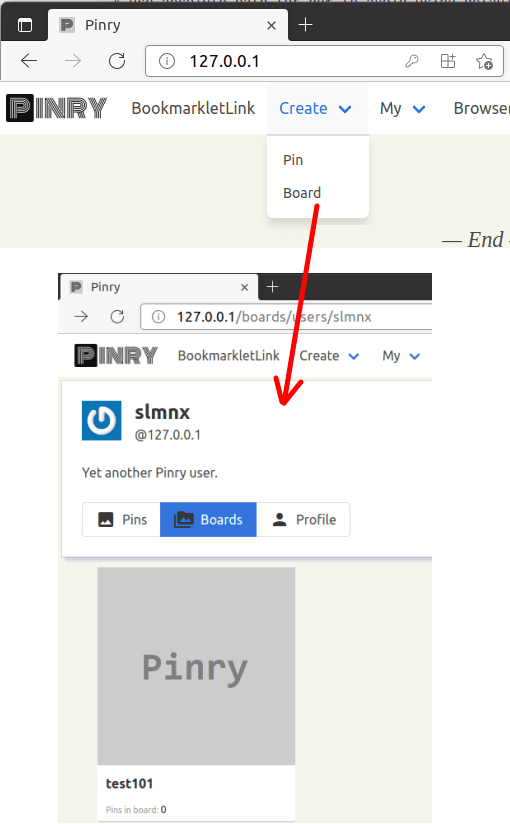
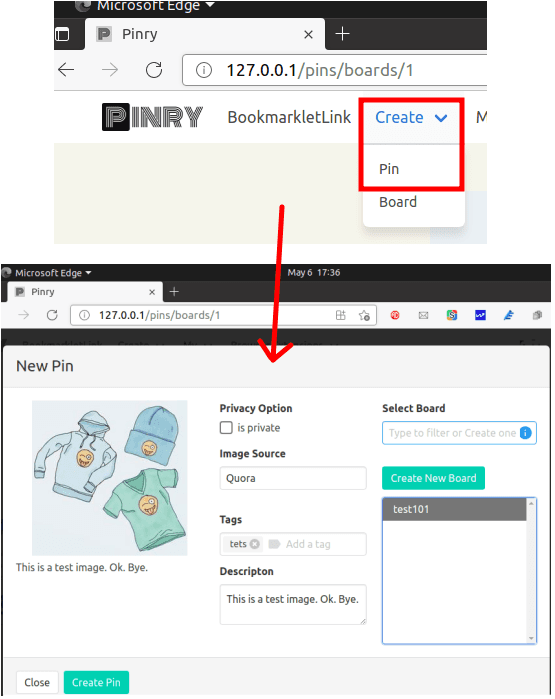
Now, you open a board and create some pins in it. Open a board and then use Create>Pin option to create a new pin by uploading an image. You will have to specify all the details about it such as title, description, URL, and tags. Individual pins can also be set public or private.
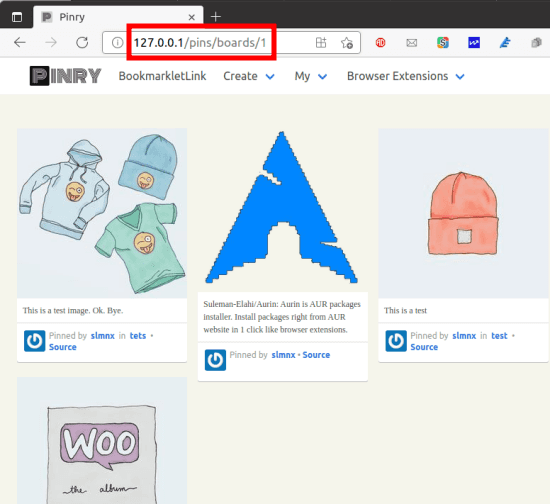
After uploading the different images, all them will be displayed on the board. After that, if you want to edit some pin then you can do that. Or, you can delete pins from the board as well. Each board has a different URL and you can copy it from the URL and then share it with anyone you want. This is as simple as that.
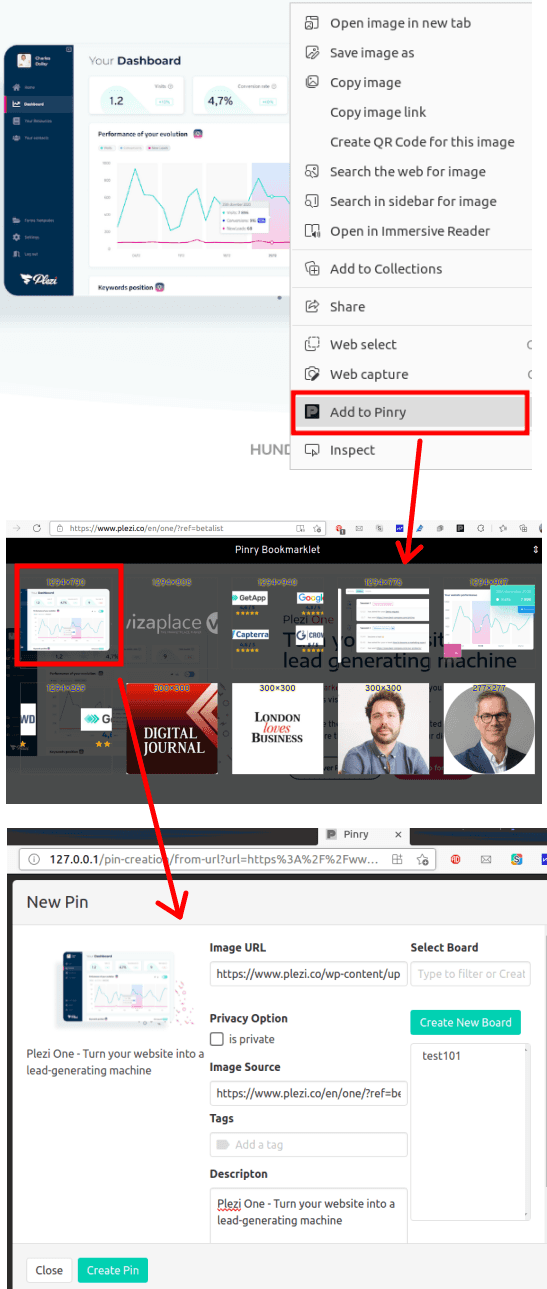
Next thing you can do is enable the Chrome or Firefox extension. After you install it, you will have to add IP address or domain of the server where you have deployed Pinry. In the extension settings, you specify the address and then you are simply done.
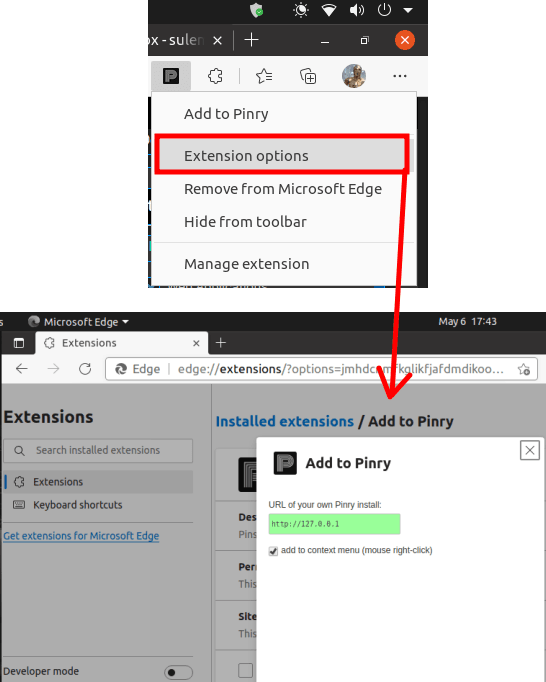
Now, when you right click on any webpage, you will see Pinry as one of the options. Click on it and it will show all the images from that webpage on a popup. Select the image and then it will take you directly to the pin creation screen. Just enter the details about the image here and then simply create a pin.
In this way, you can use this simple and powerful tool as your own Pinterest. Host it locally or in organizational server and save images as pins and boards. You can edit and delete those boards anytime and use this tool in the way you want. The browser addons further make it easy to grab and save images in the boards.
Final thoughts:
If you are looking for a free and open-source alternative to Pinterest then Pinry is a very good alternative that you can host and use. The board and pins management that it offers is very nice and you only need to set it up once. The UI is simple and, in the future, you can expect to see more features. I liked the fact that boards can be searched via their names and tags. For advanced users, you can use the command line mode of this tool.