In this short tutorial, I will explain how to Schedule Automatic Maintenance. After that I will explain how to Enable/Disable the regular Maintenance. And also, how to manually Start and Stop the Maintenance in your Windows 8 PC.
Maintenance is a feature of Windows, which helps your PC to run smoothly. It includes various tasks, like: System Diagnostics, Software Updates, and security scanning. By default, it runs at a default time automatically at a regular interval of time. You can schedule the automatic maintenance as per your choice, and your OS will start maintenance at that particular time only.
You can even enable and disable this automatic maintenance in task scheduler. And then you can manually run the maintenance.
How To Schedule Automatic Maintenance In Windows 8:
Open the WinX (Power User Menu), by using Windows Key + X, or by right clicking on the Windows logo. From the menu, click on Control Panel. In Control Panel (icon view), click on the “Action Center”.
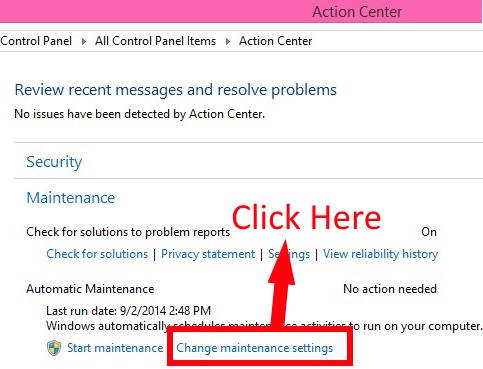
In Action Center, navigate to the Automatic Maintenance, and then click on the link that says “Change maintenance settings”.
Now, in the next window, choose anytime from the drop down list that says “Run maintenance tasks daily at”.
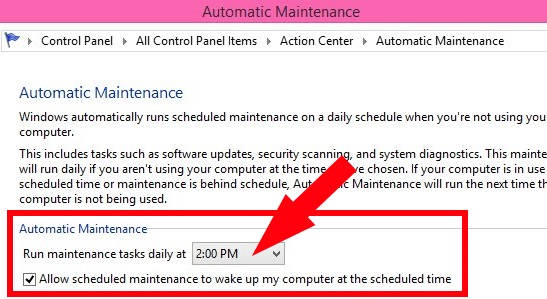
That’s it.
Now, Maintenance will automatically run at the scheduled time, without your intervention.
Learn, the complete tutorial for scheduling Automatic Maintenance in Windows 8 here.
How To Enable/Disable Automatic Maintenance In Windows 8:
After Scheduling the automatic maintenance, by default it runs every day. You can disable the automatic maintenance whenever you want, and similarly can enable it as well.
Step 1: Open the Run command box, by pressing Windows Key + R from the keyboard. Use taskschd.msc in the Run. It opens Task Scheduler.
Step 2: In the Task Scheduler, navigate to the following path:
Task scheduler Library > Microsoft > Windows > TaskScheduler
Now, in the middle panel, look for “Regular Maintenance”, and right click on it.
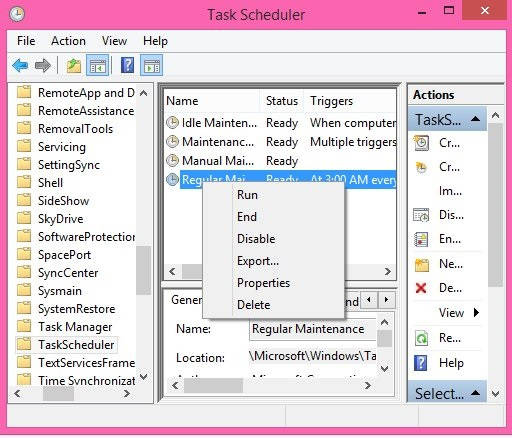
If it is Enabled (default setting), it will give an option of Disable, and vice versa.
How To Manually Start/Stop Maintenance In Windows 8:
If you have disabled the automatic maintenance, then you should manually Start the maintenance, so that your PC keeps running smoothly.
Once Started, you can stop the maintenance as per your preference as well.
Step 1: Open Control Panel (Icon view). Then, click on “Action Center“,
Step 2: In Action Center, go to Automatic Maintenance. You will see a link that says “Start Maintenance“, click on it. Once you click on it, Maintenance starts in the background.
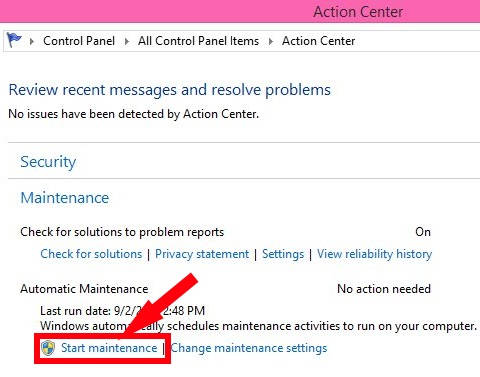
When you click on Start Maintenance, it changes to the “Stop Maintenance”. To stop the maintenance, click on the Stop Maintenance link.
Also learn, how to turn Off Security and Maintenance Messages in Windows 8.