This is a quick tutorial to explain how to use Windows 10 icons in Windows 11. Here I will mention a simple trick that you can use to do it on your PC in a few clicks. In order to do this, you basically need to replace the core icons file of Windows 11 with Windows 10’s. And here I will walk you through a step by step process to do that.
If you are a desktop customization enthusiast then you may want to play this little trick with your PC. If you want to apply Windows 10’s icon theme to Windows 11 then there are no third party software to do it. You will eventually have to play with the system files. And here I will show you how.
How to use Windows 10 Icons in Windows 11?
Follow the steps below to switch to the Windows 10 icons set in Windows11. You need to have a little bit knowledge of command line for this to work.
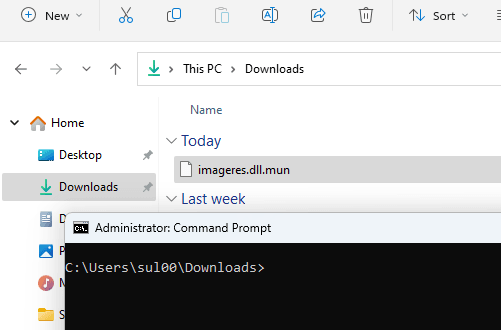
- Go to “C:\Windows\SystemResources” and then copy “imageres.dll.mun” and make a backup of this file.
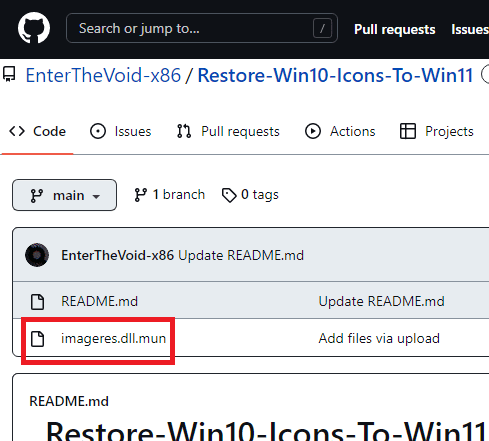
- Download the new “imageres.dll.mun” file from this GitHub repository.

- Open command prompt in the folder where you have pasted the above downloaded file.

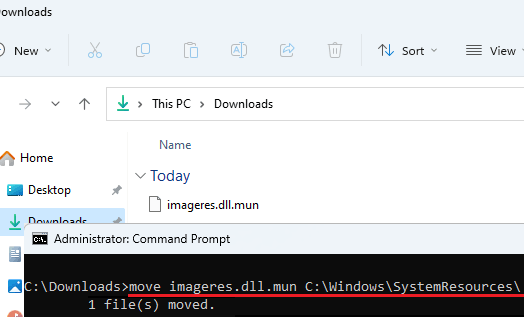
- Run the command below to move the file to the system folder.
move imageres.dll.mun C:\Windows\SystemResources\

- Done.
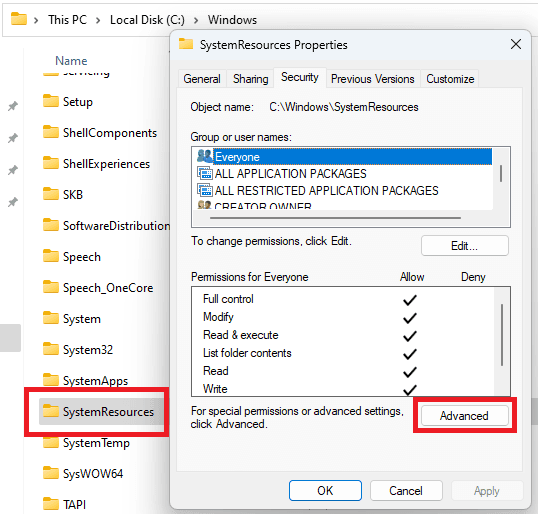
Now, all you have to do it restart the system. After the system starts again, you will see Windows 10 icons on your Windows 11 PC. And if for some reasons, you get the permission denied error then you need to own the “C:\Windows\SystemResources” folder by the current user. To do that, use the following steps.
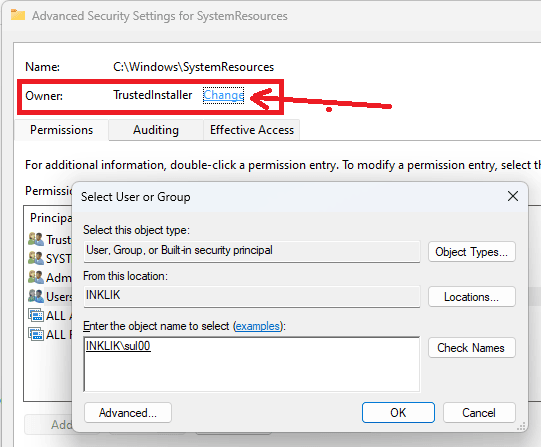
- Right click on SystemResources folder. And then from the Security in Properties, open Advanced settings.

- Change the owner to your user.

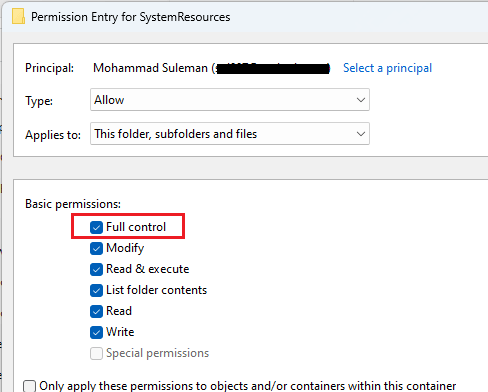
- Click on Add to add user and then assign it full control.

- Done.
This is how you can own any system folder on your PC. The process is simple and just follow these steps to do it in a few clicks. And not just Windows 11 you can follow these steps on earlier version of Windows as well such as Windows 7 and Windows 8. On those Windows version, you can have Windows 10 icons as well using the same method.
Final thoughts:
If you want to have Windows 10 icons in Windows 11 then this tutorial here will help. Follow the steps here carefully and then you will have old Windows 10 icons in Win 11. All the icons of folders such as, Recycle Bin, This PC, Documents, and other folders will be changed to the Windows 10 ones. And to get the Windows 11 icons back, you simply need to restore the “imageres.dll.mun” file that I told you to make a backup of in step 1.