When a user connects to a wired network for the first time, a Network Profile is automatically created by Windows with generic names such as Network 1, Network 2 and more. On the other hand, a wireless network profile is named after the SSID of the wireless network that your computer is connected to.
Certain administrators do not prefer such non-specific network names and would prefer changing them to something that makes sense. But this option has been discontinued after Windows 7 and you will not find any option to change your network name in the Control Panel or the Settings app. The only way out is to use the Registry Editor or by using a portable freeware called Network Profile Name Changer. In this article we will be explaining the steps to rename your network profile using both the stated methods.
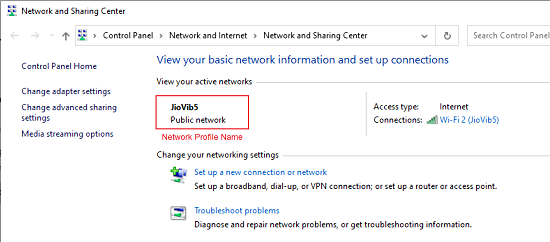
You can check the preset name of your network profile in the Network and Sharing Center on Windows. For this go to go to Control Panel -> Network and Internet -> Network and Sharing Center. Alternatively you can open the ‘Run’ dialog, input the command given below and press ‘Enter’.
control.exe /name Microsoft.NetworkAndSharingCenter
Changing Network Profile Name using the Registry Editor
1. Type ‘regedit’ in the search box on the taskbar and press Enter to launch the Registry Editor.
2. Now, you must carefully navigate to the following registry key
HKEY_LOCAL_MACHINE\SOFTWARE\Microsoft\Windows NT\CurrentVersion\NetworkList\Profiles
3. Observe that the Profiles Folder in the registry shows a list of all the network connections in your computer with a unique identification number. When you click on any ID to open it, you will be able to view a Registry Key called Profile Name.
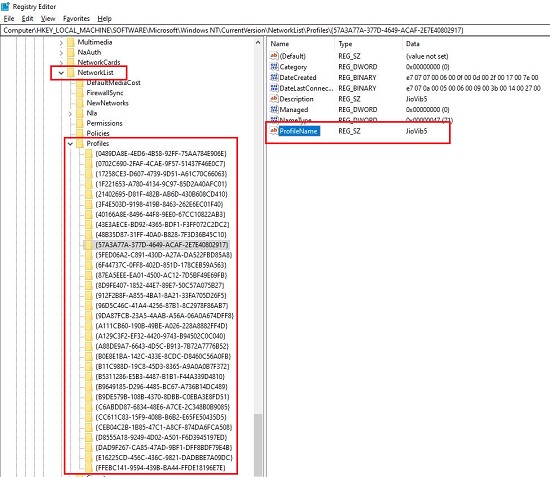
4. You need to click on each unique ID to find the Profile Name that you wish to change because each network location in your system will be represented by a unique ID folder.
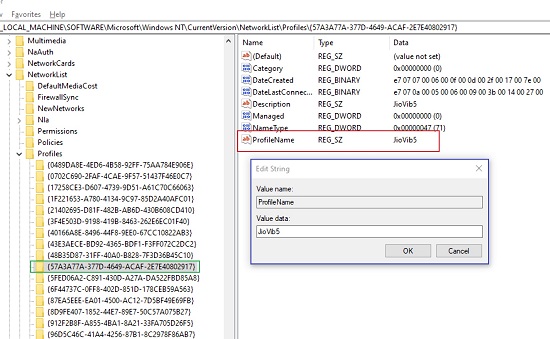
5. Next, to rename the network location, simply double click the ‘Profile Name’ registry key, provide the new name for it and click on ‘Ok’.
6. You can now access the Network and Sharing Center and verify that the network profile name has been changed.
Changing Network Profile Name using the portable freeware Network Profile Name Changer
Incorrect changes to the Windows Registry can prove to be dangerous hence a better method of changing your Network Profile name is by using Network Profile Name Changer.
1. Click on this link to download the portable freeware in Zip format. Unzip the contents of the archive and run the respective executable file.
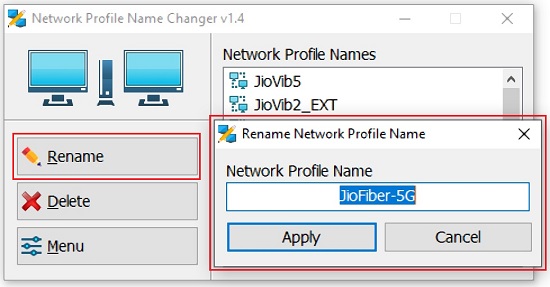
2. You will be able to view a list of all the network profiles in your system.
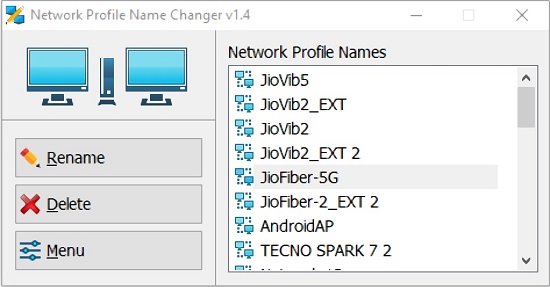
3. Click on the one that you wish to rename, click the ‘Rename’ button, change the name as required and click on ‘Apply’. Alternatively, you can also double click any network profile and change its name.
Closing Comments:
Use any of the above two methods to change the name of your Network Profile. The preferred way will be to use the portable freeware as incorrect registry changes can cause serious problems with your computer system.