Peacock is free plugin to color code VS Code workspaces separately. This extension lets you change colors of all opened workspaces. You can specify any color and it will change that immediately. With this plugin, you can opt to change the color of the status bar, activity bar, and title bar. After activating it, you just have to give it a color as hex code and it will apply that to the editor. You can create a list of favorite colors in it as well and then activate them on any workspace using the command palette. There are some very nice set of colors in it already but you are free to add your own.
If you work with multiple workspaces in VS Code then some times it becomes quite difficult to identify the one you were using recently. In that case, you can use this simple plugin to color code workspaces. You can apply your favorite color to the workspace and then it will be easy to identify that workspace. It lets you save your color schemes and other settings in JSON file in the workspace settings. There are various options in command palette to change workspace to a new color, pick one from favorites, add current color to favorites, etc.
How to Color Code VS Code Workspaces Separately?
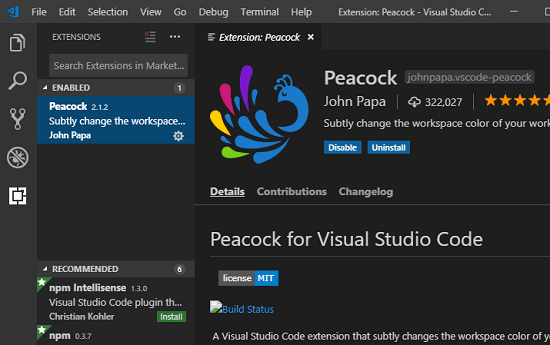
You can easily install this VS Code plugin from VS Code marketplace. Just search for it there and then you can simply install it and reload the workspace if needed. After you install this extension, you have to tweak some settings. In the settings of this plugin, you will have to specify what parts of the VS Code you want to affect. By default, it doesn’t color all components of VS Code unless you explicitly define them.
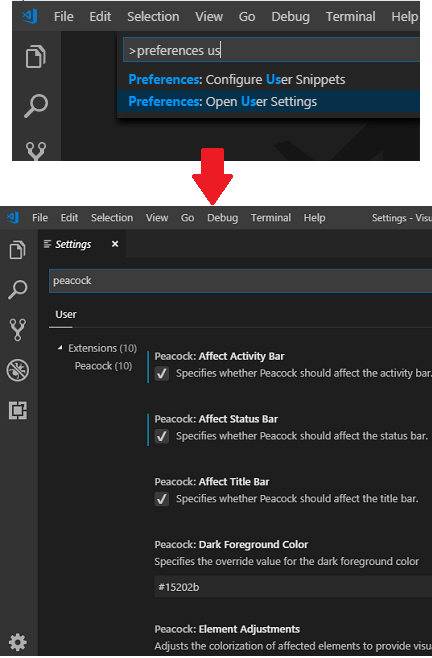
Open Peacock settings by typing “user settings” in command palette that you can invoke using “Ctrl+Shift+P”. Next in the settings, search for “peacock” and all of its settings will appear. Enable showing the color on activity bar, title bat, and status bar. And there are some other options that you can specify.
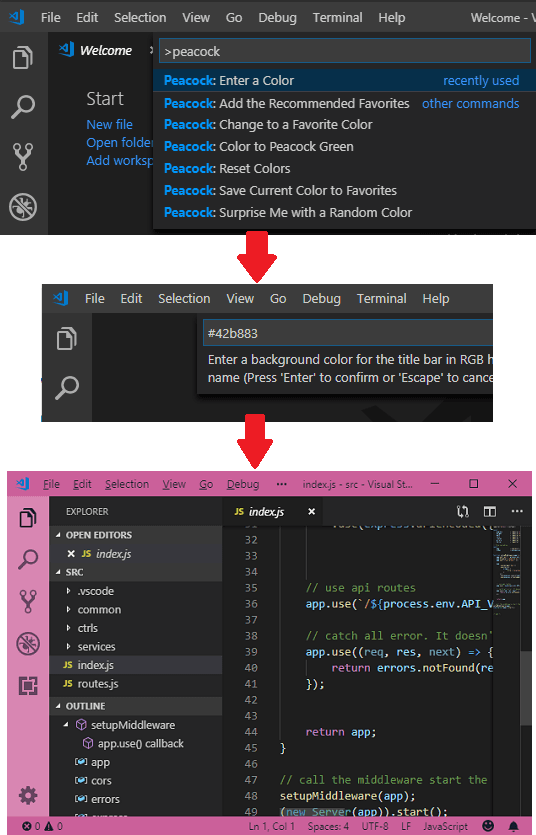
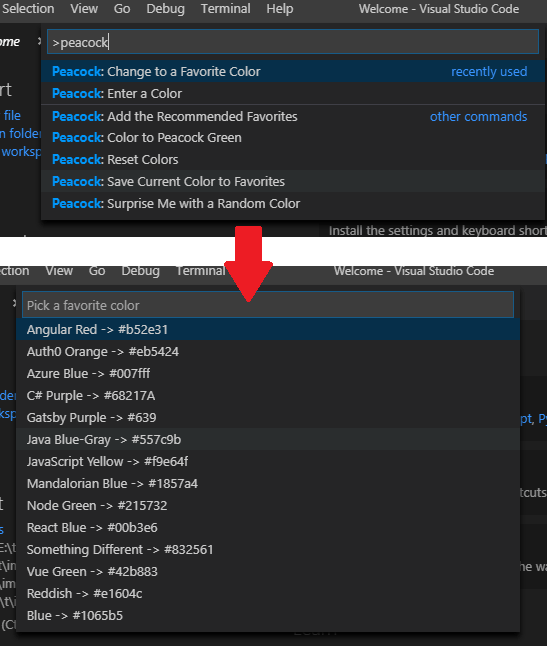
Now, at this moment, you are all ready to use it. Open a workspace and then activate the command palette (Ctrl+Shift+P). Search for “peacock” and look for the “Enter a Color” command. Next, it will ask you to specify a color code in hex. Enter the hex code of the color you want to apply to the workspace and hit enter. It will immediately change the color of the workspace as you can see in screenshot below.
In the similar way, you can use other commands such as for adding current color to favorites. After applying a color, you can add that to your favorite colors using the “Save Current Color to Favorites” command. It asks for a name for the color and saves that in favorites. You can later access favorite colors using “Change to a Favorite Color” command.
In this way, you can use this simple VS Code plugin to color code workspaces. You can create as many workspaces you want and change their color instantly. There are some other tweaks that you can find on its homepage and use them. Also, if you have problems with color codes then you can use some online websites or color picker software to pick a color to get its corresponding hex code.
Final thoughts
If you are a customization enthusiast then you will really like this Peacock plugin for VS Code. I liked this extension very much as you can use it to change color of any workspace if you often work with multiple ones. It really makes it easy to classify different workspaces and you can use it on any platform in the same way I have explained above for Windows.