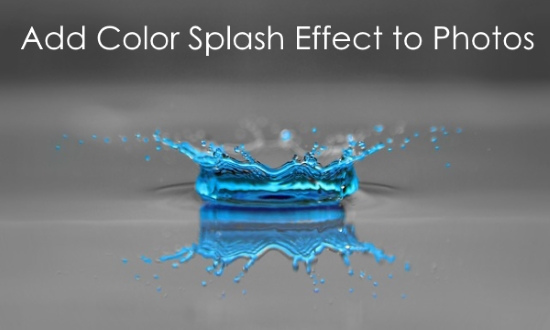
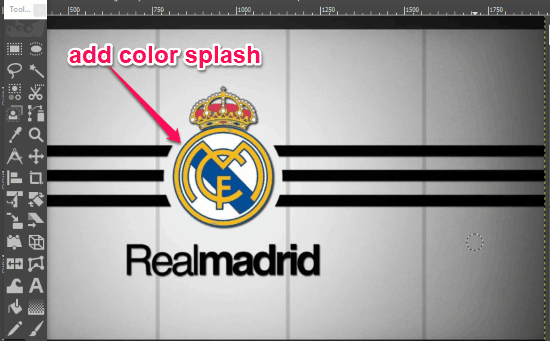
This post explains how to add color splash effect to photos with 5 free image editors. They allow you to choose any photo you want and manually add a stunning color splash effect to it. These image editors offer some useful features like layers, color adjustments, alpha channels, etc. which will let you add the effect to your photo. The best thing about these editors is that they allow you to add the color splash effect to any specific area you want on the photo. When you are done with editing, you can save the resulting photo to your PC for free.
As they are full-fledged image editors, you can also use tons of editing tools including crop, rotate, flip, path, filters, and much more. We have also covered some best free websites to add color splash effect to photos online. They can come in handy if you don’t want to download and install anything on your PC for the job.
Let’s get started with the image editors.
Paint.net:
Paint.net is one of the best image editors to add color splash effect to photos for free. It allows you to choose any photo from your PC and add the effect to any area on the photo manually. For that, you need to use some features of this editor like layers, color adjustments, etc.
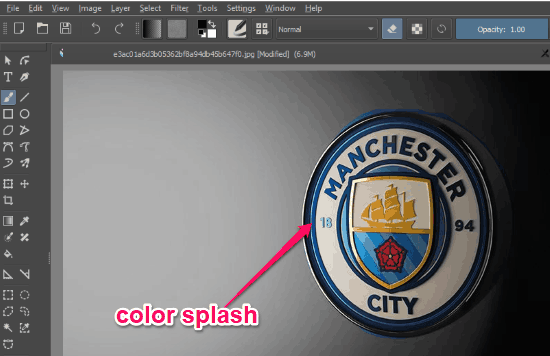
How to Add Color Splash Effect to Photos using Paint.net:
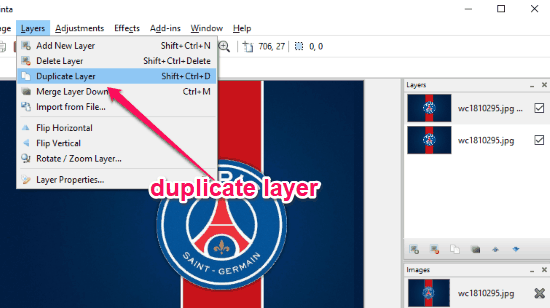
Step 1: Simply install and open Paint.net on your PC. After that, open the photo in which you want to add the color splash effect. Now, you will see the “Layers” box on which you need to duplicate the current photo layer. You can do that just by clicking on the “Duplicate Layer” icon.

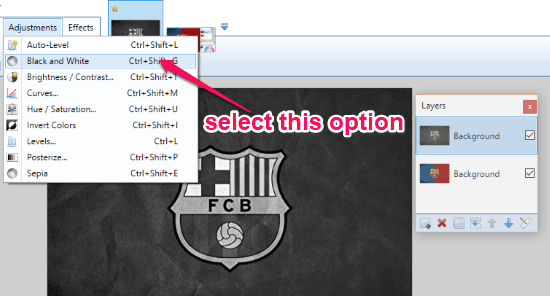
Step 2: Once you’re done with that, you need to grayscale the top layer. To do that, select the “Adjustments” menu at the top and select “Black and White” option. After that, the top layer will be grayscaled and you can proceed to add the color splash effect.
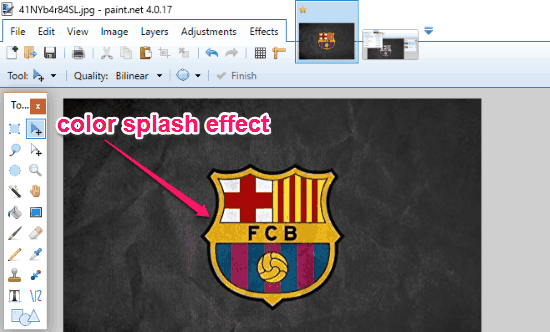
Step 3: For that, simply select the “Eraser” tool from the toolbar and start erasing any area of the top layer. This will apply the color splash effect to the photo and reveal the colored part of the bottom layer. Now, you can easily save the photo with the effect on your PC.
GIMP:
GIMP is another useful image editor which can assist you easily add color splash effect to photos. You can choose any photo and add the effect in no time. You can manually choose the area where you want to apply the color splash effect. Similar to Paint.net, you need to use features like layers, color adjustments, etc.
How to Add Color Splash Effect to Photos with GIMP:
Step 1: First, open up GIMP and then import any photo you want. Then you need to duplicate a layer of the photo. To do that, use the “Duplicate Layer” icon visible on the “Layers – Brushes” palette on the right.

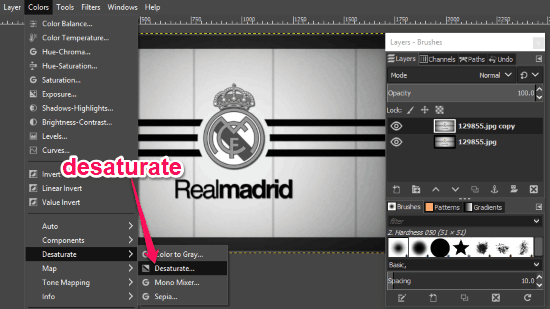
Step 2: As soon as you do that, you can go ahead and grayscale the duplicate layer. For doing that, you need to click on the “Colors” menu and select “Desaturate → Desaturate” from the top. After that, the grayscaled effect will be applied to the layer on top, as shown below.
Step 3: Now, what you need to do is add the alpha channel to that particular layer by clicking on the “Layer” menu and then selecting “Transparency → Add Alpha Channel”. It is important because when you erase any area of the top layer, the content of the bottom layer will be revealed.

Step 4: Once you’re done with that, simply select the “Eraser” tool from the toolbar and erase any area on the duplicate or top layer. When you do that, you can see that the content of the original layer is visible and ultimately the color splash effect is added. You can now save the photo to your PC.
Autodesk Pixlr:
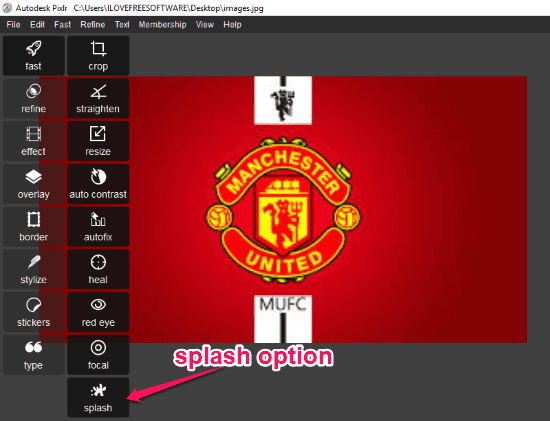
Autodesk Pixlr is also a free image editor for which you can use to add color splash effect to photos. This one lets you apply the effect manually to any photo you want from your PC. The best thing about this image editor is that it comes with a direct “Splash” option to add the effect. That means you won’t have to go through a long process for that.
How to Use Autodesk Pixlr to Add Color Splash Effect to Photos:
Step 1: To begin, open up Autodesk Pixlr and then import any photo you want to add the color splash effect. Then click on the “Fast” option and then a menu with various tools will appear. Now, you can see a “Splash” tool and select it to proceed.
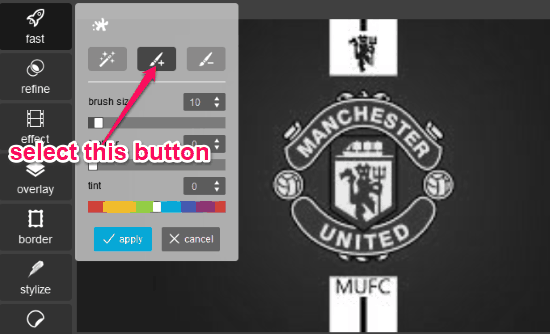
Step 2: When you do that, a small popup will open on which you got to select the “Add” button. After that, it will automatically apply the grayscale effect to the photo.
Step 3: Now, what you need to do is, simply start drawing on any area you want on the photo. This will start revealing the original background of the photo and keep the other areas grayscaled. So, this way you can add the color splash effect to a photo manually and save it.

Pinta:
Pinta is another best free image editor which lets you create stunning photos by adding color splash effect. You can simply select a photo and manually apply the effect to any specific area. For that, you can use some basic features of this image editor like layers, color adjustments, etc. It is quite similar to “Paint.net” and you can add color splash effect to photos in no time.
How to Add Color Splash Effect to Photos using Pinta:
Step 1: To start, the first thing you need to do is open the photo from your PC for applying the effect. Then you got to make a duplicate layer of the original photo layer. To do that, go to the “Layers” menu and select ‘Duplicate Layer” option.
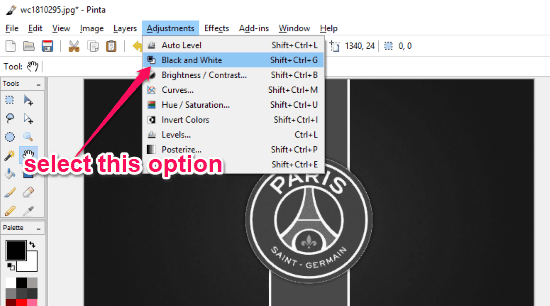
Step 2: Then you need to grayscale the duplicate layer which you have created. For doing that, select the “Adjustments” option at the top and then select the “Black and White” option.
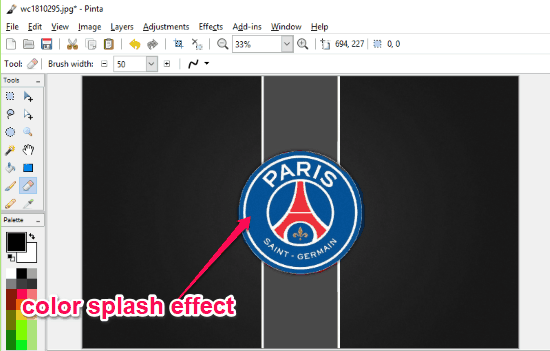
Step 3: Now, you can go ahead and manually apply the color splash effect to any area on the photo. You can simply use the eraser from the toolbar and erase the area on the top layer. The content of the bottom layer will now be visible to you. You can then export the photo with ease.
Krita:
Krita can also be used to add color splash effect to photos. This image editor lets you select any photo you want and apply the effect without much effort. You have the option to choose any area you want on the photo where you want to add the effect. This one also offers intuitive tools and features to add color splash effects.
How to Add Color Splash Effect to Photos with Krita:
Step 1: After opening Krita, simply choose any photo you want from your PC and import it. Then click on the “Duplicate Layer” button under the “layers” section on the right to create a duplicate layer of the photo.

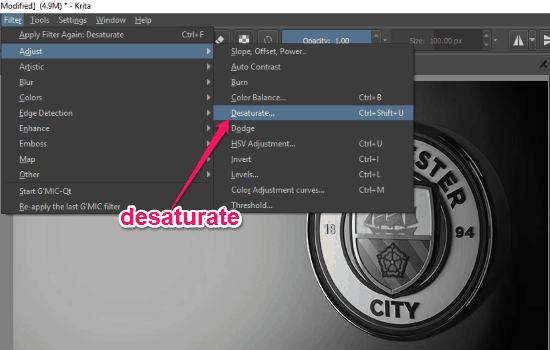
Step 2: When you do that, you need to desaturate the duplicate layer such that the grayscale effect is applied. You can do that by clicking on the “Filter” menu at the top and select “Desaturate”. As soon as you do that, the top layer will be grayscaled.
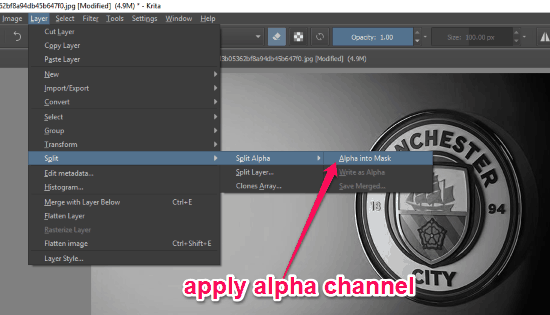
Step 3: Now, you need to add an alpha channel to the top layer before you proceed to add the color splash effect. To do that, click the “Layer” menu and select “Split → Split Alpha → Alpha into Mask”.
Step 4: Now, the photo will be ready for applying the color splash effect. You can simply select the “Freehand Drawing Tool from the toolbar and draw on the area which you want to highlight after the effect is applied. Once done, you can see that the color and content of the bottom layer is now visible and the color splash effect is applied. You can later export the photo to your PC.
Closing Words:
So, these are some of the best free image editors with which you can easily add color splash effect to your photos on PC. All these editors come with an intuitive interface making it easier for you to edit your photos and add the effect. Adding effects like Color Splash, Tilt-Shift, Double Exposure, etc. allows you to make your photos look outstanding.
Try these editors for free and let me know which one you liked in the comments.