In this tutorial, I will be explaining how to setup your own VPN server on DigitalOcean. Here I will list some pre ready scripts that you can run on your DigitalOcean server to install a personal VPN server. These scripts generally use OpenVPN to turn your droplet into a VPN server. You just have to run a few commands to set up a VPN server and then you will get the VPN credentials that you can use to connect to the VPN. You can connect to the VPN from almost any device in an easy way. And to use these scripts, you just need a droplet in your DigitalOcean account, PuTTY SSH client, and a SFTP software.
There are plenty of other VPN services out there that you can try. But the advantage of using your own VPN server is that you will get high speed and secure VPN that you can fully control. The scripts that I have added in the below post lets you create many clients. And then you can connect to the VPN by either using the username, passwords or the open VPN client profiles.

How to Setup your Own VPN Server on DigitalOcean?
OpenVPN-install
OpenVPN-install is probably very simple, secure and straightforward script to set a VPN server. It basically installs OpenVPN server on your droplet with some slight modifications. Here it focuses more on the encryption process to harden then security. You can run and install this script in an easy way and get your VPN server running in a few minutes. In the installation process, it asks you to specify some preferences and then it installs the VPN server for you. You can add multiple clients in it and then create VPN credentials for all of them.
Follow these simple steps to install OpenVPN-install on your DigitalOcean server.
Step 1: Make sure that you have created a droplet and you are logged in any SSH client like PuTTY.
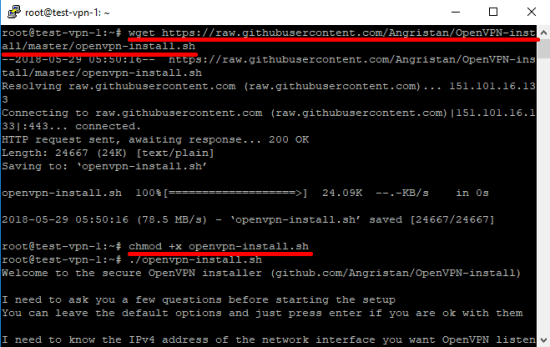
Step 2: Run this command to download this script and then assign permission to it. After running these commands, you will be able to run it in the usual way.
wget https://raw.githubusercontent.com/Angristan/OpenVPN-install/master/openvpn-install.sh

chmod +x openvpn-install.sh
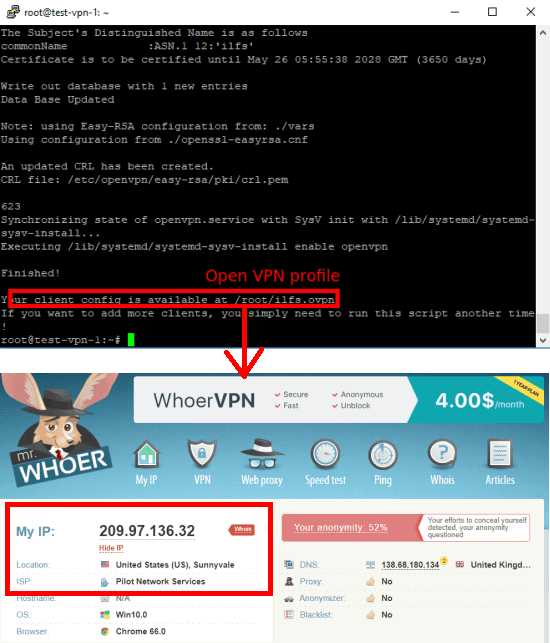
Step 3: Now, finally it’s time to run this script. Use the following command to run this script and before starting the installation, it will ask you some questions and you can specify the relevant options for that. After that, in the end it will install the VPN server. And you can start connecting to your VPN. It will show you the location of the OpenVPN profile that it creates.
./openvpn-install.sh

Step 4: You can download the OpenVPN connection profile that it creates. After that, load that in OpenVPN desktop client to connect to the internet . And if you want, then you can check your IP on the websites like Whoer.net or MyLocation.org.
In this way, you can set up your own VPN server on DigitalOcean and then surf internet anonymously. In a few minutes, you can install this VPN and then manage it. Also, if you want to add more clients in it or you want to uninstall it, then simply run the script again.
IPsec VPN Server
IPsec VPN Server is another VPN that you can install and run on your server. Just like the VPN above, you can install it through a script and then you can connect to it from any device. It lets you setup a VPN using a IPsec/L2TP protocol. And after the installation, it gives you the credentials to connect to the VPN server. When it comes to installing this on your server, there are 3 methods to do it. But I will explain the one which is the easy one and that you can use conveniently. After getting the connection credentials, you can use them in the VPN client and connect to the internet. Here you can even use the Windows 10 built in VPN manager to connect to the VPN.
Here are the steps to install this VPN on DigitalOcean server in an easy way.
Step 1: Get your droplet ready and then open your session in PuTTY.
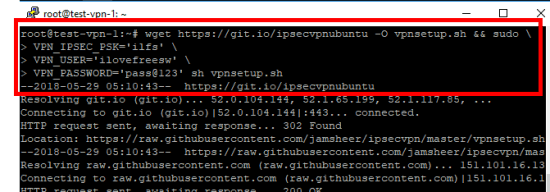
Step 2: Now, run this command in it to install the VPN server. But before running this, you will have to modify it a little. You have to specify the pre shared key (PSK), username, and password in the following command.
wget https://git.io/vpnsetup -O vpnsetup.sh && sudo \

VPN_IPSEC_PSK='your_ipsec_pre_shared_key' \

VPN_USER='your_vpn_username' \

VPN_PASSWORD='your_vpn_password' sh vpnsetup.sh
Step 3: Hit enter to start running the command. It will take a few minutes and when it has installed successfully, you will see the credentials in the terminal window of PuTTY.
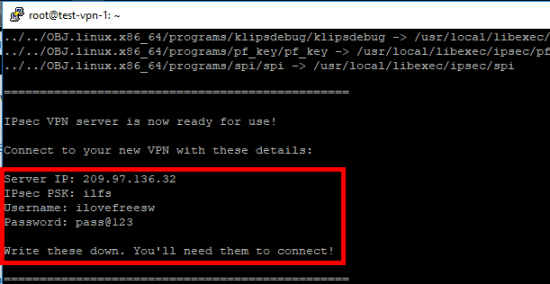
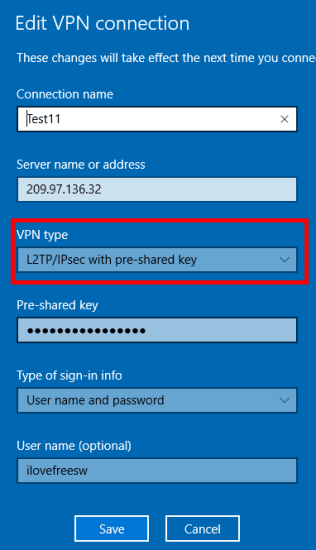
Step 4: You can use the credentials that it shows in the terminal window to connect to the VPN server. You can use the Windows 10’s built-in VPN to connect to the server. And to use the VPN, you will have to choose the “L2TP/IPsec with pre shared key” protocol.
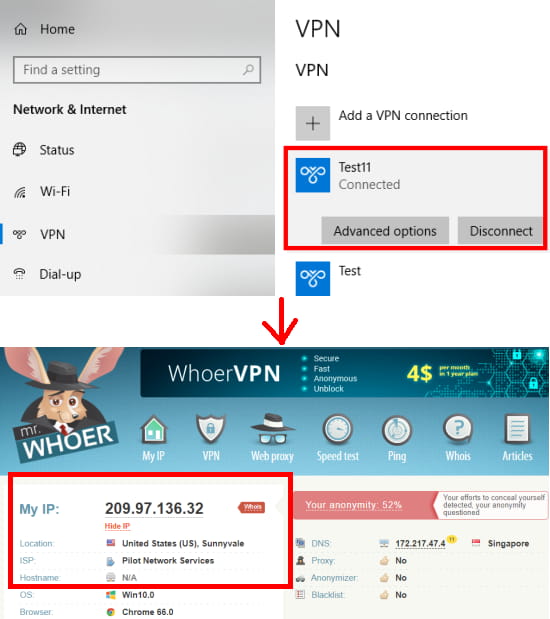
Step 5: Connect to the VPN and then start surfing the internet with anonymity. You can check the local IP address assigned to you. Use the Whoier.net websites to do that for you.
In this way, you can easily set up a secure and powerful VPN server in a few minutes. And you can do that by just running a few commands. If you want to uninstall this VPN then you can see this guide.
Also see:
Final thoughts
If you want to set up your own VPN server then this tutorial may come in handy. And luckily if you have a DigitalOcean account with you then you can do that in just a few minutes. And you will have your own VPN server running that you can use anytime and enjoy the high speed VPN at really cheap cost.