A Fax (short for facsimile) is the telephonic transmission of text or images usually from a telephone number associated with a fax machine to another fax machine. Later, as technology evolved, a lot of applications were made available that allowed you to send a fax using a modem connected to a computer to a fax machine or a similar setup.
As a result of the power of Internet Technologies, nowadays you don’t require any such applications and hardware to send a Fax. You can now send a fax from Gmail to a Fax machine provided you know the Telephone (Fax) number.
For this, we will require a reliable Online Fax Service like Fax.Plus that we can download from the Google Workspace Marketplace.
In this article, I will be listing the steps on how to send a Fax from your Gmail.
Steps to be followed:
1. Sign in to your Gmail account and click on the button with the ‘+’ sign on the right sidebar. This opens the Google Workspace Marketplace.
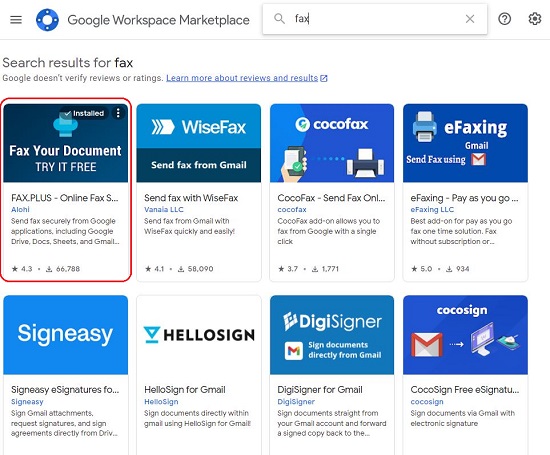
2. Search for a Fax Service using the string Fax and in the search results click on Fax.Plus.
3. Click on the ‘Install’ button on the Fax.Plus page. You must accept all the prompts asking for permission for it to install and work.
4. Once Fax.Plus is installed, you will be able to see its icon in the sidebar along with the icons for the other add-ons.
![]()
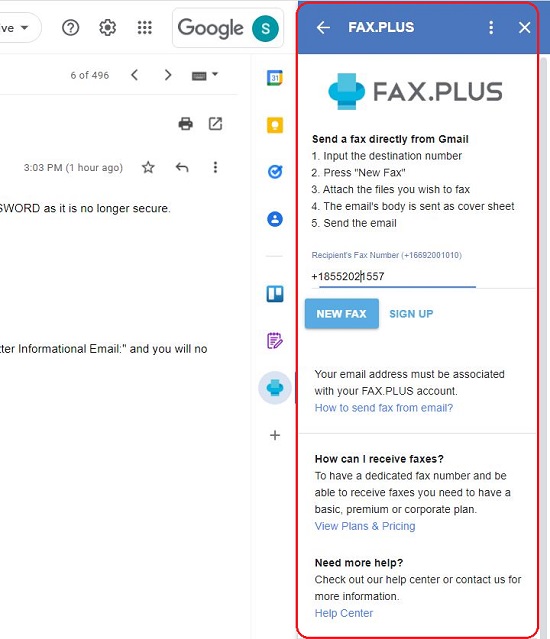
5. Next, you must register your Gmail address with Fax.Plus for it to work successfully. Click on the Fax.Plus icon to open up a small window at the right side. Click on ‘Sign up’ and complete the registration using your Google Account.
6. Next, type the recipients fax number. You must start with a ‘+’ then add the dialing code of the country you are sending this to, and then the recipient’s fax number. No spaces are allowed anywhere in the fax number. Now click on ‘New Fax.
7. This brings up the familiar Gmail window where the destination fax number will be auto-populated in the ‘To’ field. Additionally, email addresses can also be added in the BCC and CC fields for sending the same document to others via the email route.
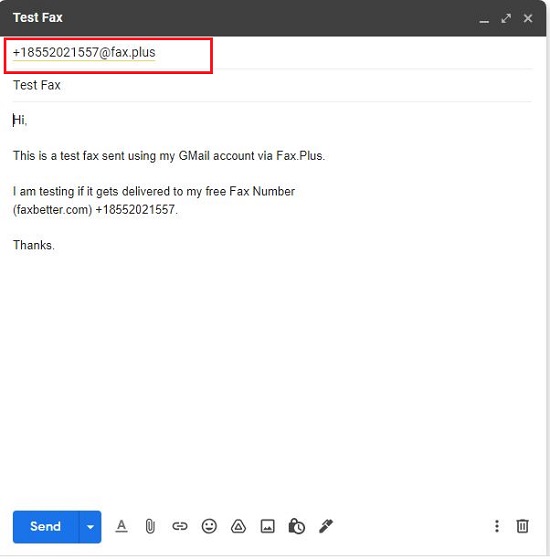
8. The cover sheet of your Fax will be the emails ‘Body’ section. Any documents you want to send can be inserted as an email attachment with the message. Finally click on ‘Send’ as you would do to send a standard email and the attachments will be delivered as a fax with the body of your message as a cover sheet.
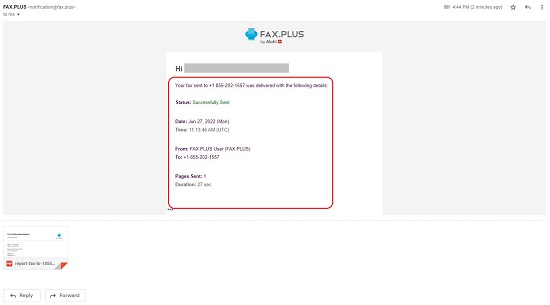
9. You will receive a confirmation email in a couple of minutes with an acknowledgement report that your fax has been sent successfully.
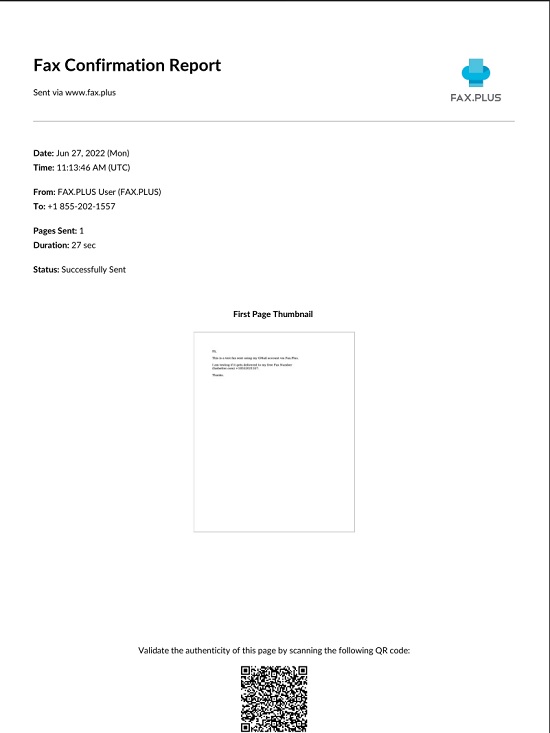
10. You can also Login to Fax.Plus by clicking here, and verify your sent faxes by clicking on the ‘Sent’ button.
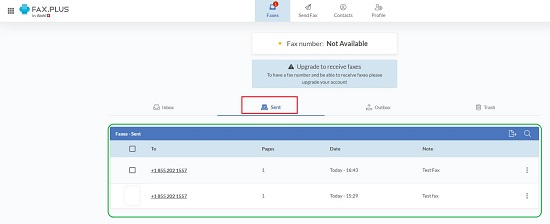
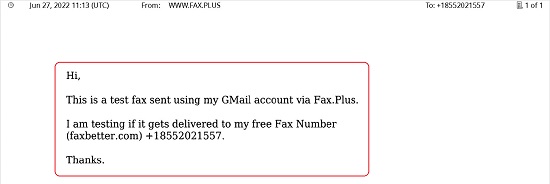
For testing, I used Faxbetter.com which gives you a Free Fax number to receive Faxes without a regular Telephone line. I could successfully receive and visualize all the Faxes that I sent from Gmail via Fax.Plus. The screenshots have been attached above.
The Free Version of Fax.Plus allows you to send only 10 faxes. You must subscribe to their paid versions to remove this limitation and also for some additional very powerful features. Click here to view their Plans and Pricing.