This tutorial details how to manually create a system restore point in Windows 10. I’ve repeatedly said that modern day Operating Systems are highly stable and fault tolerant, owing to massive strides in their development over the years. However, they are not one hundred percent impeccable, which means there’s always a chance of a random system crash messing up a perfectly functioning computer. And system crashes almost always lead to some data loss. This is the reason that Windows Operating Systems have always included a bunch of utilities for getting a downed PC working again, even if only to some extent
One such utility is System Restore. In a couple of my previous write-ups, I’ve talked quite a lot about System Restore, explaining how you can specify the disk space to be used for System Restore, and even detailed how to delete restore points for a disk partition. I’m sure you already know that System Restore in an automated manner, creates restore points on its own behind the scenes. But what if you want to save the current system state, which is perfectly stable according to you, as a restore point?
Today is your lucky day, my friend, as Windows 10 allows you to manually save the current system state as a restore point. Intrigued? Let’s see how you can manually create a system restore point in Windows 10.

How To Manually Create A System Restore Point In Windows 10?
Creating a system restore point manually is fairly easy in Windows 10. Doing so saves the current system configuration in the form of a restore point, to which you can revert your computer, should the need arise. Here’s a step by step tutorial, illustrating how it’s done:
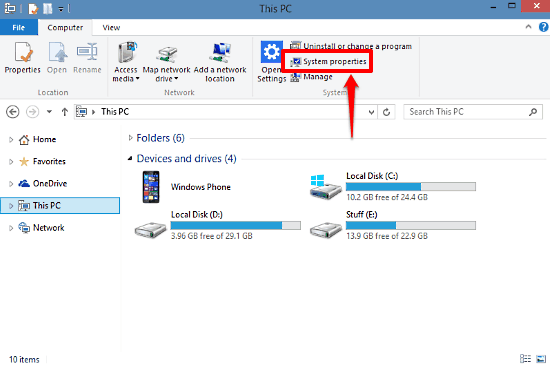
Step 1: Open up This PC, and move to the Ribbon Menu. Select the Computer tab, and click System Properties.

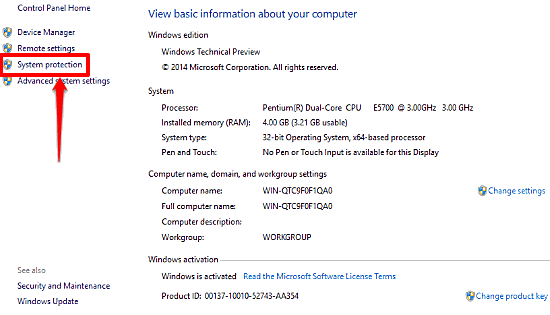
Step 2: You should be now on the System information pane, where you can find out essential information about your computer. On the left, click on the System protection option.

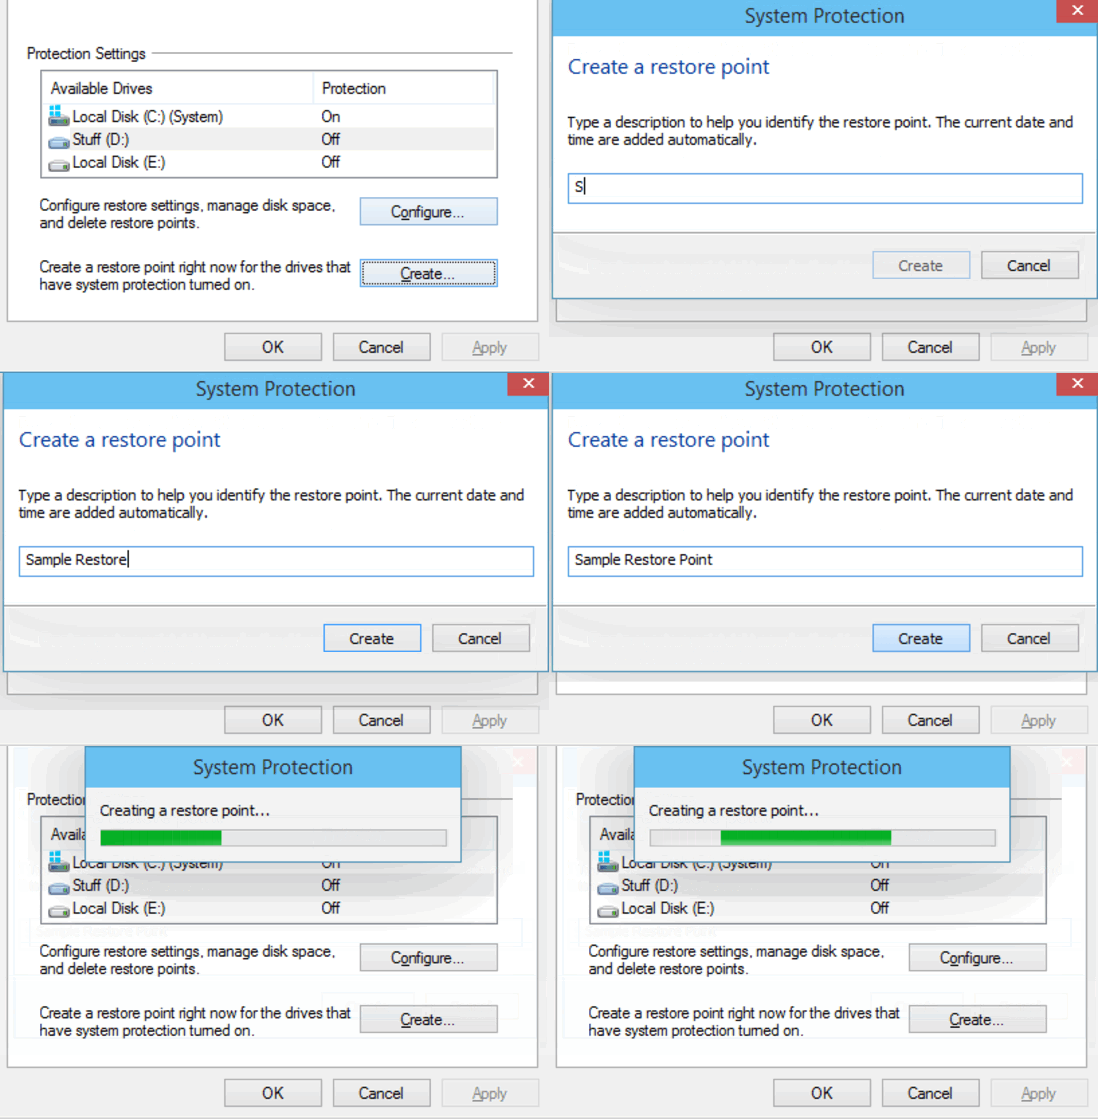
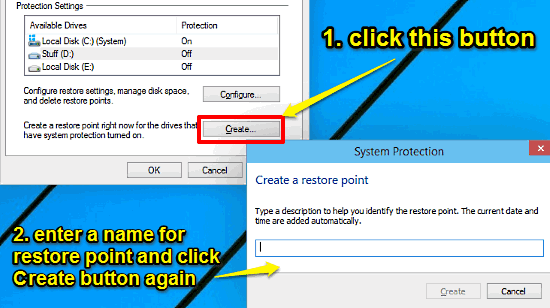
Step 3: The System Properties dialog box should come up, with the System Protection tab already focused. Click on the Create button, and you’ll be prompted to enter a descriptive name for the restore point. Do that, and click Create. Here’s a screenshot:

That’s it. Windows will now save the current system configuration as a system restore point, that you can use in future to get your PC to the current state, in case of any crashes. Pretty awesome, right?
Related: Turn On System Restore For Individual Disk Partitions In Windows 10
Wrapping It Up
System Restore is an essential Windows utility that serves a very important purpose. It’s simple, and incredibly easy to use. And the fact that you can create restore points on a manual basis, makes it even better. Try it out, and let me know what you think in the comments below.