In this tutorial, I am going to explain how to move your iTunes library to an external hard drive. Doing so, you can remove the iTunes library and all its data from your PC to free up storage. However, you don’t have to worry about your library as it will be moved to the external hard drive. Whenever you want to access your iTunes library, simply connect the drive to your PC and you can view and play all your library files.
If you have a vast collection of music files or videos synced with iTunes, and at the same time, you’re running out of storage on your PC, then this is a simple solution to overcome this problem by moving your entire iTunes library to an external hard drive or USB flash drive.
So, let’s get started with the tutorial.
How to Move iTunes Library to an External Hard Drive or USB Drive:
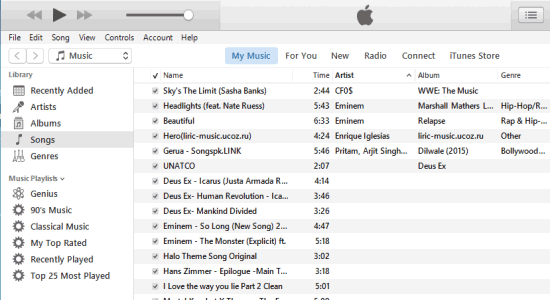
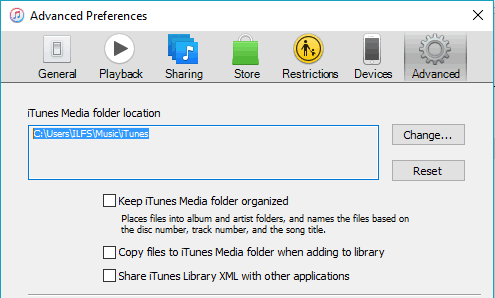
Step 1: To get started, the first thing you need to ensure is that all our library files are stored in the default iTunes Library. For this, open iTunes and click the “Edit” tab at the top. After that, select the “Preferences” option and go to the “Advanced” section. Then see whether the folder location is like “C:\Users\Your Username\iTunes” or not. If it is not, then click the “Change” button and select your iTunes Library folder as it will be needed while moving the library.
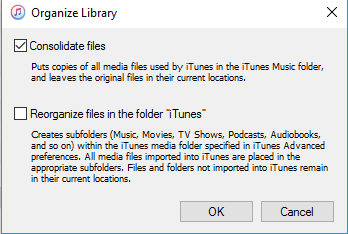
Step 2: In the next step, you need to put the copies of files used by iTunes in the iTunes Media Folder. To do this, go to “File→Library→Organize Library” and a popup will appear as shown below. Enable the “Consolidate Files” option and hit “OK”, that’s all. By doing this, you can make sure that all your files are stored in the library before you decide to move the library.
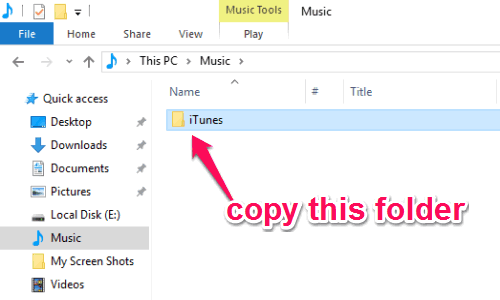
Step 3: Once the files are copied, you can proceed with the steps for moving the iTunes library to any external hard drive. First, close iTunes and connect your USB or external hard drive to your PC. Then go to the default folder location of your iTunes Library, which you have selected in Step 1 i.e; “C:\Users\Your Username\iTunes”. Now, copy the entire “iTunes” folder and paste it in your external hard drive.
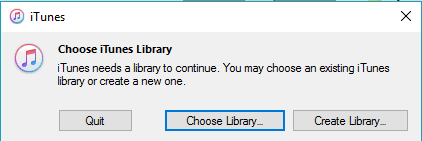
Step 4: When the files are copied to the external hard drive, press & hold “Shift” key and double-click on iTunes app to open it. A small popup will appear with two different options like Choose Library and Create Library.
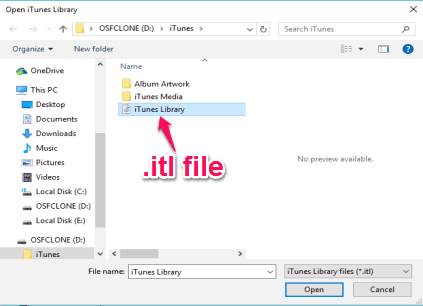
Step 5: Select the “Choose Library” option, and a new window will appear where you need to browse your external hard drive and open the “iTunes” folder. After that, you will be able to see a file named, “iTunes Library” with the extension .itl inside the iTunes folder. Select the file and click the “Open” button to proceed.
Step 6: As soon as you do that it will automatically import your iTunes library from your external hard drive. You will be able to see all your media files and play them if you want. Apart from accessing your iTunes library from your external hard drive, you can remove the default library folder from your PC to free up storage. Each time you want to play songs or watch music videos from your iTunes library, simply connect your hard drive and you’re done.
You may also like our tutorial on How to Auto Sync Songs You Download to iTunes.
My Final Verdict:
Ever wonder, how to move and access your iTunes library from an external hard drive or USB flash drive? If yes, then this tutorial can help you do the same. Simply follow the simple steps explained in this tutorial to move your entire iTunes Library to an external hard drive with ease.
I hope you find this tutorial useful.