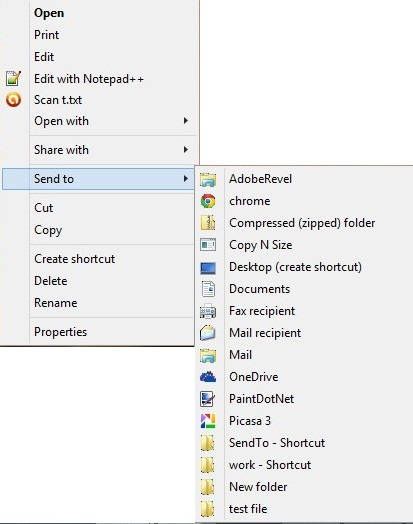
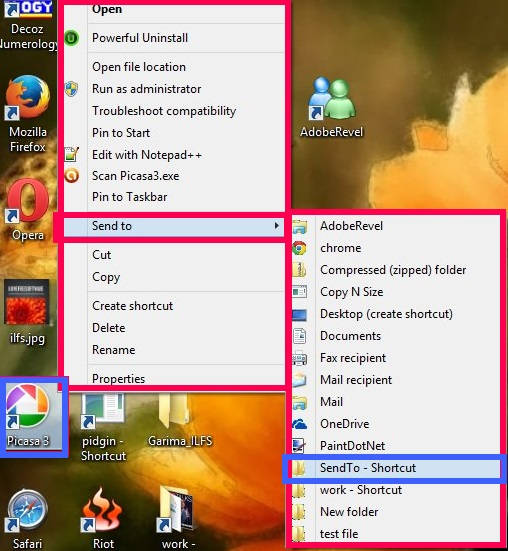
Here is a short tutorial that explains how to customize Send to Context Menu in Windows 8. When you right click on a specific file or folder, a Context Menu appears, which has many options, including “Send to”. When you hover your mouse on Send to option, it gives a list of destinations, where you can copy that particular file or folder, like: Desktop, Mail recipient, Fax recipient, etc.
If you want to customize the Send to menu in Windows 8, it is easy to do that. Here is an easy trick to add options of your choice to Send To Menu. You can add or delete any destination to the Send to Context Menu, like: OneDrive, Any Specific Folder, etc.
In this tutorial, I will also explain how to add Send to option to Send To Context Menu. It will help you to add any destination/program to Send to option in right click. Whenever you want add any new destination to Send to, you can click on the relevant option and it will be added to the send to option. You don’t need to visit again and again to the Send to folder to modify it.
Adding Options To Send To Context Menu In Windows 8:
To add any new destination to Send To Context Menu, or to remove previous one, follow the instructions given below:
Step 1: Open Run. To open, press Windows Key + R. In the run box, use the following code and press OK.
shell:sendto
It will open Send to folder. You can even navigate to the Send to folder by using the following path:
C:\Users\User_Name\AppData\Roaming\Microsoft\Windows\SendTo
Instead of User_Name, look for the user name you are signed in with.
Step 2: In Send to folder, right click anywhere on the screen. Navigate to New and then click on Shortcut. Browse the destination as per your choice. You can choose OneDrive, or any other program or browser as well. It will open that particular file with that program or browser.
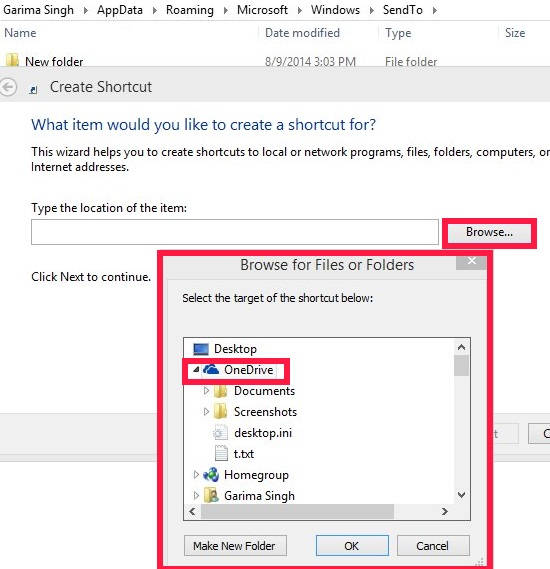
Once you have created the shortcut, click on it to check if it is working.
Alternatively, you can drag and drop the shortcut from the Desktop to the Send to folder. It will be even easier.
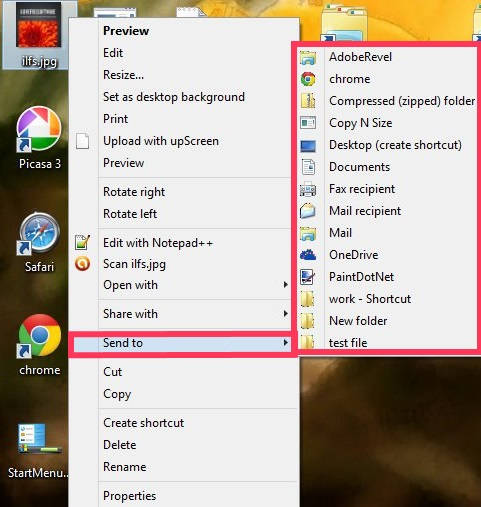
Now, the specific program has been successfully added to the Send to Context Menu. To check, right click on any file/folder, navigate to Send to. It will show the added destination as well.
Adding Send To Option To Send To Context Menu:
Now, every time you need to add any new destination to the Send to Context Menu, you need to follow the above mentioned steps. Although, the steps are quite easy, but it would be easier if the new destinations are added via right click only.
You can do that as well. To do that follow the below mentioned Steps:
Step 1: Open Send to folder, by using Step 1 in above mentioned method.
Step 2: Now, click on “SendTo” available at the path panel, and drag it to an empty space. When it says “+ Create a link to SendTo” drop it.
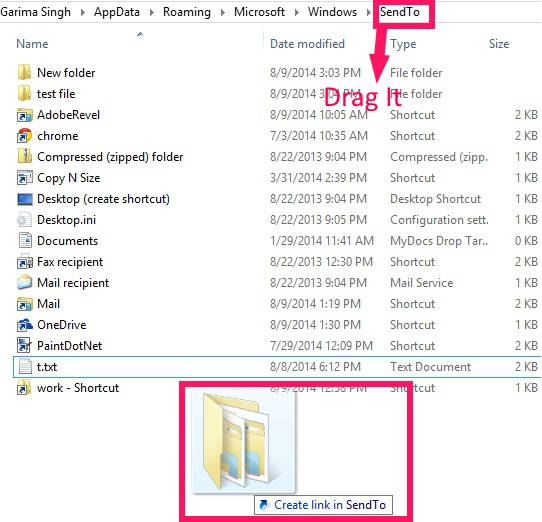
You will find that the SendTo shortcut has been successfully added to the SendTo folder.
Quite interesting??
Now, right click on any destination, go to the Send to, you will find SendTo option is also available into the Send to Context Menu.
Now, whether you want to copy any file to another destination, or you want to create new destination to SendTo context menu, you can do both of these in right click only.
Also learn, how to add Recycle Bin and Control Panel in Context Menu in Windows 8 .