This tutorial explains How to Convert JPG to XPS. Here I have explained 2 different methods to convert JPG to XPS easily. The first one is a free and portable software (ImageToPDForXPS) and second method is Windows’s own printing feature (Microsoft XPS Document Writer). With the help of Image To PDF or XPS freeware you can batch convert JPG to XPS easily in a few seconds (sometimes in just 1 to 2 seconds). In case of Microsoft XPS Document Writer feature, you have to browse and select multiple JPGs using Explorer and then select option to print in XPS format.
Let’s explore both these options.
Method 1: How to Batch Convert JPG to XPS using ImageToPDForXPS
Image To PDF or XPS is a free and portable software which lets you bulk convert JPG to XPS format. You can use this software to convert Single JPG to Single XPS, Multiple JPGs to Multiple XPS, and even combine Multiple JPGs to Single XPS.
Step 1: Download the ZIP file containing software and extract it to any folder. You can get ImageToPDForXPS from here. Run it and click Add Files button to add single or multiple JPG files by browsing.
Step 2: Now in this step you have to choose the XPS format as output from the Output Type section.
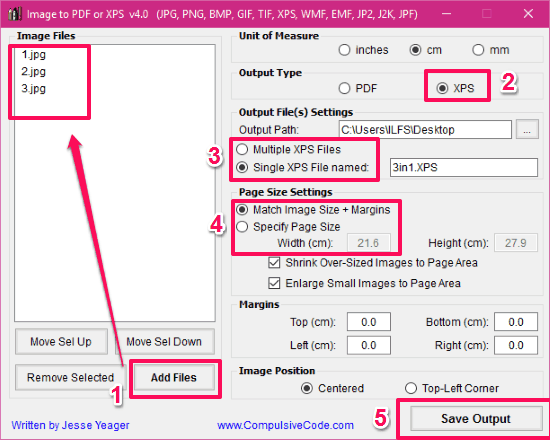
Step 3: Select the output path and select any of the following: Multiple XPS files or Single XPS file. Provide the name to output XPS file in case of “Single XPS File” from the Output Files(s) Settings section.
Step 4: If you want to save the original file dimensions of the input file in the output file; choose “Match Image Size + Margins” radio button or choose “Specify Page Size” if you resize the images in output.
Step 5: You have to click Save Output button to save the output XPS to the selected location.
Apart from jpg, this Image To PDF or XPS also lets you convert other common image formats, like: PNG to XPS, GIF to XPS, BMP to XPS, TIF to XPS and many more to PDF or XPS format.
Method 2: Convert JPEG to XPS using Windows Printing Feature:
In this method you have to use the Microsoft XPS Document Writer as a printer when giving print command for JPG file(s). Below is a brief description which lets you know the complete procedure to convert JPGs to XPS easily.
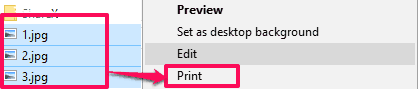
Step 1: First open the folder using Windows Explorer and select the JPG files by holding Ctrl button and clicking on desired file(s).
Step 2: Now Right Click on the selected files and choose Print option from the context menu.
Step 3: A new Print Pictures window will open. Here you have to choose the Microsoft XPS Document Writer as a printer from the drop down.
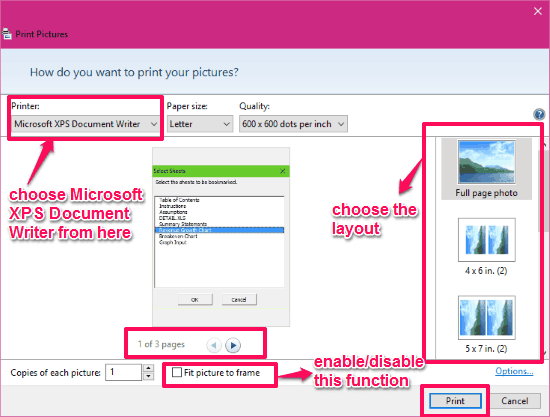
Step 4: Finally choose the layout and test other settings which suits you by enabling/disabling the features and click Print button.
Step 5: Now provide the file name and choose the *.xps from the Save as type drop down and save the file to the desired location.
Final Words:
The above tutorial briefly describes the 2 methods to covert JPG to XPS in seconds. The first method ImageToPDForXPS is very fast and the executable of this program is portable. While in the second method, it is a Windows inbuilt function which lets you print JPG to XPS as well as other types of files to XPS format. If you are looking to bulk convert JPG to XPS, then the first method is the way to go.
You can also try Free XPS Viewers for Windows from here.