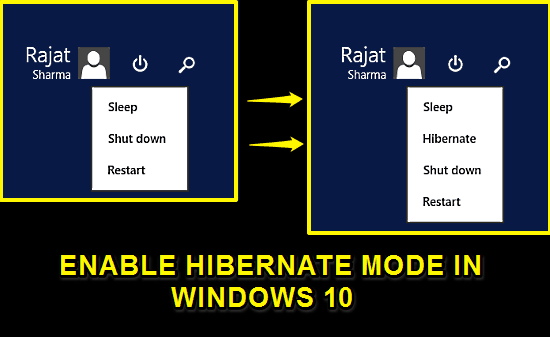
This tutorial details how to enable hibernate mode in Windows 10. As the primary system software installed on any computer, an Operating System has to perform a variety of crucial system tasks, such as memory management, resource allocation, power management, and things like that. If we talk about power management options, it involves (from the end user’s perspective) operations such as Shutdown, Restart and Sleep.
The Windows family of Operating Systems has always been excellent when it comes to power management, and the freshest Windows 10 isn’t an exception either, including extensive power related configuration options. However, for some reason, it doesn’t seem to have the well known and hugely useful Hibernate mode. Or is it so?
Turns out, Windows 10 does include the Hibernate mode, you just have to enable it. Can’t wait to find out, right? Jump over to the other side of the break to see how to enable hibernate mode in Windows 10.

How To Enable Hibernate Mode In Windows 10?
In Hibernate mode, Windows automatically saves all of your active applications, documents etc. as they are, and shuts down the computer. This means that when you power the system back on, you can immediately resume from where you left. That’s hugely convenient folks.
Before proceeding, it’s important to note that enabling Hibernate mode in Windows 10 requires administrator privileges. With that being said, the process itself is fairly complicated. Here goes a little step wise tutorial, to get things going:
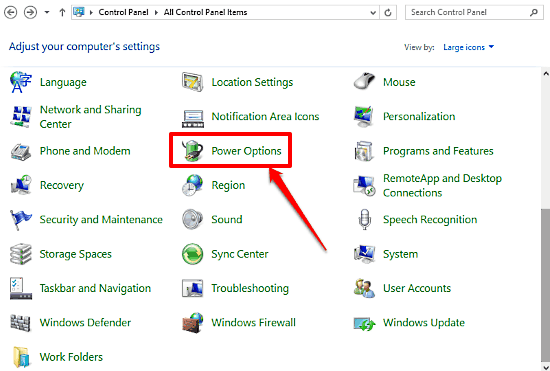
Step 1: Open up classic Windows Control Panel, and click on Power Options.

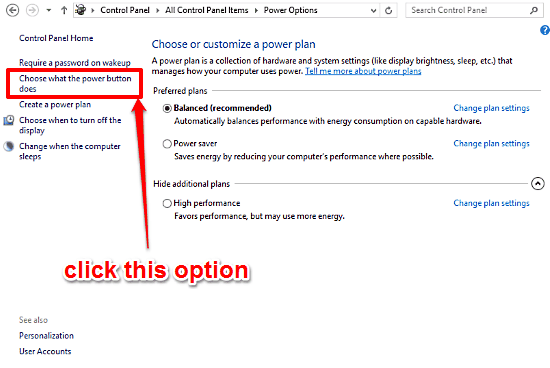
Step 2: You’ll be directed to the Power Options configuration screen, where you can tweak all sorts of options related to power management. On the top left section, click on the “Choose what the power button does” option.

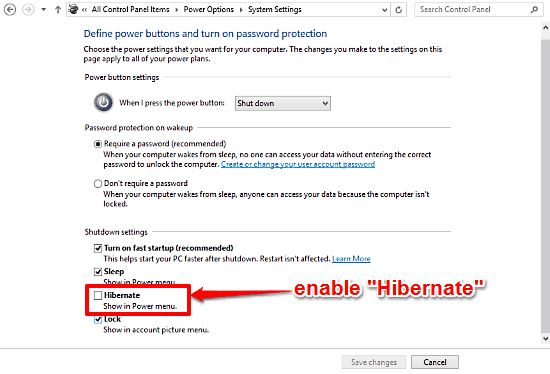
Step 3: This is where the action takes place, and the administrator privileges come into play. Click the Change settings that are currently unavailable option to switch to administrator mode (It goes without saying, you actually need to be the system administrator to be able to do it). Once that’s done, move down to the Shutdown settings section, and click the checkbox against Hibernate. Click Save Changes.

Voila! From now on, whenever you access the Power menu, you’ll see the Hibernate option. How cool is that?
Also See: Turn on automatic spell check and correct in Windows 10 and change mouse scroll rate in Windows 10.
Wrapping It Up
The Hibernate mode has always been extremely useful, and that’s still true. With this mode, you can quickly save all your active applications and documents to the disk and shut down the system, and easily pick up your work from where you left off, the next time you start your computer. And as you’ve seen above, enabling it is a walk in the park. Go ahead and try it out, and let me know what you think in the comments section.