This tutorial explains how to add turn 0ff display to Windows 10 Desktop context menu. Normally, it is not possible to turn off computer/laptop display by right-click context menu. However, using a simple Registry tweak and a free and popular command line tool, you can add turn off display option to the right-click context menu of Windows 10 desktop.
Usually, we press the power button or click on the Start button and then power icon in Windows 10 to access the Sleep option. However, those who wish to or want turn off display in the desktop context menu, this tutorial is handy. I have covered all the steps using which you can add this feature.
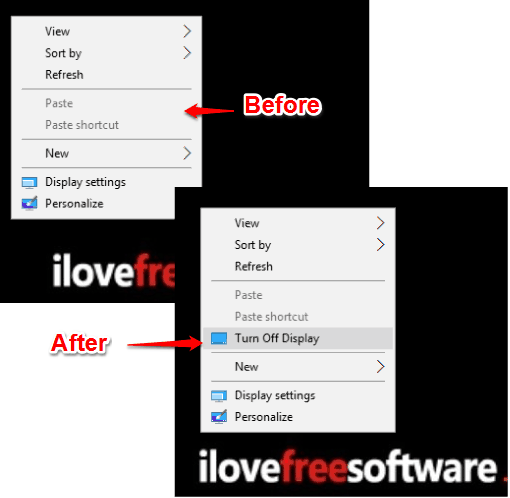
Above you can clearly see the difference before and after in the Windows 10 desktop context menu. First, there was no option to Turn Off Display, but later it is visible in that menu.
How To Add Turn Off Display To Windows 10 Desktop Context Menu?
Step 1: Open Registry Editor of Windows 10. After that, access “shell” key.
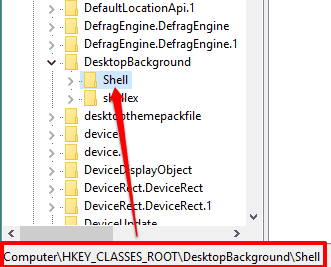
Step 2: Create “Turn Off Display” key under the shell key.
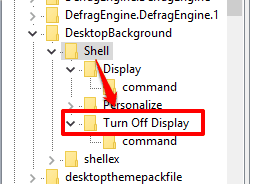
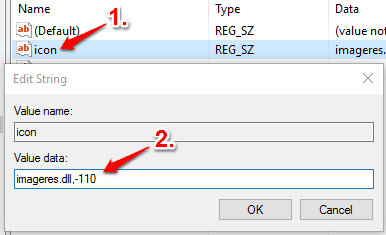
Step 3: Now add two String values under Turn Off Display key (right click on Turn Off Display key → New → String Value) and name them:
- icon: Under icon string value, set value data “imageres.dll,-100” and save the changes. This is used to show the display icon.
- position: This string value is used to set the position of Turn Off Display option in the context menu. You can set its value data as top/bottom/middle.
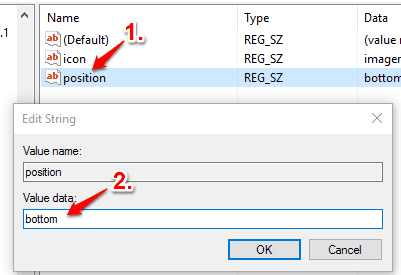
Do not close the Registry Editor. By following these steps, you will be able to add “Turn Off Display option” in Windows 10 Desktop context menu. However, you can’t use this option yet because you need a command that can process your display turn off request. For this, we need to use NirCmd command line tool. This is a very popular and powerful tool which comes with dozens of parameters. Among those parameters, there is one parameter that helps to turn off display. Let’s move forward to use this tool.
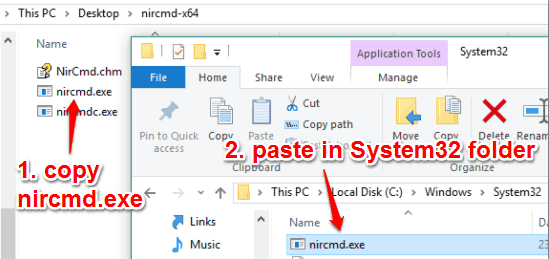
Step 4: Now grab the zip archive of NirCmd tool, extract it, and you will find nircmd.exe. Copy this EXE and paste it in Windows 32 folder.
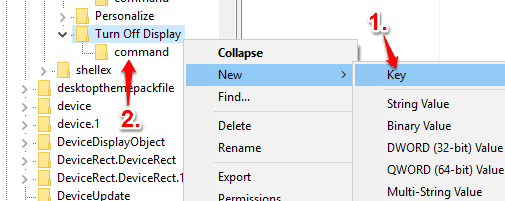
Step 5: Now go back to the Turn Off Display key available in Windows 10 Registry and create a new “command” key.
Step 6: After creating command key, add a String value, and keep its name Default. Now you have to add a command/parameter under the Value data field of this String value. The command is: “nircmd.exe cmdwait 1000 monitor async_off“.
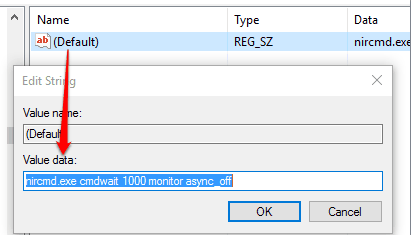
Save the changes.
Step 7: Now go to the desktop, right-click, and you will find “Turn Off Display” option. Press that option and it will immediately turn off the display using NirCmd tool.
When you don’t want to use this feature, you can simply remove Turn Off Display key from Windows 10 Registry.
You can also learn how to hibernate Windows 10 using command prompt and enable hibernate mode In Windows 10.
The Verdict:
This is quite an interesting as well as a useful feature. Turning off display using Windows 10 desktop context menu will take only two mouse clicks. Just make sure you carefully follow the above mentioned steps. After that, you will be able to turn off your Windows 10 PC or laptop display using the context menu.