Pawxel is a free, light-weight screenshot tool tailored for Designers and Developers that is available for Windows as well as Linux operating system. Pawxel is open-source and the link for downloading it as well as the source GitHub repository has been provided at the end of this article.
Pawxel can be used as a system tray application or as a replacement for the popular Snipping tool. Let’s briefly go through its list of features.
Features:
- Special tools for Designers: Two special tools have been made available for designers. A color detection tool that helps you to find the color of a pixel instantly and a Pixel distance measurement tool that helps you to gauge the distance between elements in a screenshot
- Blur tool: You can use this tool to redact some parts of the screenshot by blurring when you do not want to reveal the content in that area.
- Infinite zoom: Zoom in and out as much as you require down to those last pixels that you want to observe.
- Dedicated folder: You can select a folder in your disk where Pawxel automatically saves all the screenshots.
- Emojis: Use this tool to directly add emojis to your screenshots when required.
- GPU-powered editing: If you have a graphics card that supports Open GL 2.1 and above, you can make use of the GPU powered editing feature of Pawxel and give the screenshot tool a great performance boost.
- Handy editing tools: Pawxel also offers some convenient editing tools such as Markers, Shapes (text, rectangle, circle etc) so that you need not use any other image editing tool for your basic needs.
How it Works:
1. Download Pawxel as a ZIP or TAR package using the link that we have provided at the end of this article. Unzip the contents and launch the application (Pawxel.exe). It does not require any installation as it is a portable application.
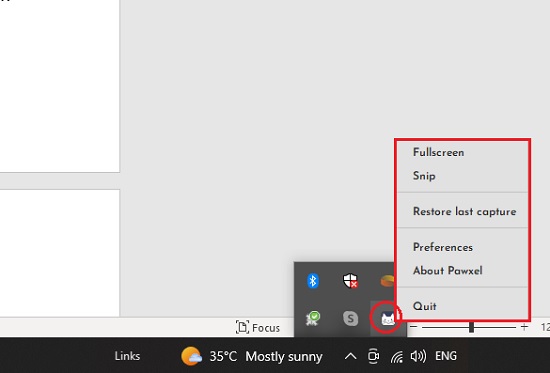
2. Notice that once the application is launched, its icon appears in the system tray. You can right click on the icon and click on ‘Preferences’ to configure the certain settings such as the folder where you wish to save the screenshots, file save format (PNG / JPG) shortcut keys for snipping and full screen capture, enable GPU editing and more.

3. To capture an area of the screen, press the key combination Ctrl + Spacebar. The cursor changes to cross (+) and you can now use click and drag to snip the chosen area. As soon as you release the mouse button after snipping, the screenshot thumbnail appears on the screen. To capture the entire screen, use Ctrl + F11. Both these shortcut key combinations can be changed through the Preferences as mentioned above.
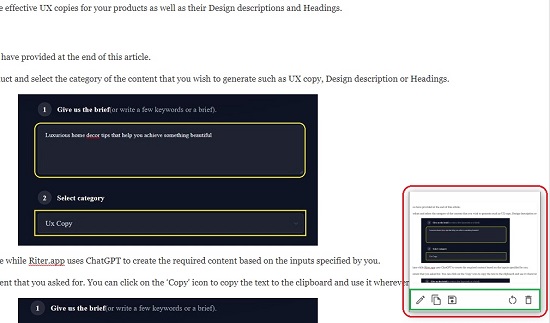
4. You can click on any of the corresponding icons in the toolbar to Edit, Copy the screenshot to the clipboard, Delete the screenshot and more.
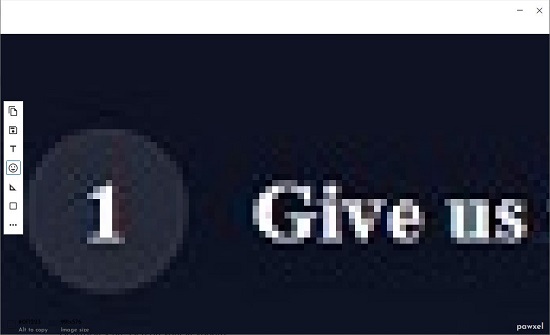
5. Clicking on the ‘Edit’ icon displays the screenshot in its actual size. If you wish to quickly find the color of any pixel, simply hover your mouse on the required area and the color and its Hex code will be displayed at the bottom left of the screen.
![]()
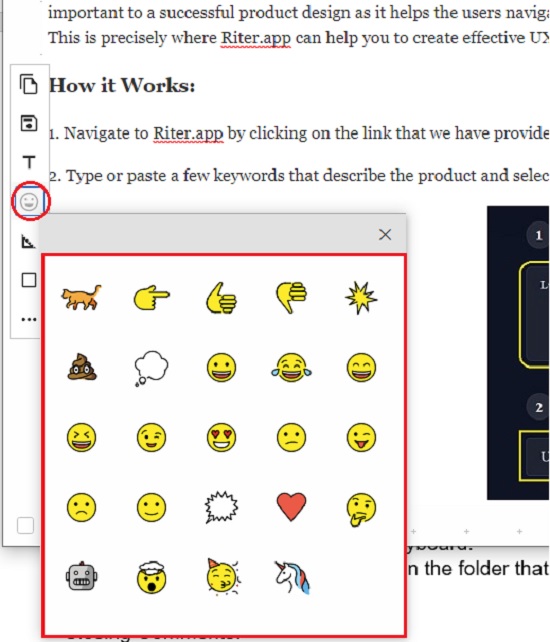
6. To add any Text, Rectangle or Emojis to the screenshot, click on the corresponding icon in the vertical toolbar that is displayed towards the left of the screen. Likewise, to insert a Circle or Highlight (marker) in the screenshot, click on the 3-dots icon in the toolbar and choose the appropriate option. The circle or marker will by inserted at the top left of the image. You can drag and drop it at any location that you desire.
7. You can click on the ‘Measure Distance’ tool to gauge the distance between any two elements but I observed that this feature does not work as desired.
8. For Infinite Zoom in / out, use your mouse scroll wheel while keeping the Control key pressed on your keyboard.
9. Finally, to save the screenshot in the folder that you specified, click on the ‘Save’ icon in the toolbar.
Closing Comments:
Pawxel is a good screenshot capture tool with a couple of handy features that are beneficial for developers and designers. On testing it, I observed that it works well except for the distance measurement tool. The features are good but not quite intuitive. This may be due to the reason that it is still a product under development with more and better features yet to be launched. Give it a try and let us know what you feel.
Click here to download Pawxel for Windows or Linux. To access the source code of Pawxel, click here.