PC Manager is a powerful tool that has been launched by Microsoft to help accelerate the performance of Windows 10 and 11 PCs and disabling those applications that affect the health of your system. PC Manager is currently in the Beta Phase, but you may check it out early to see if does the job perfectly for you. It was initially launched for the PC Market in China although the installer and application both automatically default to the English language.
PC Manager offers a consolidated location for running numerous tools that may already be existing in the various settings menus of your Windows operating system as well as its management programs.
Features:
Boosts and Accelerates your system: PC Manager helps clean up the system fragments and frees up vital resources that are unnecessarily occupied. This results in a considerable improvement in the speed of your operating system.
Space Management: PC Manger clears unused temporary files, carries out a deep analysis and scrub of your system storage space and effectively manages large files. This greatly frees up your storage space resulting into efficient storage management.
Abnormality Detection: You can detect any anomalies and abnormalities in your system before it is too late for any remedy. Additionally, it performs garbage cleaning, detection of viruses and provides a one-click solution to mitigate any system risks.
Professional removal of Viruses: PC Manager has built-in support for Windows Defender which is a component of Windows 10 that delivers full-fledged security protection for systems and default capability to remove malware, viruses and more.
Working:
1. Download PC Manager using the link that we have provided at the end of this article.
2. Next, run the setup file (MSPCManagerSetup.exe) and follow the on-screen instructions to install Microsoft PC Manager. Since it’s a lightweight installer (5.7MB), the installation should not take much time.
3. Once the installation is completed you can run / open the application using Start menu, Desktop shortcut or via the System tray at the bottom right.
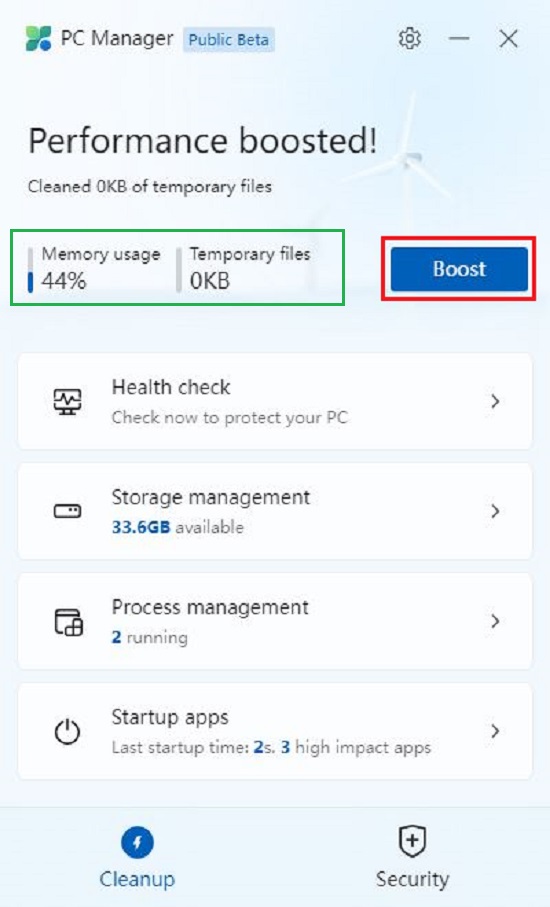
4. To boost your PC’s performance, simply click on the ‘Boost’ button. This will eliminate all the temporary files as well as instantly frees up memory. I observed that when I tested this feature, it brought down the memory usage from 55% to 39% and deleted all the junk files from the system. So, whenever the response of your system appears slow, you can click on ‘Boost’ to speed it up.
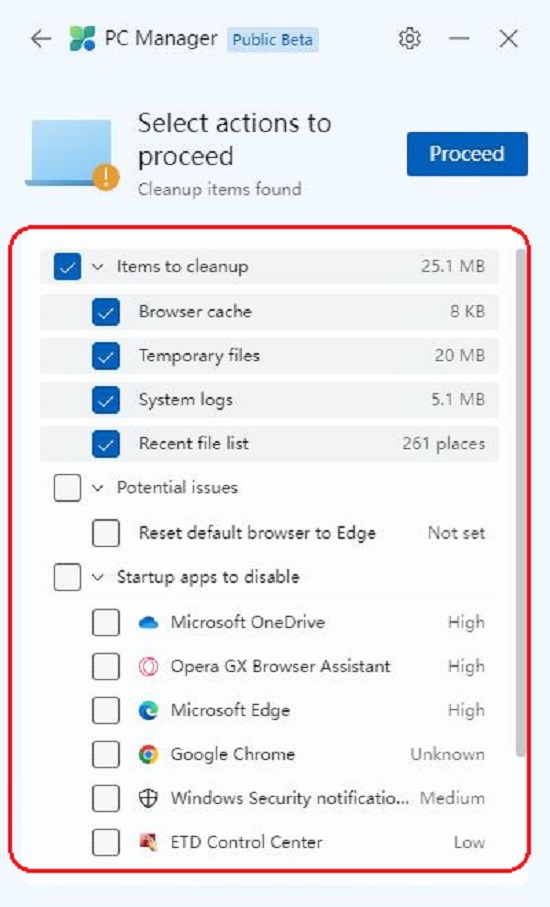
5. Click on ‘Health Check’ to identify the potential issues that may exist on your PC. This feature looks for all types of junk files including system logs, recent file lists and the Windows cache and cleans up the selected items. In addition to the above, it also advises you about the programs that can be disabled during system startup to improve the boot time of the PC. You can click on the respective checkboxes to select the programs that you wish to disable.
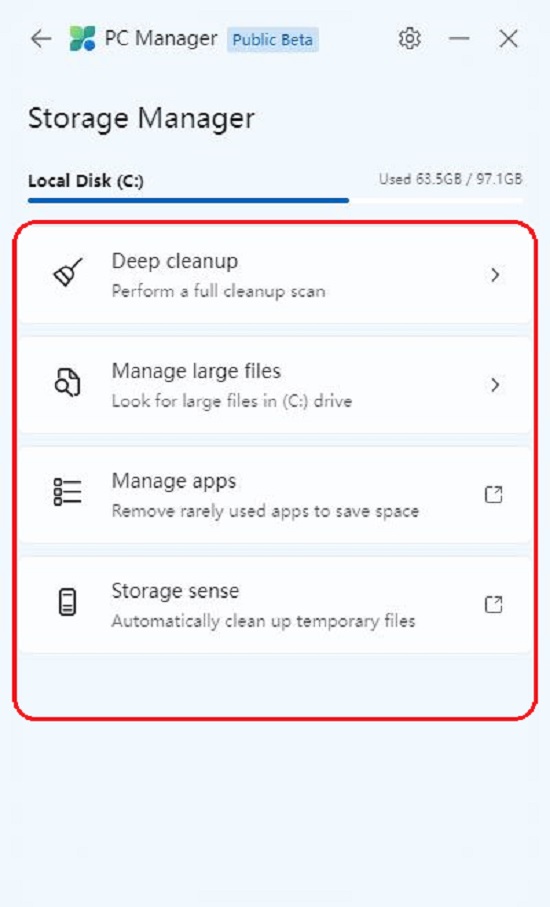
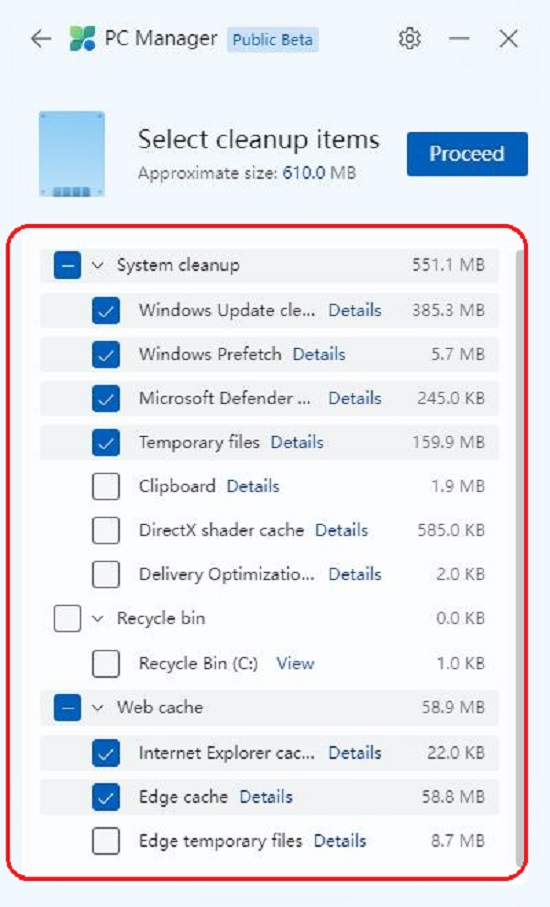
6. To perform a deep clean-up of your computer, click on ‘Storage Management’ and then choose ‘Deep cleanup’. The feature searches every disposable file, upgrade files of previous OS installations and more and allows you to remove them to create free space. You can locate the large files in your C: drive using File Explorer by clicking on ‘Manage large files’ and deciding what action needs to be taken. Also, you can easily access ‘Apps and Features’ settings or the ‘Storage Sense’ feature of Windows 10 / 11 using the relevant links in Storage Manager.
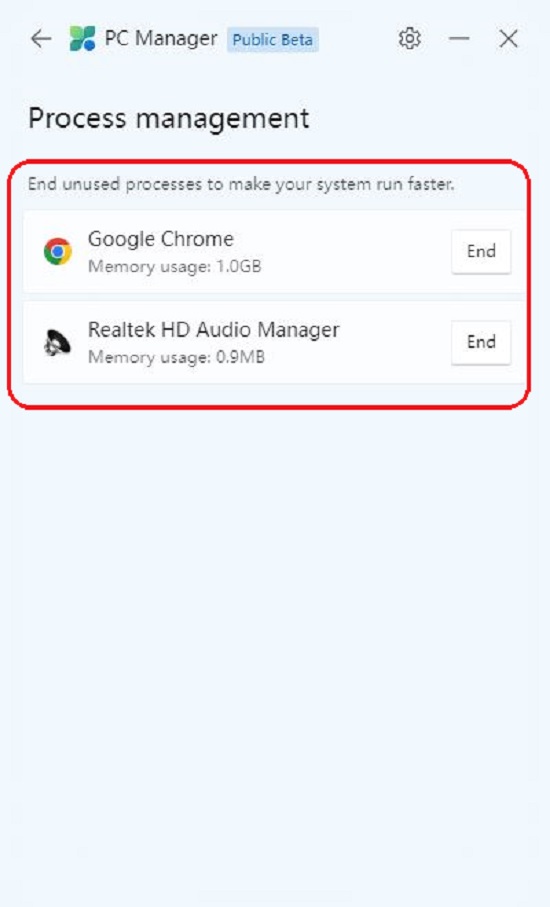
7. To locate the Apps and Processes that are eating up your memory resources (RAM), click on ‘Process Management’. You can End any of the Apps that are listed to make our system run faster by freeing up RAM.
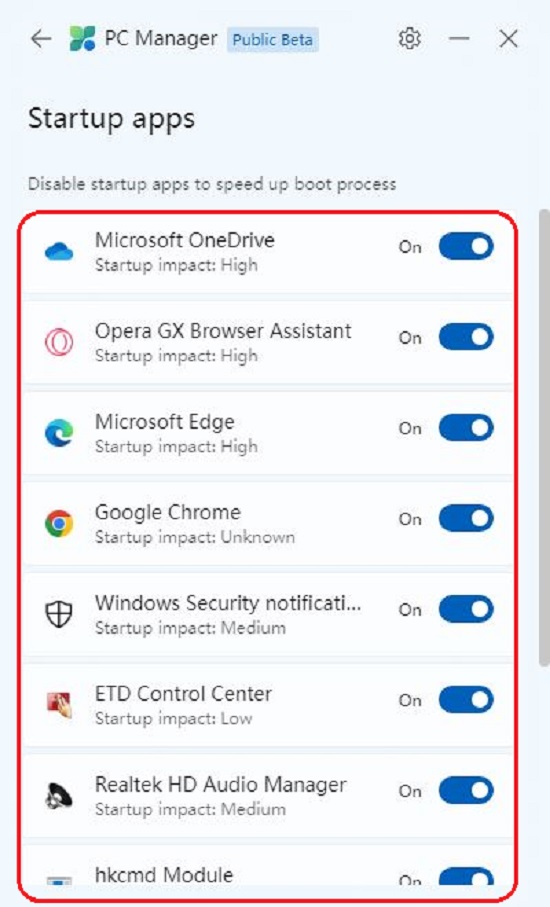
8. Startup applications are one of the biggest culprits when it comes to slowing down your PC at boot time. Click on ‘Startup apps’ in PC Manager to easily enable or disable any of them. You can try to disable the ones that are unnecessarily being loaded at boot time to improve the speed of your system.
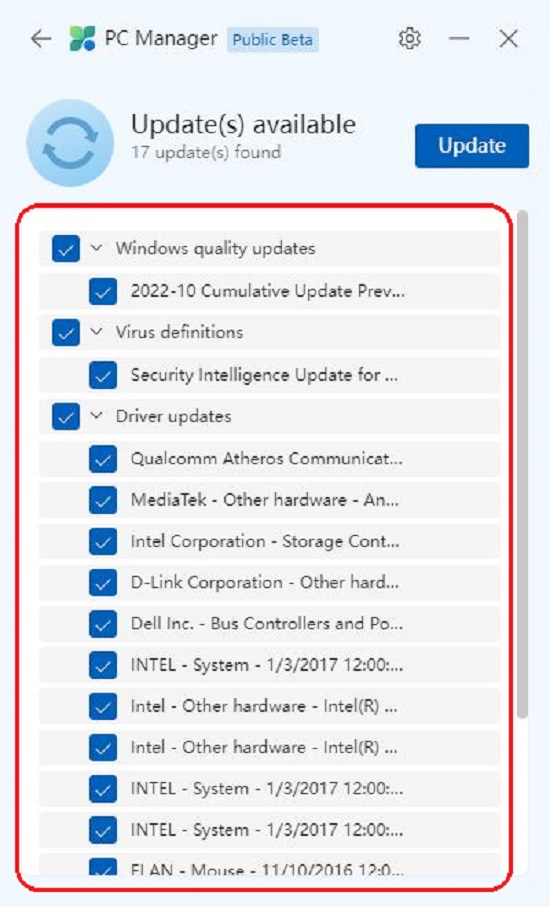
9. To scan your PC for malware, viruses and other threat, click on the ‘Security’ tab at the bottom left and then click on the ‘Scan’ button. Additionally you can obtain the latest features, driver updates and more by clicking on ‘Windows update’ and selecting those that you want to install on your computer.
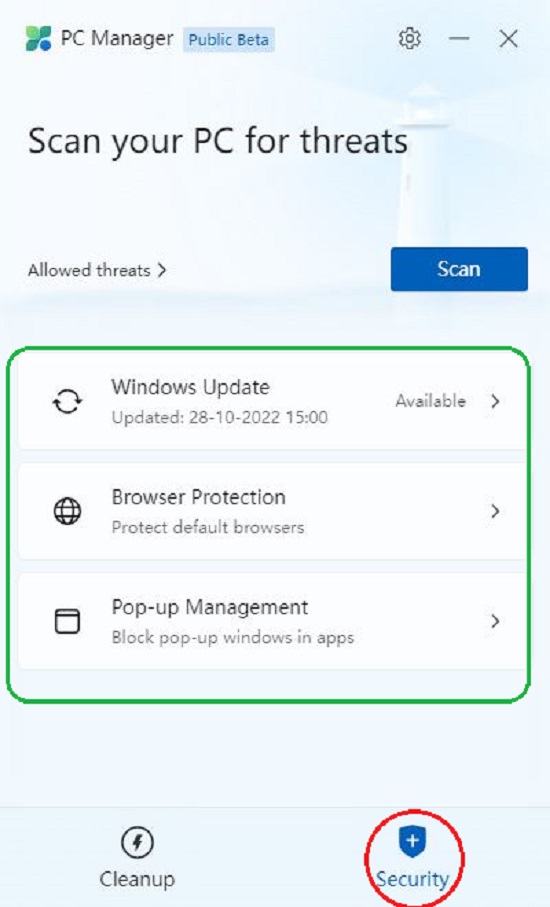
10. To block pop-up prompts from appearing in Apps, click on ‘Pop-up management’ and use the toggle switch to enable the block. This feature is very essential to prevent adware from causing a chaos on your PC.
11. You can block malicious apps from changing the default browser by clicking on ‘Browser protection, setting the default browser and using the toggle switch to activate the feature.
Closing Comments:
Since Microsoft PC Manager has been launched only as a Public Beta it can be very difficult to come to any conclusive verdict about it since it may undergo a lot of changes before a stable version is released. But I can very well say that PC Manager streamlines and brings under one roof, all the numerous Windows 10 / 11 settings, options, toggles and more, and that itself is a big boon for the ordinary users. You can improve your system performance, clean and free up disk space, free up RAM, disable needless startup apps, kill aggressive applications and more using this tool. It is definitely a very important and potential maintenance app for the average user of a computer system.
In comparison with CC Cleaner, I think PC Manager is quite better as it has no junkware and utilizes very less RAM with minimal CPU usage.
Go ahead and try it out this worth application. Click here to download PC Manager.