Notesnook is a free, powerful and open- source Note Taking app focused on privacy of data and ease of use. It enables you to write notes with freedom and encrypts the data using end-to-end encryption algorithms such XChaCha20-Poly1305 & Argon2. Notesnook supports automatic syncing due to which you can access the Notes from anywhere, anytime whether its your smartphone, desktop system or browser.
The application is compatible with Windows, macOS and Linux systems. It is also available for Android and iOS devices. Alternatively, you can also use it as a web application.
Features:
Share Notes: Notesnook enables you to securely share Notes and Monographs with anyone on the Internet using a private shareable URL even if they do not use Notesnook. You an encrypt the monograph with a password before sharing to prevent the information from falling into wrong hands. You can also use the self-destruct feature that deletes the monograph once it has been accessed so that it is viewable only-once.
Edit Notes: You can edit the notes the way you desire and use tables, embeds, tasks and more using the built-in rich text editor.
Reminders: You can keep track of your tasks and activities in Notesnook by setting set reminders so that you do not forget the important things especially those works that are time-bound.
Web Clipper: Notesnook provides a free web clipper for Chromium based browsers and Firefox to extract text and image content from a web page and store it for further reference. You can use it to capture a snapshot of the entire web page or only the specific parts that you would like to save. Once you save your web clips, you can tag them so that they are easily organized.
How it Works:
1. Click on this link to download Notesnook for Desktop systems or Mobile Devices. To navigate to the Notesnook web app, click here and sign up for a free account using your email address
2. Once you have signed up successfully, you will automatically be navigated to the Notesnook Dashboard.
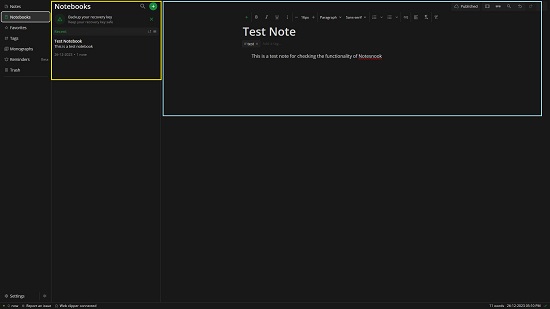
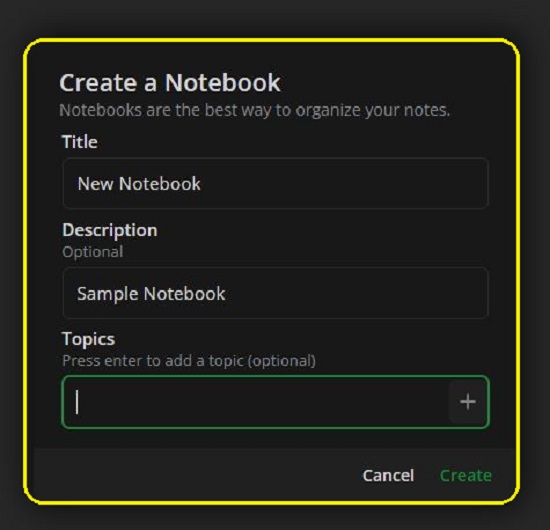
3. At the outset, you must create your first Notebook by clicking on the large green-colored ‘+’ sign, assigning a Name, Description and adding Topics to it. Notebooks are a great way of organizing your Notes.
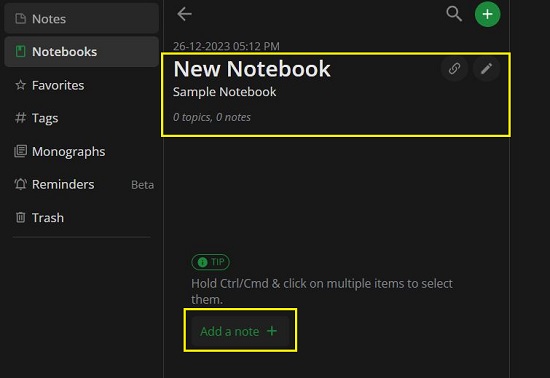
4. Once the Notebook has been created, click on it to open, and then click on the ‘Add Note’ button to start adding Notes using the Notes editor that is displayed towards the right of the screen.
5. Just specify the Note Title and start typing the content of your Note. You can use the toolbar at the top of the editor to change the choose a font, select the font type / style / size, create a numbered / bullet list, add a link and more.
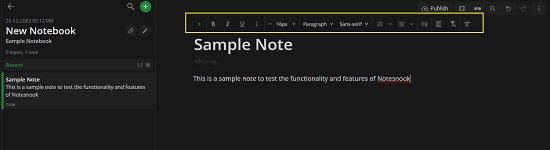
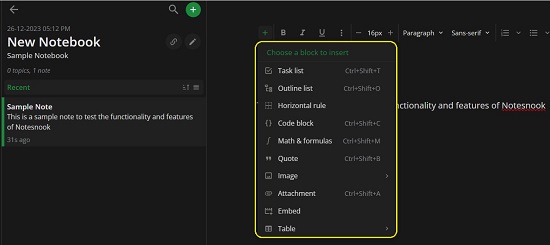
6. To choose a block to insert in the note, click on the ‘+’ sign towards the left of the toolbar and select the respective block such as task list, outline list, code block, image, attachment embed, table and more.
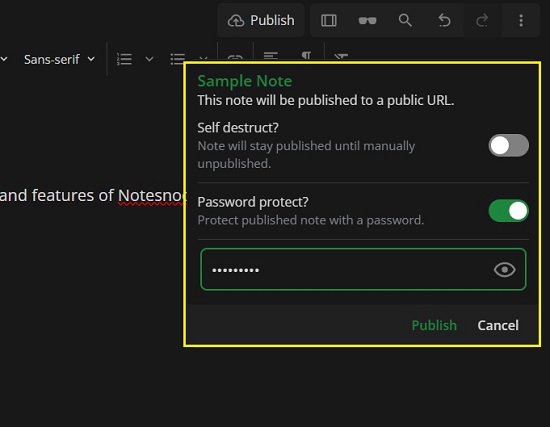
7. Once you have finished creating the note, you can publish it to a Public URL. For this, click on the ‘Publish’ button in the toolbar at the top right and then click on ‘Publish’. Additionally, you can use the corresponding toggle buttons to enable the self-destruct feature or to password protect the published note.
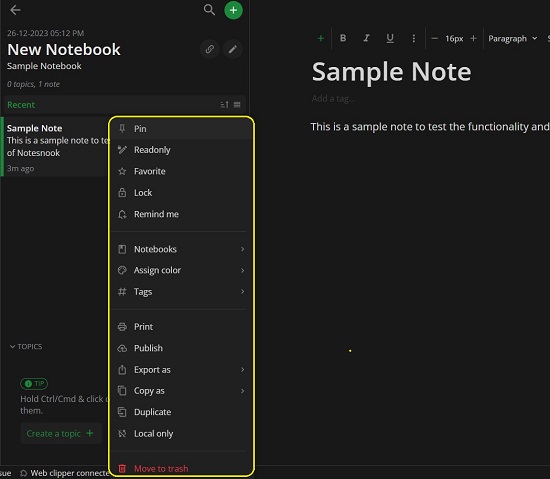
8. All the notes that you have created under a particular Notebook will be visible in the left-side panel. You can right-click the Note and click on ‘Reminder’ to add a reminder for it. Additionally, you can lock the note, make it read-only, assign tags and more using the options in the context sensitive menu.
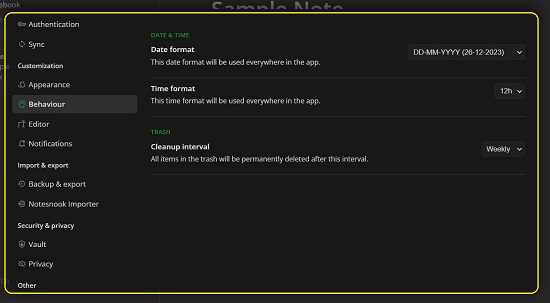
9. You can click on the ‘Settings’ button at the bottom left of the dashboard to configure the Application Themes, Date / Time format, Default Formats for the Editor, Sync options and more.
10. Click on this link to install the free Notenook Web Clipper for Chrome / Firefox.
11. Once the web clipper has been installed, navigate to the desired web page, launch the extension, click on ‘Select a note to append to’ and choose the Notebook to which you wish to add the clipped content.
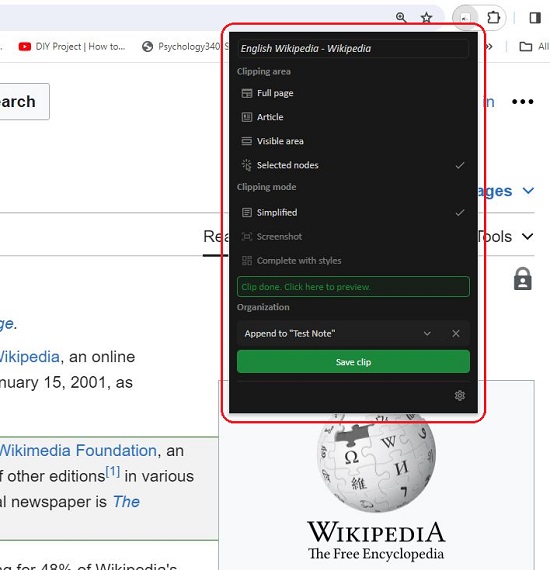
12. Next, select the type Clipping Area from the available options such as Full page, Article, Visible area, Selected nodes and more and click on ‘Save Clip’ at the bottom of the Extensions popup.
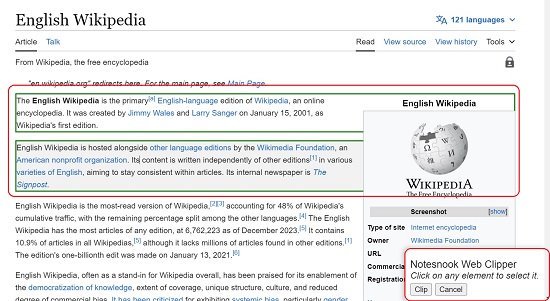
13. Now, select the clips on the web page that you wish to capture and finally, click on the ‘Clip’ button in the ‘Notesnook Web Clipper’ popup windows at the bottom right of the screen.
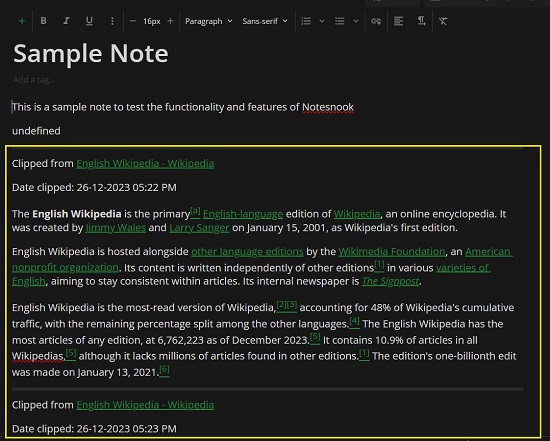
14. Navigate to the chosen Notebook and you will find all your saved web clips.
Closing Comments:
Overall, Notesnook is a great and easy-to-use Note Taking app that allow you to take down notes easily and quickly. The application also provides a free browser extension that you can use to clip content from any webpage and save it in your note. You can publish your notes to a URL and easily share it with others using a password if required.
Notesnook uses end-to end encryption algorithms ensuring the privacy and security of your data. It supports automatic syncing due to which you can access the Notes from anywhere using a desktop computer, mobile device as well as through a web browser. Go ahead and try out the product and do write to us about what you think. Click here to download Notesnook. To access its source code on GitHub, click here.