Webp2jpg-online is a free, open-source online tool that enables Batch Image Conversion and a variety of other important functions such as size modification, watermark embedding, image trimming and more.
The application is a pure front-end implementation and runs locally in your browser. Due to this, it does not require an Internet connection as no data is uploaded to any server. Hence you can be rest assured of the safety and security of your data especially while converting confidential or sensitive images.
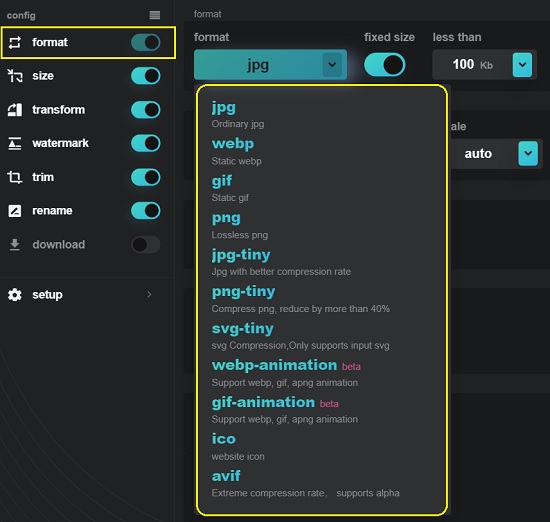
The following are the image formats that are supported by Webp2jpg-online:
Input:
- JPG
- PNG
- WEBP
- GIF
- PSD / PSB
- HEIC / HEIF
- AVIF
- SVG
- ICO
- BMP
- HDR
- TIFF
- TGA
- XCF
- MIF
- DCM
- XPM
- PCX
- FITS
- PPM
- PGM
- PFM
- MNG
- DDS
- OTB
Output:
- JPG
- PNG
- WEBP
- GIF
- JPG-TINY
- PNG-TINY
- SVG-TINY
- WEBP-Animation
- GIF-Animation
- ICO
- AVIF
Working:
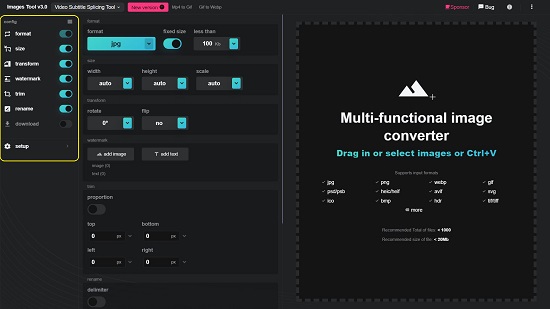
1. Click on this link to navigate to Webp2jpg-online. You are not required to register or sign up for any account to this product.
2. You can observe all the Functions provided by the tool on the sidebar towards the left of the page. You can enable / disable any Function using the corresponding toggle button adjacent to it.
3. Click on the ‘Format’ option in the sidebar on the left and choose the output image format. You can use the adjacent slider to adjust the image quality. Alternatively, you can enable the ‘fixed size’ toggle button and choose the size of the output file if required.
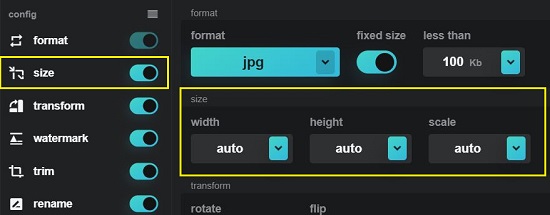
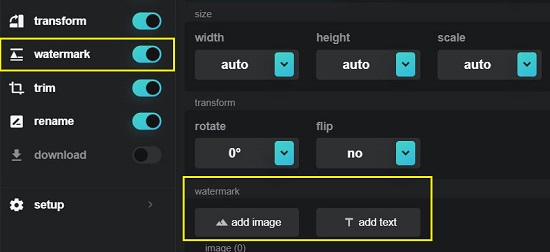
4. Next, enable the ‘Size’ toggle button to modify the width, height, and scale of the output file. By default, these values are set to ‘Auto’.
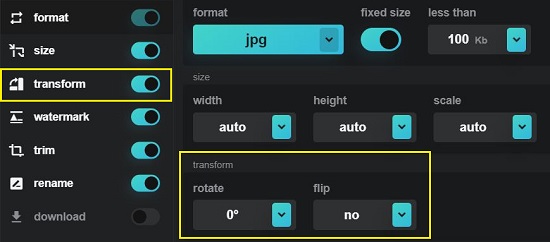
5. If you desire to Rotate or Flip the image during the process of batch conversion, enable the ‘transform’ toggle button and use the corresponding drop-down menus to specify the angle and flip options.
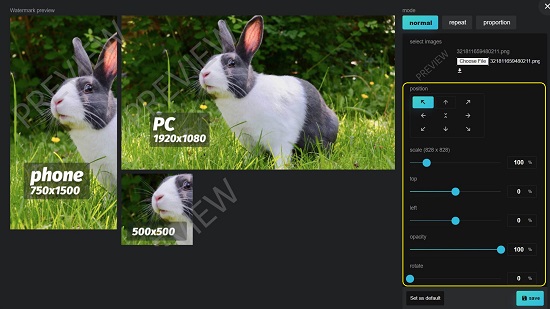
6. If you wish to add a Watermark to the output images, you must enable the corresponding toggle button. Now, click on the button ‘add image’, click on ‘Choose file’ and upload the image from your system that you want to use as a watermark. You can adjust the position of the watermark using the associated grid. Additionally, you can modify the watermarked image’s scale, opacity, rotation angle and more using the respective sliders.
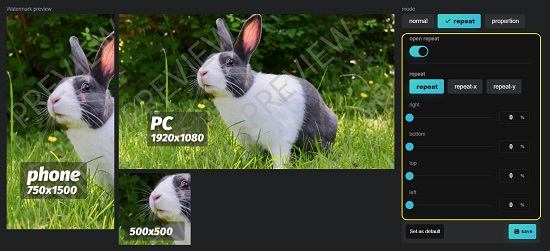
7. If you wish to repeat the watermark image multiple times, click on the ‘Repeat’ tab and enable the ‘open repeat’ toggle switch. You can then choose if you wish to repeat the watermark across the entire image or only horizontally / vertically in which case you can use the respective sliders to adjust the position.
8. To adjust the ratio (proportion) of the watermark with respect to the image, click on the ‘Proportion’ tab and make it configure the respective settings.

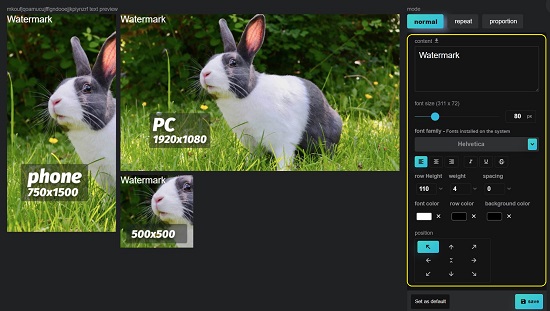
9. Instead of adding an image, you can also add plain text as a watermark by clicking on the ‘add text’ button in step 7 above. In this case, apart from the watermark options that we have discussed above, you can also specify the font family, size, alignment, color and more of the watermark text as required.
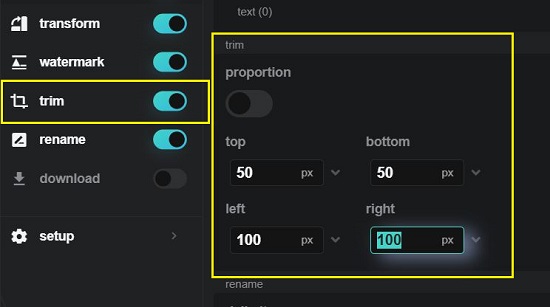
10. If you wish to trim the output image, enable the ‘trim’ toggle button on the sidebar and specify the amount of the image that you wish to trim at the top / bottom / left / right in pixels. You can also enable the ‘proportion’ toggle button if you want to specify the values in percentage.
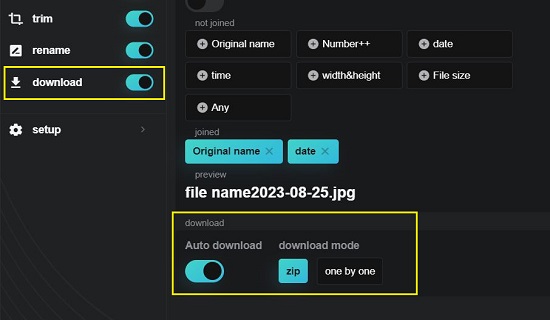
11. To choose how to rename the output image files, enable the ‘rename’ toggle button. You can now click on the respective options such as Original name, Number, Date, Time etc. in a chosen sequence to construct the output image file name that you can preview and decide the best approach.

12. Once you are through with the above configuration and settings, you must drag and drop all your images on to the dotted box towards the right of the page. The maximum recommended number of files is less than 1000.
13. Once the input image files have been uploaded, you will be able to see their thumbnails on the screen along with other details such as file name, format, size etc. You can click on any of the uploaded files to view them in a larger size.

14. Finally, you can click on the ‘download zip’ button at the top to download all the output images in a Zip archive. Alternatively, you can download the individual converted images one-by-one by clicking on the ‘download one by one’ button.
15. In case you wish to automatically download the output image files to your system, enable the ‘download’ toggle button, and then enable ‘Auto download’. You can choose if you wish to download all the output files together in a compressed Zip archive or one by one (individually) by clicking any of the corresponding buttons.
Closing Comments:
Overall Webp2jpg-online is a great tool that allows batch conversion of images along with a variety of handy functions that you can use whenever required such as watermarking, trimming, modifying size and more. As the tool entirely runs in your browser and no data is uploaded to any server, you can be confident about the privacy and security of your data.
Go ahead and use the product and do write to us about what you feel. Click here to navigate to Webp2jpg-online. To access the source code of the tool, click here.