FreeScout is an open source and self-hosted alternative Zendesk an HelpScout. Basically it is a self-hosted shared mailbox and help desk. You can use it as a customer support portal to manage all the customer queries. An admin user can create mailboxes and assign them two different members of the team. A single mailbox can be assigned to multiple users, and they can process all the incoming email as opened, closed or as pending tickets. It even has an official Android app that allows you to access the platform right from your mobile phone.
Startups or small businesses that can’t afford Zendesk like services can rely on this open source alternative. It is cheaper than others and you can use it in a local environment as well or host on your own server. It has all the features that you need to manage user email queries and other stuff. You can assign emails to respond to different users and others can also assign emails to you to deal with. It has a very nice real time notification system that keeps your updated of new events.
Installing FreeScout on a VPS:
The best way to install FreeScout is via Docker. If you are using DigitalOcean like VPS then docker comes installed in the droplets already. There’s just a single command that we have to use in order to fetch it from docker registry and install it on your server.
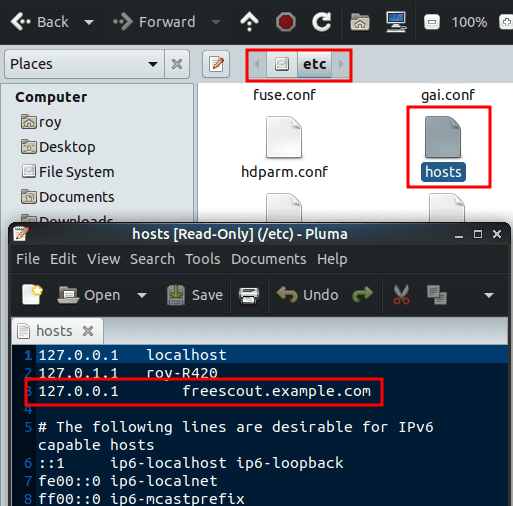
If you have a domain where you want to install your help desk then it is good. Otherwise, for local installation, you have to define “freescout.example.com” as a resolver to localhost or 127.0.0.1 in the hosts file. In Windows, you can do that by editing “C:/Windows/System32/Drivers/etc/hosts”. Or on Linux, you can do that in the “/etc/hosts” file.
To get started, if first have to fetch it from GitHub. After cloning it, you “cd” into the “examples” directory and then run the “docker-compose” command. To sum up this step, you run the following commands one after another.
git clone https://github.com/tiredofit/docker-freescout

cd docker-freescout/examples

sudo docker-compose up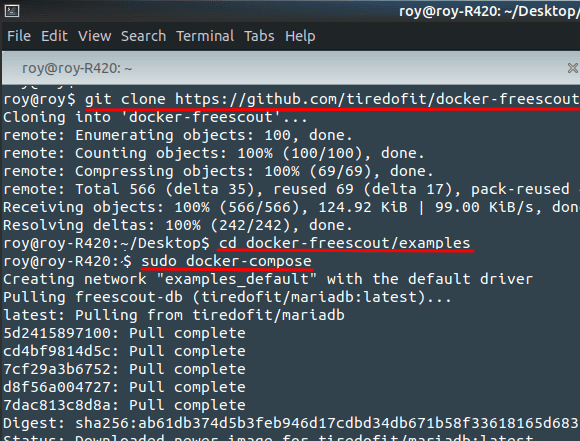
Now at this point, FreeScout is installed and it is already to use.
Using FreeScout to Manage Emails and Setup Shared Mailboxes:
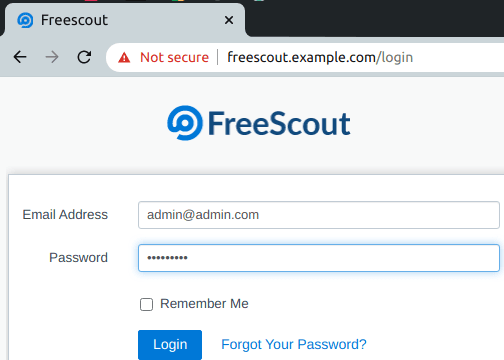
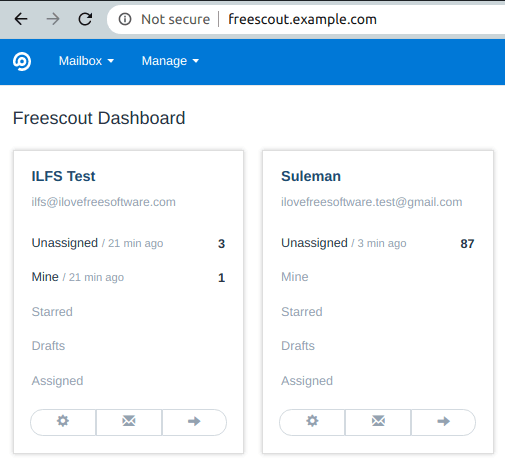
After installing, you go to the domain that you provided in the “docker-compose.yml”. And if you are using the default template on local server then you can access FreeScout at “freescout.example.com”. Just type this in the address bar of the browser and then login into the admin portal. Default admin credentials are “[email protected]” and password “freescout”.
Now, after login into the portal, the first thing you have to do is set up system mail settings. The system mails such as sending login links to new users will be handled by this. You can set up an SMTP server here for sending emails. Additionally, you can also configure some general settings relates to timezone and profile pictures.
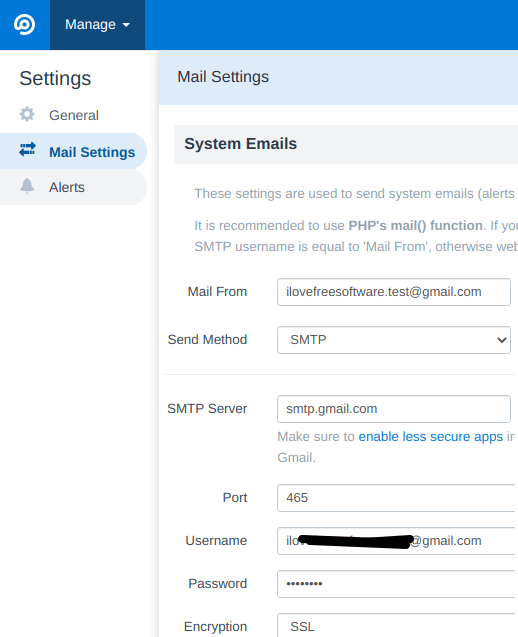
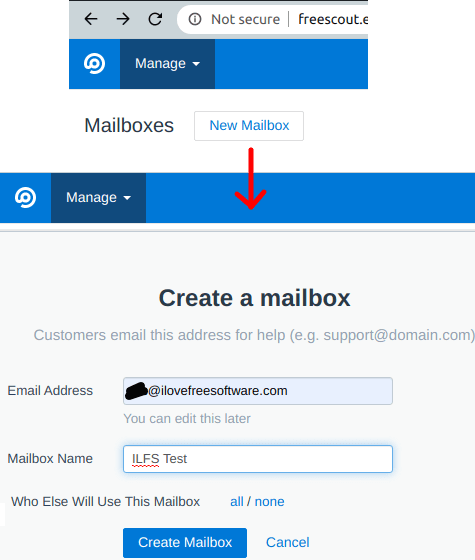
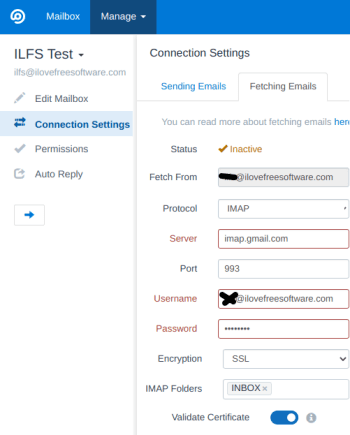
You can now start adding mailboxes. Just create a mailbox by specifying an email and then proceed with configuring the receiving and sending options. Here you can add SMTP server that will be used to send email notifications to the users. You can use the SMTP server that you have or you can use Gmail address as well. In my case, I am using Gmail and if you know how to set up Gmail over SMTP then you can easily handle this step.
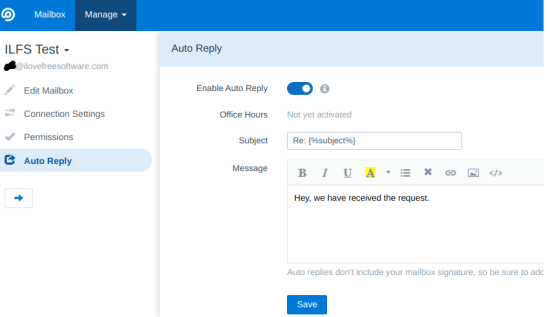
Along with sending and fetching settings, you can opt for auto replies for each mailbox. For that, you can just go to the “Auto Reply” section and then simply specify a message. It gives you a rich text editor where you can save a auto message.
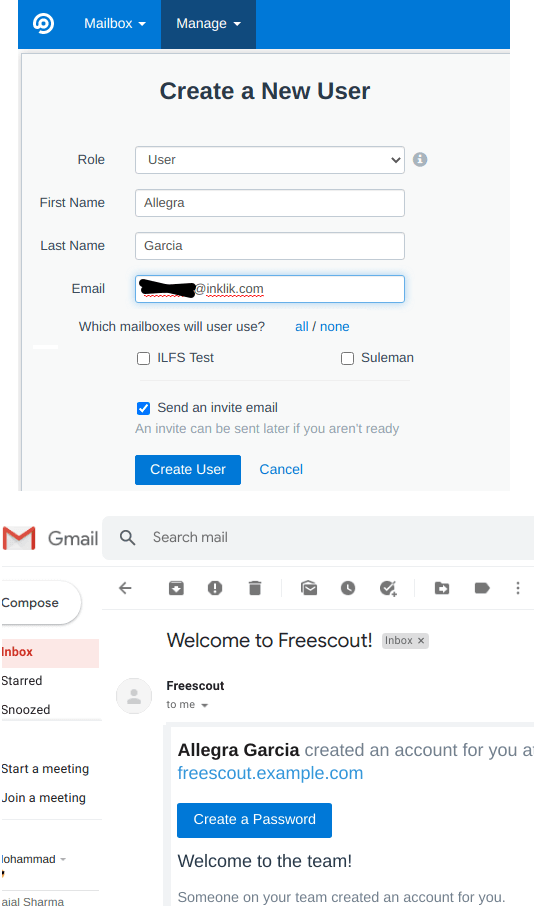
Now, it is time to add anew user. For that, you go to the admin user settings and simply add a new user. This is simple and you just have to specify an email address. Next, you specify a mailbox to the user and then just get on with it. An email will be sent to the user to set the password. And the user can use that password to login and start working on the emails. You can also assign multiple mailboxes to a user as well.
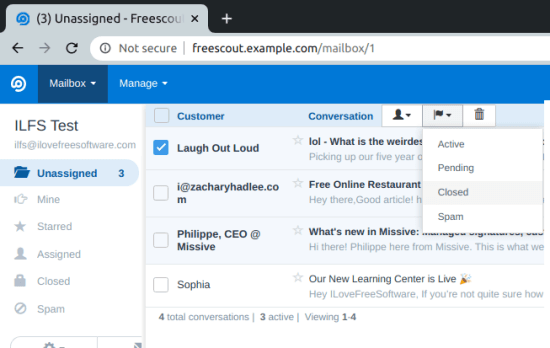
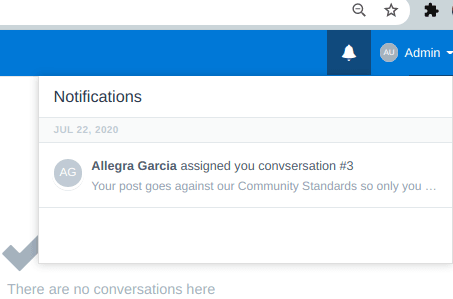
Users can now log in to the help desk with the credentials and then start managing the tickets. All the unassigned emails are there and as a user you can just mark them as open, closed, or pending. Also, if you are not sure how to deal with certain tickets then you can just assign that to someone else.
In this way, you can use this simple and powerful self-hosted help desk. You just host it in a local environment or you can just set it up on a VPS that you own. The installation process is easy and it works pretty fast. The notification system will keep you in check of the new assignments. As an admin user, you will be able to manage mailboxes and users and you can also manage the help desk too.
Closing thoughts:
If you need a help desk that you can self-host then FreeScout is one of the best you can use. It has almost all the features that you can expect from a Zendesk alternative. You just host it somewhere and then start using it. I really liked its interface and the features that it offers. The push notifications are nice and you can have unlimited mailboxes here and assign them to any user you want. So, if you are looking for a free Zendesk ot HelpScout alternative then you are at the right place.