Mailmaker is a free AI-powered email marketing solution that empowers business establishments to create, design and send awesome newsletters and campaigns without any design skills or coding requirements. It boasts of an AI Assistant that helps you to craft, enhance and schedule your emails so that you need not spend much time in creating that perfect email ever again. Also, Mailmaker is loaded with a plethora of components such as headers, footers, images, text blocks and more that enable users to generate professional and visually appealing emails with just a few clicks. Once the newsletter or campaign is ready you can choose to showcase it on your own public newsletter profile or send it across to selected users.
As you use Mailmaker, it provides you with detailed analysis about your campaigns as well as the behavior of your target audience so that you can keep on improving and boosting your productivity. You can easily find out which emails are working, and which ones aren’t.
Features:
AI Assistant: Make use of the revolutionary inbuilt AI Assistant that allows you to quickly and easily access any information that you require without navigating away from the page. You can simply chat with the AI and get the responses that you need in just a few seconds. The AI Assistant analyses your past email campaigns and audience engagement to provide highly personalized suggestions and recommendation for future emails. You can use this feature to help optimize your content, subject lines as well as send times so that you receive maximum engagement and conversion.
Compose: This great feature enables you to create any type of content within seconds. With one click, you can easily change the length, style and tone of the content such as happy, excited, anxious and more.
Fix Grammar: No more embarrassing mistakes in your content. You can quickly fix any grammar errors in your writing with just one click. The advanced grammar checker will go through the content and offer recommendations for improvement so that the message in the campaign or newsletter is effective and clear.
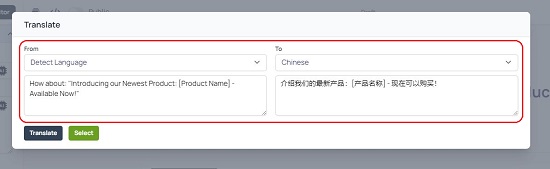
Translate: Get your newsletter or campaign translated to any language without the use of any Internet tools. The AI algorithms of Mailmaker ensure that the content is accurately translated so that you can widen your reach to a global audience.
AI Painter: This is a handy and powerful tool that helps you in quickly generating stunning images that you can add to your emails. You may want to showcase a product or generate a custom graphic, AI Painter is there at your disposal.
Built-in Components: These are typically, pre-designed email elements that you can very easily drag and drop into your newsletters and campaigns. A few examples are text blocks, images, videos, headers & footers, CTA elements, buttons and more. They save you a lot of time while and effort in creating emails without compromising the control that you have over the design process.
The free version of Mailmaker allows you to create 1 project with 1000 emails and unlimited contacts. To overcome this limitation, you can subscribe to their Premium plans. Click here to learn more about them.
How it Works:
1. Use the link that we have provided at the end of this article and click on ‘Get Started’ at the top right to register for a free Mailmaker account.
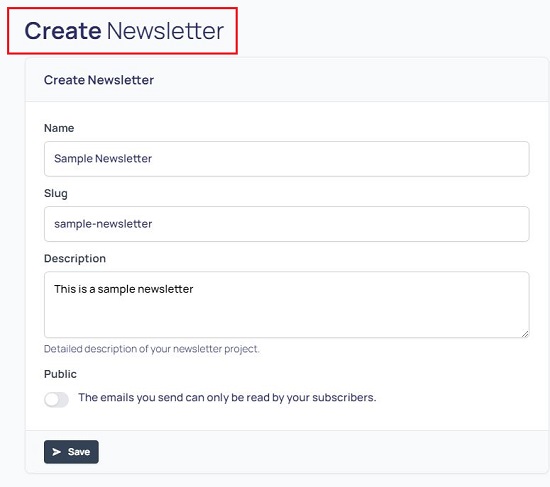
2. Click on the button ‘Newsletter’ at the top left, assign a Name and Description to the Project and click on ‘Save’. You can use the toggle button at the end to choose to make it Public.
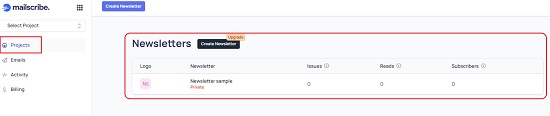
3. Click on ‘Projects’ in the panel on the left side of the page and then click on the Newsletter project you just created. This will load the project in the dashboard from where you will be able to view the Emails / Pages in this project, Daily Statistics, Viewing Statistics, Subscribers and more.
4. To create a New Email or Page (Newsletter), click on the corresponding button at the top left of the screen. This will open the Mailmaker Editor on the screen which is the principal area from where you will create and design the Email or the Newsletter.
5. By default, a Subject name will be automatically assigned. You can directly modify it in the ‘Subject’ field.
6. To Compose an appropriate Subject for the Newsletter using AI, click on the ‘AI’ icon towards the right of this text box and choose ‘Compose’. Type a few keywords pertaining to the Subject, select the Mood and Length using the respective drop-down lists and choose the Format of the content such as Paragraph, Email, Story, Letter and more. Click on ‘Compose’ to compose the Subject and it will be displayed on the right of the box. You can directly edit the text that has been generated. Also, you can use the Formatting toolbar at the top of the Compose box to format the text as per your requirements.


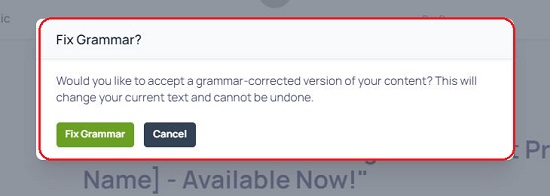
7. Similarly, you can click on the AI icon at the right of the Subject field and choose ‘Fix Grammar’ or ‘Translate’ to correct grammatical errors or to translate the content if required.
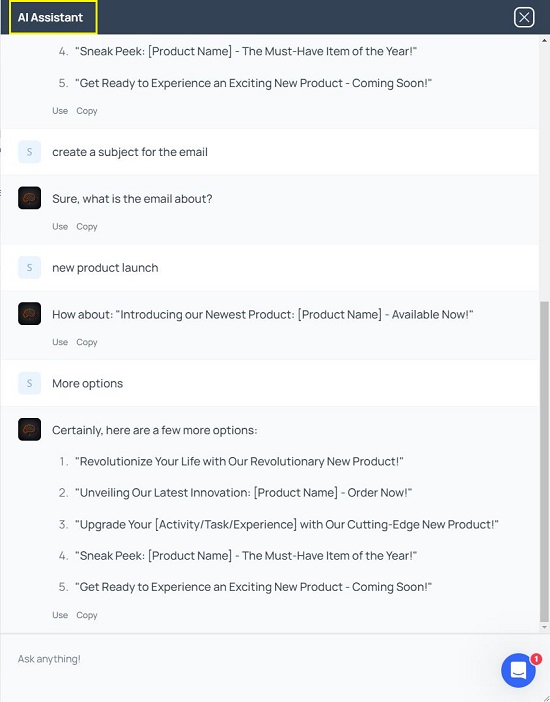
8. To use the powerful AI Assistant, click on the corresponding option and query for any information that you require through by way of a text prompt and get a quick response. Click on the ‘Copy’ button below the response to copy to the clipboard or click on the ‘Use’ button to insert it at the selected location in the newsletter.
9. Repeat the same process as above for the Description field of the Newsletter.
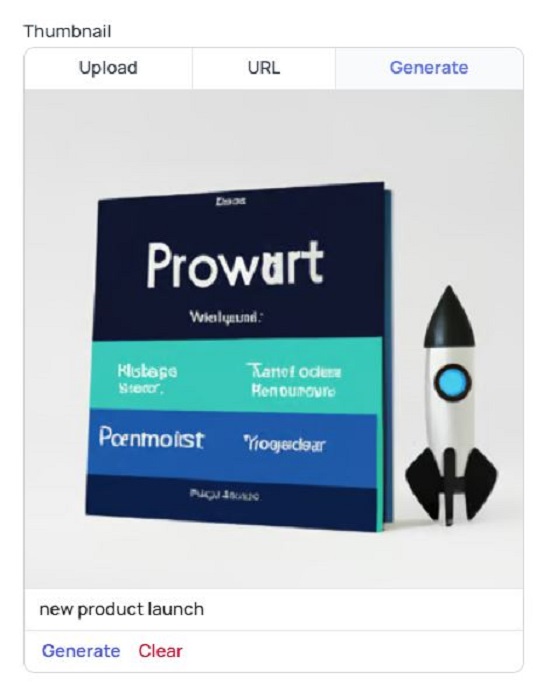
10. To select a Thumbnail for the newsletter, use the Thumbnail section and choose to upload an image from your computer, from a weblink, or click on ‘Generate’ to create the image using the AI Painter feature.
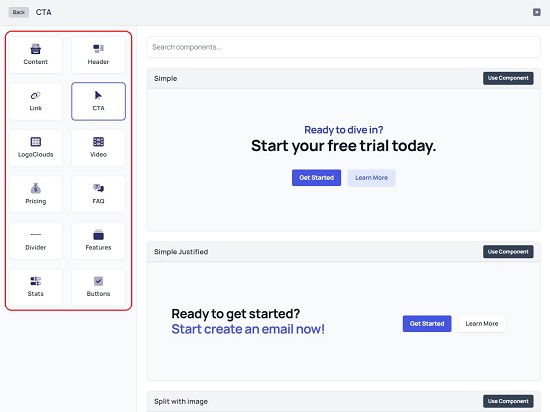
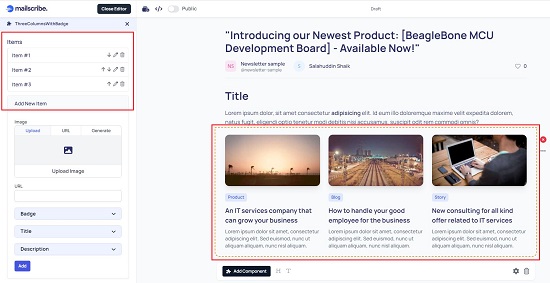
11. Now is the time to add Components to your Email or Newsletter. Click on the ‘Add Component’ button and choose what you wish to add by browsing through the Component Categories such as Header, Link, CTA, Divider, Buttons, Stats, About us and more.
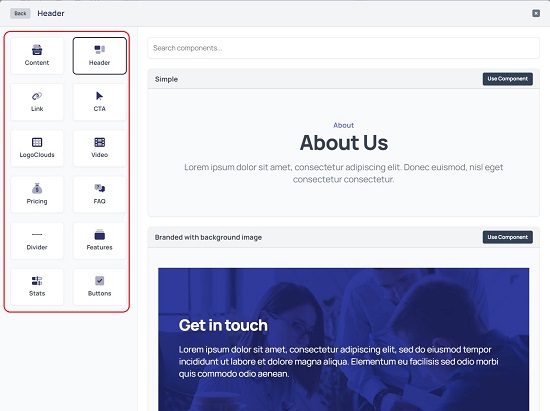
12. Clicking on any Category, gives you an idea about the Components that are available in the selected category. Click on the button ‘Use Component’ at the top right of any component to insert it into the email or newsletter and format and configure it accordingly as per your requirements.
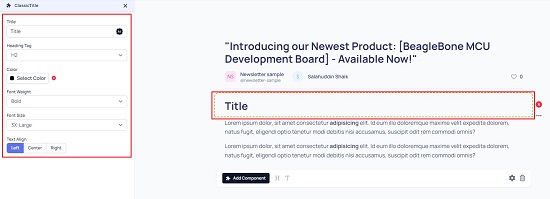
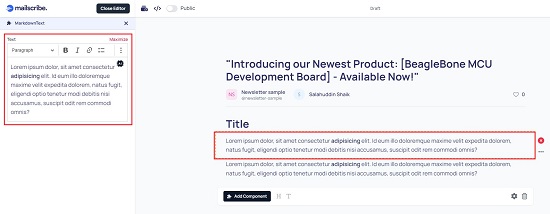
13. To add a Title, Sub-Title or Text to the newsletter click on the ‘H’ or ‘T’ icons beside the ‘Add Component’ button. Like earlier, you can directly modify the text content or use the AI tools for content ideas using the panel on the left side of the editor.
14. To preview the email or newsletter that you have created, click on the ‘Preview’ button at the top right of the screen. You can then copy the URL of the newsletter and share it with others in case you have enabled the ‘Public’ toggle button at the top of the screen. If you have set it to Private, only the authorized users will be able to view it. You can add authorized users by clicking on ‘Subscribers’ in the left panel of the dashboard.
15. In case you are creating an email, you can click on ‘Publish’ at the top right of the screen and choose to send it to all your Contacts, or specific ones. You can also Schedule to send the email at a later date.

Closing Comments:
Mailmaker is a truly powerful AI based email marketing platform that enables businesses to generate, customize and send amazing newsletters and email campaigns. It does not require any designing or coding skills and the entire process of creating the newsletter or email takes only a few minutes. Go ahead and try out this wonderful product and let us know what you feel.
Click here to navigate to Mailmaker.