Have you found yourself grappling with the sheer volume of documents you deal with on a daily basis, as well as the considerable time devoted to manual data entry? Well, it’s a common challenge for every professional team, and in this article, we’ll delve into a solution called Terabinder that can rescue you from this chaotic situation.
Terabinder is a free online application that allows you to upload your documents, analyze them using advanced OCR technology and extract the valuable information that you require.
Whether it’s a contract, invoice, purchase order or any other document, Terabinder automatically interprets and extracts all the essential information from them. Due to this, there is no requirement for any manual data entry or sifting of records. Once this is done, Terabinder helps you with custom reports as well as a summary of the entire data for analysis and auditing. You an also export the report to Excel or CSV to probe further.
All that you need to do is upload the document in PDF or any popular image format, classify and create all the data fields that are required and manually key in the values in those fields to train the file. After this is done, future uploads from the same entity will cause the application to automatically extract and save the field values that you described earlier.
Working:
1. Click on this link to navigate to Terabinder and sign up for a free account using your email address. You must verify your email address for the product to be activated.
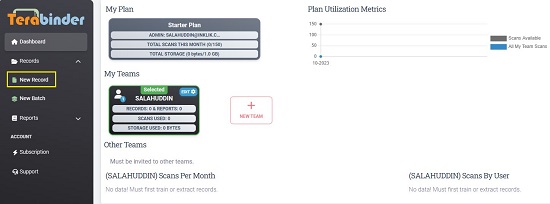
2. After you sign in successfully, you will be navigated to the Terabinder Dashboard which gives you an overall picture of your Scans, Records, Reports and more.
3. At the outset, you must upload your document in PDF or Image file format train it and then go ahead upload the batch of the same type (entity) of documents for data extraction. For this, click on ‘Records’ in the left-side panel and then choose ‘New Record’ Next, click on ‘Add File’ and then click on the ‘Choose File’ button to upload the required PDF / Image file from the system. The uploaded file appears under the ‘Files’ section as File (1).
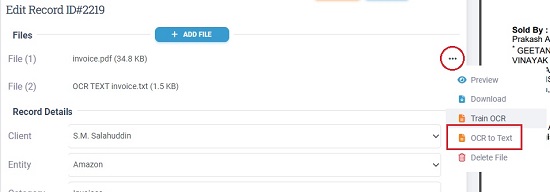
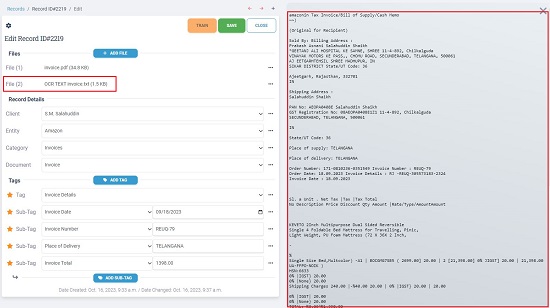
4. You can click on the 3-dots icon ahead of the file name and the select the ‘OCR to Text’ option to extract all the text from the document if required. The extracted text appears in the same section as File (2). Like earlier, you can click on the 3-dots icon ahead of this file and choose ‘Preview’ to see the complete extracted data.
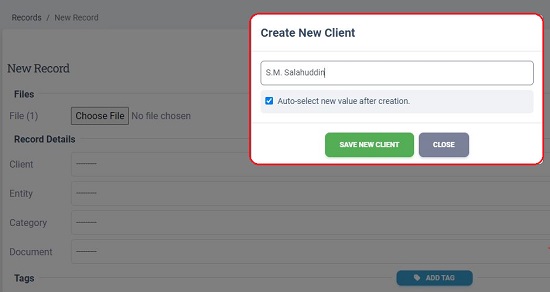
5. Let us now begin with the Training part. Click on the ‘Client’ drop down, choose ‘Create new client, type the Client Name and save the information. Client is basically the owner of the document.
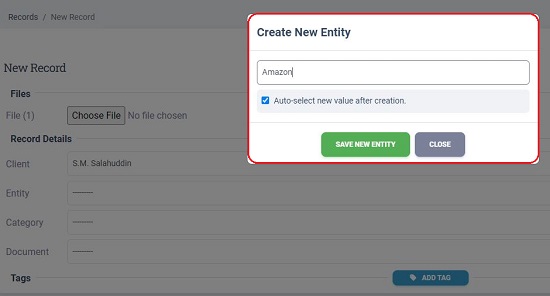
7. Perform the same exercise as above for ‘Entity’ which is the next field. Entity is typically the Company / Business / Organization from whom the document has originated.
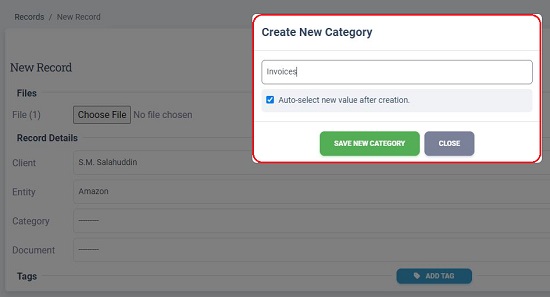
8. Similarly, click on the ‘Category’ and ‘Documents’ drop down and create the new Category Name and New Document within the category such as Invoices, Receipts, Bills etc based on the data that you wish to extract later.
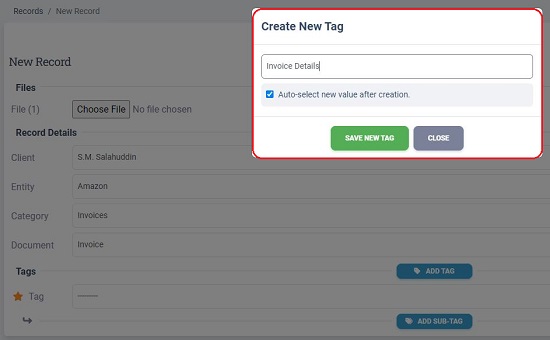
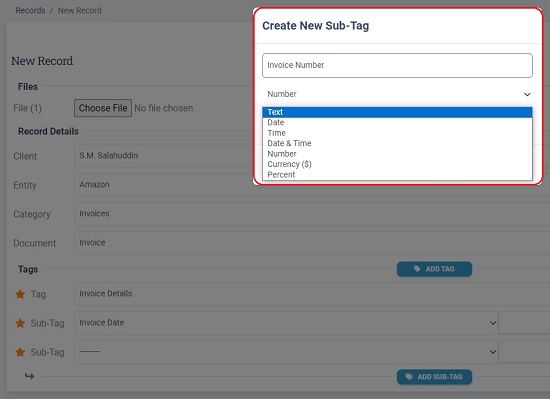
9. The next step is to add the Tag and Sub-Tags along with the data type. The Tag acts as an umbrella for all the Sub-tags which offer the specific data that you seek to extract from the document. For example, if you are performing the training for an Invoice extraction, you may specify the Tag as ‘Invoice Details’ and the Sub-tags as Invoice date, Invoice number, Amount and more.
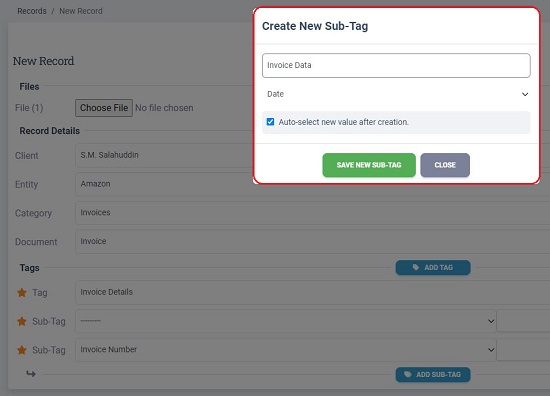
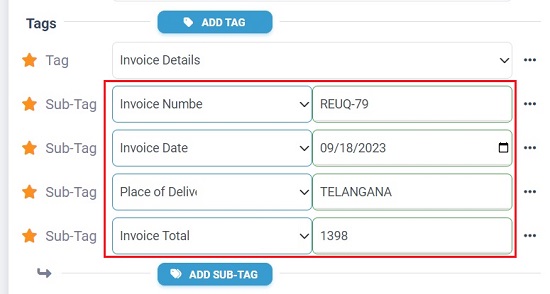
10. Next, you must key in the information for the sub-tags manually. Ensure that the values that you are typing for the sub-tags are present in the document. Also, you must remember that during the automated extraction process, this information will be mined automatically from the uploaded batch of documents.
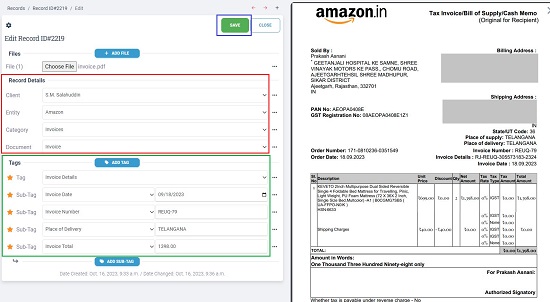
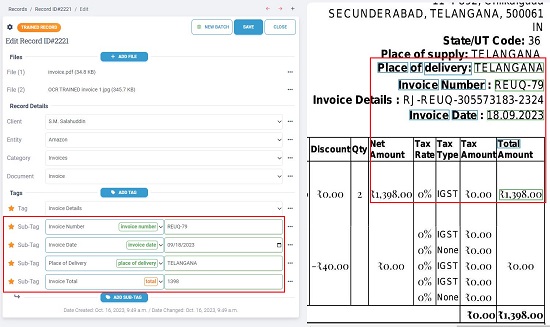
11. Now, click on ‘Save’ to save the record and then click on the ‘Train’ button at the top. Wait for some time for the Terabinder to process the document based on the Record that you have created above. After this is done, you will find colored values ahead of each sub-tag tag that you have created. These are the headers found in your document that exactly (or closely) match the sub-tag headers that you have designated in the record.
12. The OCR Trained Document (Image) will be available in the files section. You can preview it and find out the exact location in the document from where the sub-tags have been matched.
13. The system is now ready to extract data from a batch of documents. For this, click on the ‘New Batch’ button at the top and select and upload multiple documents (of the same type) from your system and then click on ‘Create Batch’.
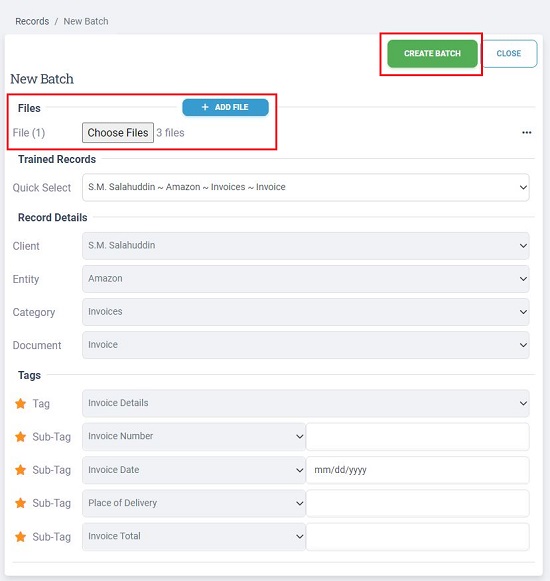
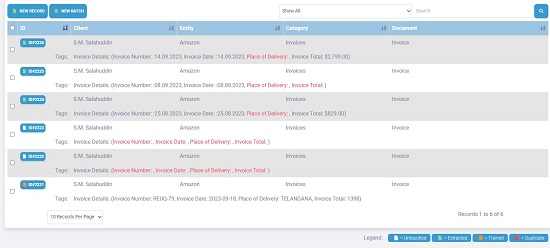
14. Wait for some time while Terabinder uploads the documents and extracts the required data from them. Once this process is done, you will be able to view all the individual records that have been created with the associated document attached as well as the required data that has been extracted from them.
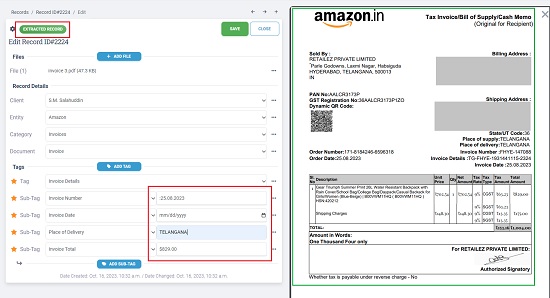
15. You can click on the corresponding ID of any document to review the extracted data as well as the original document from where it has been captured..
Closing Comments:
Terabinder empowers you to upload your PDF or image files, where it leverages advanced OCR technologies to analyze and extract data. You have the ability to customize the application, training it to extract precisely the information you need from your documents. The application is set to revolutionize the way data is managed and documents are handled by eliminating the necessity for any manual data entry, whether it’s a contract, invoice, purchase order, or any other document type.
Go ahead and try it out and do write to us about what you think. Click here to navigate to Terabinder where everything that you need is just a click away.