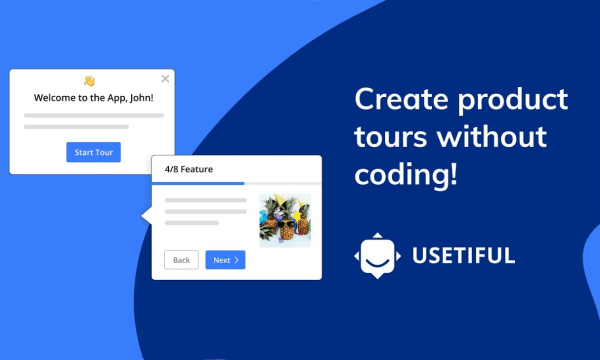
This article covers a simple method to add product tours to your website without coding. A product tour comes handy to give a walkthrough to the users on your website or application. With walkthrough tours, you can guide the visitors around the website and make them aware of the highlights and features of the application.
The conventional way of building a product tour is not easy for everyone to follow. Instead, you can use Usetiful to build the walkthrough tours and then embed them by adding a sort code to your website source. This service offers you an editor where you can create a custom tour with pointers, models, slide outs, and redirects. You can customize each aspect of the tour and preview it on your website before installing it.
You can create an install 1 product tour with the free plan that offers a wide range of guides tour elements with cloud hosting. If you want to create more than one tour then you have to go with paid plans which also includes themes, usage analytics, dynamic personalization, training, desktop app support, and local hosting.
Also read: Create Automated UI Tests for Websites without Coding
Add Product Tours to Your Website without Coding
To get started with Usetiful, visit the website and start for free. It prompts you to create an account using your email address and then asks you to pick a plan. Pick the basic free plan to get started.
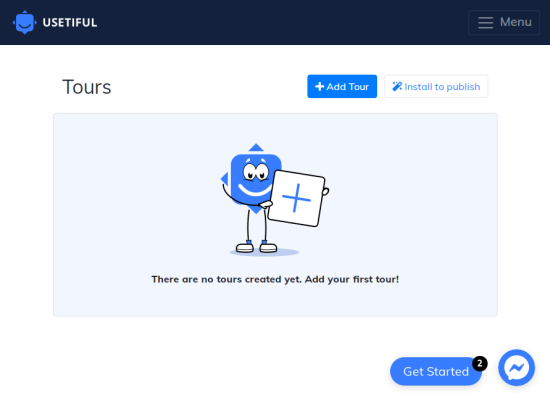
When you log into your account, you get the dashboard of the tours where you can see all the tours you’ll create with this service. Initially, the dashboard is empty with two buttons at the top; “Add Tour” and “Install to Publish”. With “Add Tour”, you can create a new tour and with “Install to Publish”, you can get the code to install the tour on your website.
Create a Product Tour
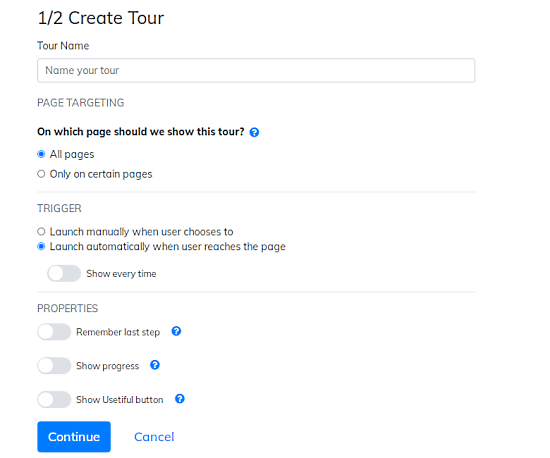
When you start creating a tour, you get a bunch of options for the tour. Here, you can enter a name for the tour, select whether you want to show it on certain pages or all the pages of the website. If you pick the certain pages then you can enter the URL of those pages. After that, you can select the trigger and set your preference for “remember last step” and “show progress”.
Add Walkthrough Steps
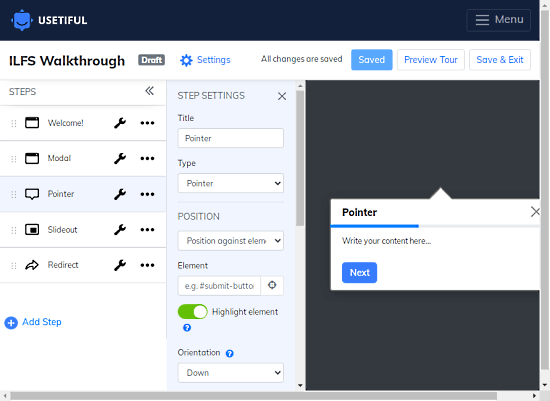
The next step ones the edited where you can create the tour. You can add steps to the tour and configure each step accordingly. Here is a list of types of steps that you can add to the tour:
- Pointer: Title, Position, Element, Element Highlight, Orientation, Progress click, Alignment, Add Buttons, URL Triggers, and Auto skip.
- Modal: Title, Alignment, Add Buttons, URL Triggers, and Auto skip.
- Slideout: Title, Position, Alignment, Add Buttons, URL Triggers, and Auto skip.
- Redirect: Title, Automatic Redirect, Next Page Address, and Start Tour.
Preview Tour
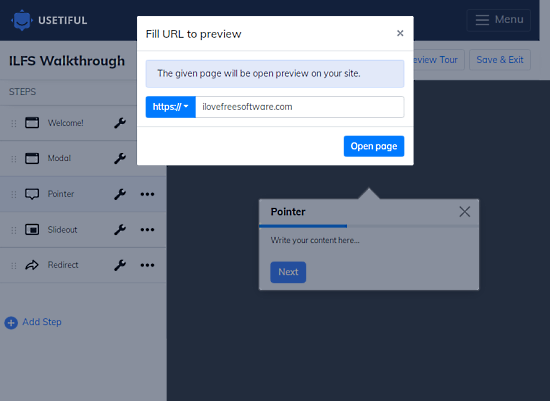
After creating the tour, you can preview it on your website. Simply click the “Preview Tour” option from the top. This prompts you to install the Usetiful browser extension to preview the tour. Install that browser extension from here. Then click the “Preview Tour” option again and enter the URL to the page where you want to preview the tour.
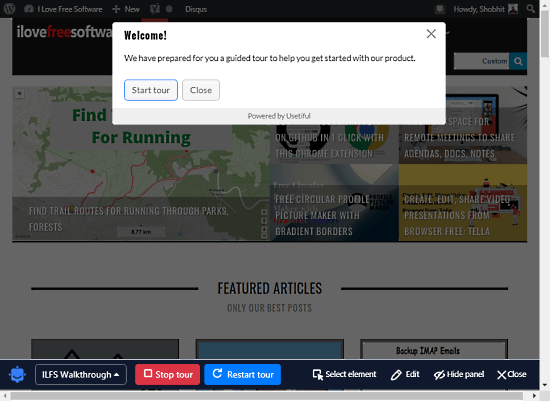
When the preview starts, it opens the URL and shows a preview panel on the bottom. The preview shows each step of the tour on the screen. For each step, you can use the “Select element” option from the panel to select where you want to show the particular tour step on the webpage.
Publish Tour
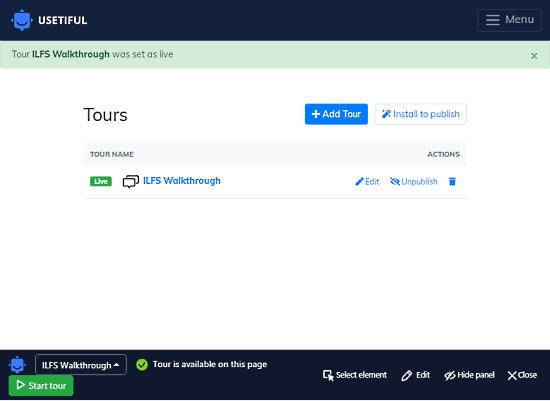
Once all set, click the “Save & Exit” button from the top to save the preview and exit the editor. This takes you back to the dashboard where you can see the tour you have just created. Since the tour is hosted online, you can published it from here. Do note that, you have to publish the tour to install it on the website.
Add Product Tour to Your Website
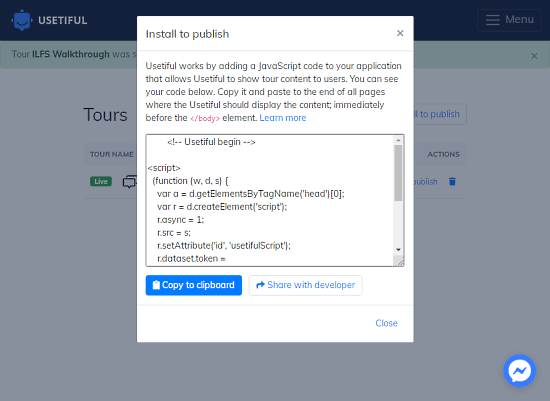
After publishing the tour, the “Install to publish” option from the dashboard. This brings a javascript for the tour that you can copy and add to the website source where you want to add it. It also gives you an option to share the script with the developer in case someone else is managing your website for you.
Wrap Up
Usetiful makes it simple to add product tours to websites without coding. This is way easier than the conventional method of building the tour with coding to your website source code. The free plan is good enough to build a detailed product walkthrough tour to make your digital product adoption simple.