Supademo is a free Web Application that aids you in creating interactive and self-guided product demos of websites, web apps and more in just a few minutes that you can use to give a boost to your conversions.
These demos can allow the buyers to get familiar and experience your product before they go ahead and purchase it. They are also a great way to demonstrate the outstanding features of your product so that the buyers can promptly understand its value in an interactive and appealing manner.
The process of creating the demos is divided into 3 steps:
Step 1: Installation of the Supademo Chrome Extension and recording of the steps that comprise the flow of the product and a demonstration of its features. Supademo automatically detects important events, captures screens by itself and generates the product demo.
Step 2: Editing of the interactive demo such as addition of Hotspot texts, changing of Colors, rearrangement of Flows and adding CTA (call to action) if required. All this is achieved with only a couple of clicks.
Step 3: Sharing of the demo by way of an email, public URL or as an HTML embed on a website.
The free version of Supademo allows you to create a maximum of 5 demos with watermarks. To remove this limitation and the watermark, you must subscribe to their paid plan. Click here to learn more about it.
How it Works:
1. Navigate to Supademo using the link that we have provided at the end of this article and sign up using your Google account by clicking on ‘Sign up Free’
2. Click on ‘Install’ in the Welcome section on the left of the page to install the Google Chrome Extension. The recording of the interactive demo is carried out using this extension.
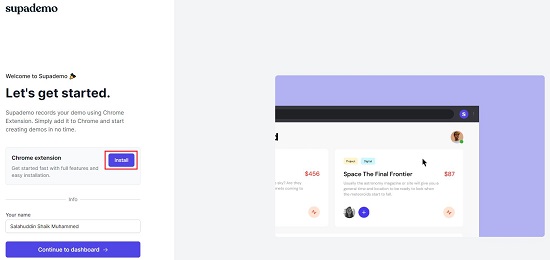
3. After the installation of the Extension is over, click on ‘Continue to Dashboard’ in the Welcome section. You are now ready to start recording the interactive demos.
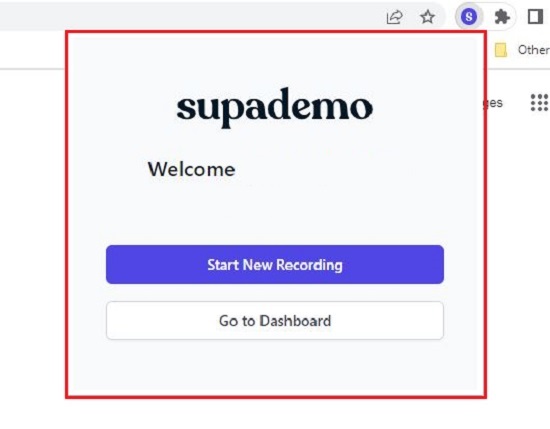
4. Navigate to the website or web application that you want to record, click on the Extension icon to the right of the address bar and then click on ‘Supademo Beta’. Make sure that you are ready to start recording the steps and click on ‘Start New Recording in the popup box.
5. Perform all the actions on the website or web app that you normally would do as a user and Supademo goes on recording them. If you are making a demo of the important features, you must ensure that you traverse through all of them. Similarly, if you are creating a demo of the product flow, make sure that you get the sequence right.
6. Once you have finished performing all the steps and actions, click the ‘Stop Recording’ icon. Your demo will automatically be generated and presented in a new tab as well as be available in the dashboard.
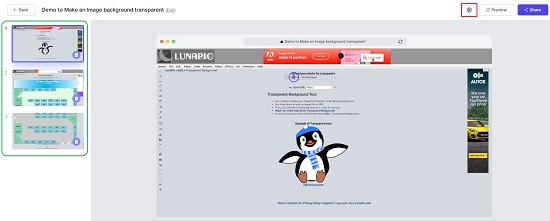
7. To Edit the Demo, click on the ‘Edit’ icon at the top right of the screen, choose the screen that you wish to edit and then click on the ‘Settings’ icon at the top right to bring up the settings box.
8. Click on the ‘Start Overlay’ tab to enable / disable an overlay button that you can display on the first slide. You can change the text on the button as well as the background and text color using the settings on this tab. You must save the settings before you close this tab.
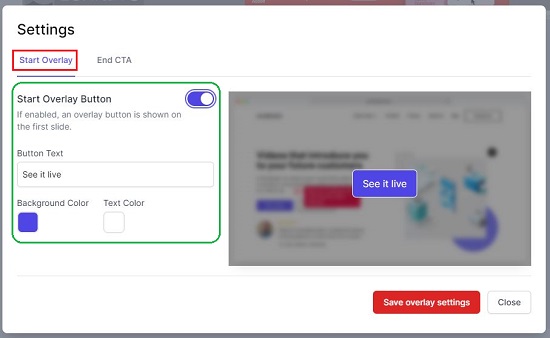
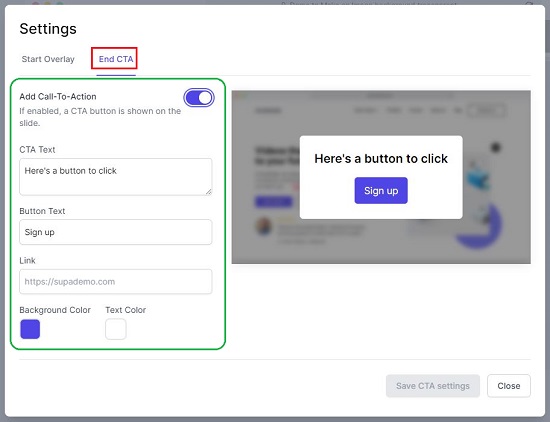
9. Click on the ‘End CTA’ tab to add a CTA (Call to Action) button if required. Like before, you can specify the text on the button, change the background and text colors and also provide a link (URL) to be used when the button is clicked in the demo. Remember to save the settings before you close this tab.
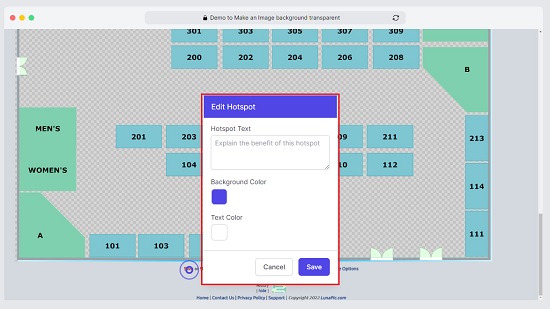
10. To add Hotspot text and change its colors, you can click on the Hotspot and complete the steps.
11. To delete any screen from the interactive demo, you can click on the ‘Delete’ icon at the bottom right of the screen thumbnail.
12. Once you finish creating the demo and are ready to share it click on the ‘Share’ button at the top right. Next click on the arrow mark beside the Draft button and then click on ‘Published’ to make your demo public with a link that you can copy and share it with others.
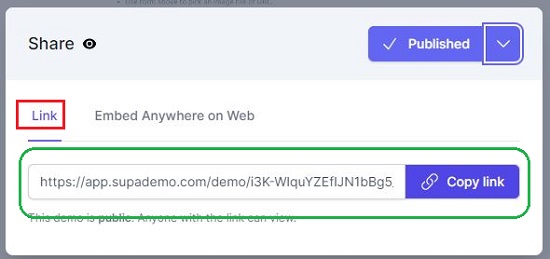
13. If you want to embed the demo on your website, click on ‘Embed Anywhere on the Web’, click on ‘Copy Embed Code’ and then use it in your website.

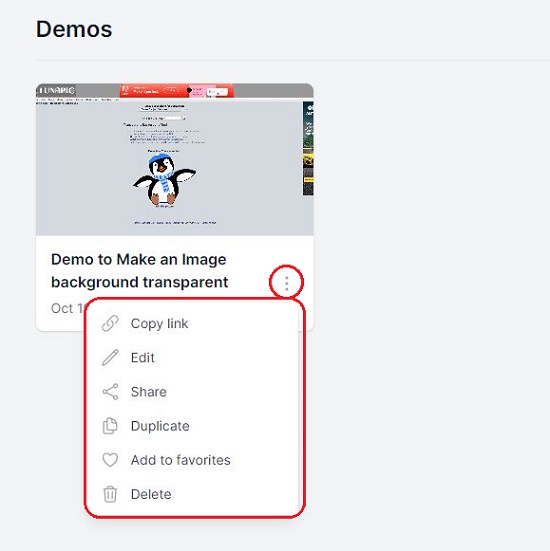
14. All your interactive demos will be accessible through the Dashboard. You can click on the 3-dots icon at the bottom right to copy the link to the demo, edit, share, duplicate the demo and more.
Closing Comments:
Supademo is a great product when it comes to creating interactive demos of websites and web apps. The demos can really help to boost your conversions as well as give your customers a look and feel of the product, its flow and features, before they can go take the decision to sign up.
Go ahead and click here to navigate to Supademo.