Microsoft Designer is a free AI based graphic design tool that you can use to create unique high-quality social media posts, logos, invitation cards, website banners and more. Designer allows you to automatically create images with DALL-E 2 using its AI option by simply typing a text description or ideas of what you want. This helps you in getting started easily and customizing any design that you like.
In addition to the above Designer also allows you to use your own images coupled with the in-built design tools to create and customize your graphic projects. It provides you with a range of Templates, Color themes, Shapes, Photos, Text styles, Icons and more to help you create the perfect design that matches with your requirements.
At the time of writing this article, Microsoft Designer has been provided to users via a waiting list. Users can add their email address to the list and once granted access, they will receive instructions to login. However, the current preview of the application does not include all the planned features. Microsoft plans to obtain a feedback from those users who have been granted access and use it to improve the tool before it is launched for the general public. After its launch, Microsoft Designer will be provided as a free app for the subscribers of Microsoft 365 with an optional range of paid features.
How it Works:
1. Once you are granted access, click on the invite link that has been provided to you and the Designer Co-Pilot screen will be displayed. This is an AI system from Microsoft that generates your visual designs based on your text description using AI generated images or existing images from your system. You an also choose to begin with a blank canvas.
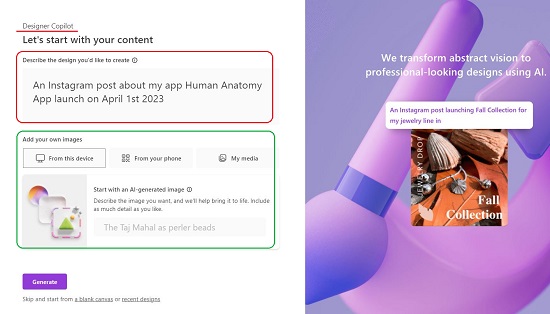
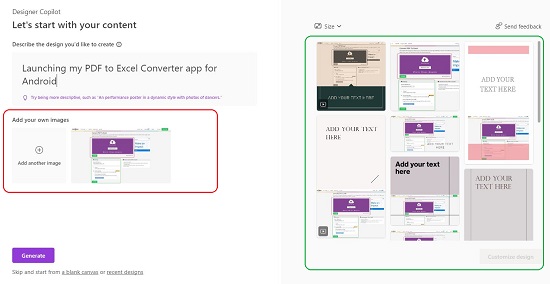
2. Type a few words / phrases about the design that you would like to generate such as an Instagram Post, Invitation card, Logo etc. You can keep trying different variations of the text prompt till you get a precise result that matches with your ideas.
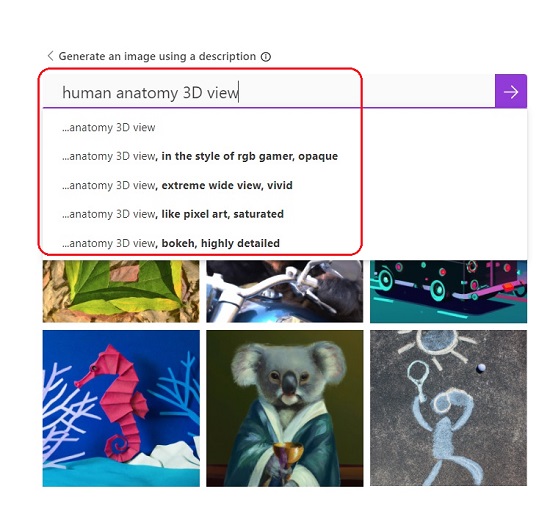
3. The images used in the visual design that you are creating can either be uploaded from your device, phone or generated using AI (DALL-E 2).
4. If you are interested in AI generated images, click on ‘Start with an AI-generated image’, type the best possible description of the image, click on the Purple arrow icon towards the right and wait for the AI images to show up. Notice that one you type your text prompt, Designer offers a list of suggestions that modify and tweak it even further to provide you with ideas on how to adjust the final image.
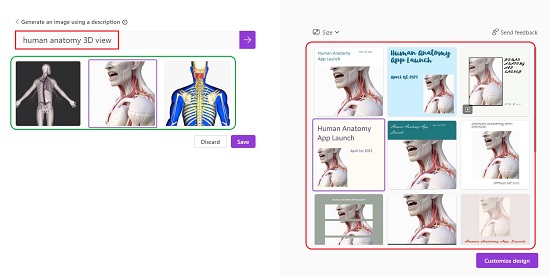
5. Once you see an image that you like, click on ‘Save’ to use it in your design. You will now see the visual design ideas start appearing on the right based on the description that you specified in Step 2 above. The designs will use the AI generated images or the ones that you manually selected as the case be. Any modification in the description of the design, image etc. will be updated in real time. This makes it easy to create lots of variations with several combinations and choose the one that best suits your needs.
6. You can choose the design that you wish to use and then click “Customize Design” to open it in Designer.
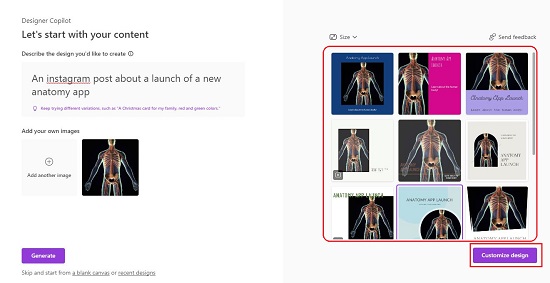
7. If you wish to upload your own image rather than using an AI generated one, choose ‘From this device’ and upload the picture from your local computer. Next, select from one of the automatically generated designs on the right that includes your image and finally, click on ‘Customize Design’ to open it in the Designer. You can use the ‘Size’ drop-down box at the top to specify the size (square, landscape, portrait) of the design.
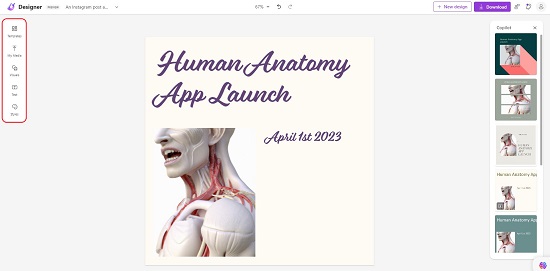
8. Once your visual opens in the Designer, you will be able to see the tools on the left side panel and the real time preview of the design in the centre of the interface. Any changes that you make are saved automatically.
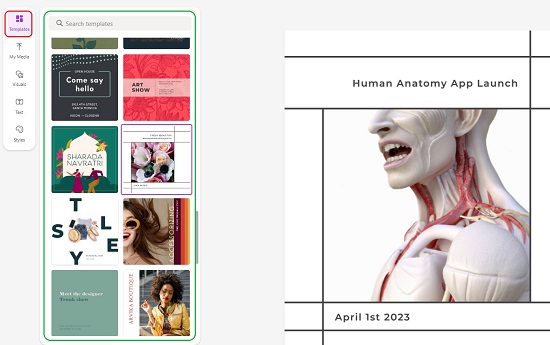
9. You can click on ‘Templates’ in the left panel and choose any existing template or search for additional ones from Microsoft to give a different style to your design.
10. To insert additional images from your device, phone, Google Drive, Dropbox, Google Photos etc or to choose a previously uploaded image, click on the ‘My Media’ icon and simply click on the image that you like.

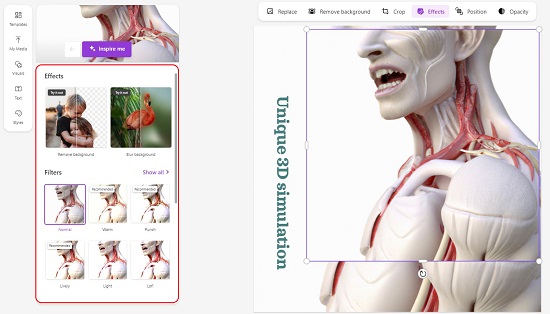
11. When you select any image in the visual, a vertical panel appears towards the left. You can use this panel to apply Effects like Background removal, Background blur, Filters etc as well as to change the image’s Brightness, Contrast, Saturation Sharpness and more.
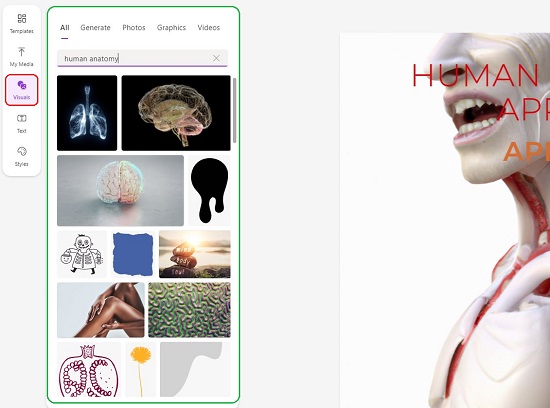
12. To view additional visuals recommended for your Design, click on ‘Visuals’ and pick any required items such as Organic shapes, Filled shapes, Videos, Abstract background images, Icons, Illustrations and much more. Alternatively, you can click on ‘Generate’ and again generate an AI image using DALL-E 2 by typing its description.
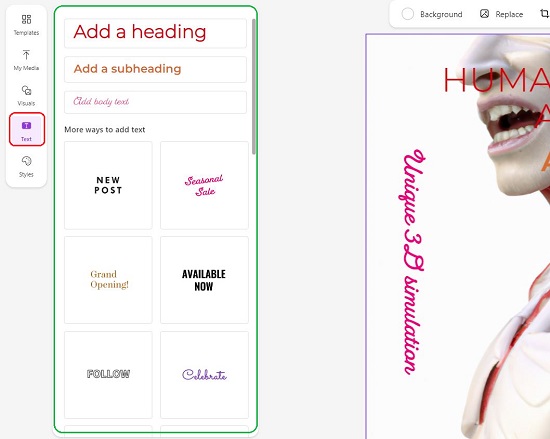
13. Next, you can add a heading, subheading, or body text. You can also choose a particular text style and directly type / modify the text in the design. Choose the text handles at the edges and corners to rotate the text or enlarge / reduce the size. The text formatting bar that appears at the top of the design can also be used to change the Font, Size, Style, Position, Opacity and more.
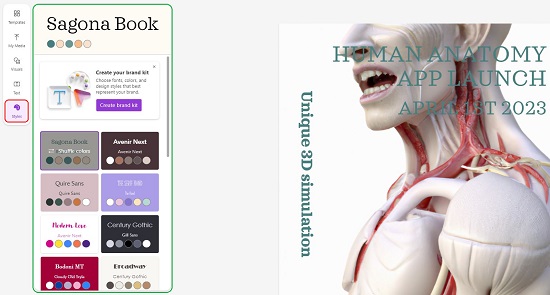
14. To pick a different color scheme or text style combination, click on the ‘Styles’ icon and simply click on the Style that you desire.
15. To start with another design, click on ‘New Design’ button at the top right of the interface and the Designer Co-pilot will launch once again to start a design from scratch.
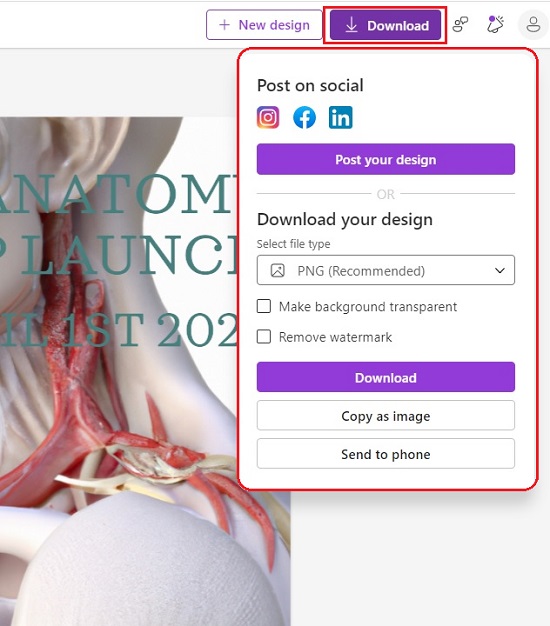
16. To share your design on social media platforms like LinkedIn, Instagram or Facebook or to download your design, click on the ‘Download’ button. Designer allows you to download the visual in PNG, JPG and PDF file formats. You also have the option to make the background transparent and to avoid a watermark. In addition to this, you can click on ‘Copy as image’ to copy the image to the clipboard or click on ‘Send to phone’ to deliver the image to your phone by scanning a QR code.
Closing Words:
Microsoft Designer is an awesome tool that provides all the features that you need to design creative and attractive design for Social media posts, Cards, Logos, Banners and more. But what sets it apart is its ability to generate AI images through DALL-E 2 and use them in your designs easily and quickly. I strongly suggests that users give it a shot and you will not regret it.
Click here to join the Microsoft Designer wait list.