Womp Alpha is an amazing and easy to use web application for 3D model creation and publishing. The present release of Womp is an Alpha Version that is 100% free. The application is fashioned to run in your browser; hence you can work on it virtually using any device and from any location.
To build the 3D models, Womp uses an innovative and revolutionary fluid-like 3D material that is goopy (viscous and sticky) and non-destructive. Using this material, Womp allows you to goop, melt, merge and subtract shapes with each other to create and edit complex 3D models, animations and even 3D prints effortlessly right from your browser. You can also work collaboratively as a team and share and remix models with each other to generate new renders.
Features:
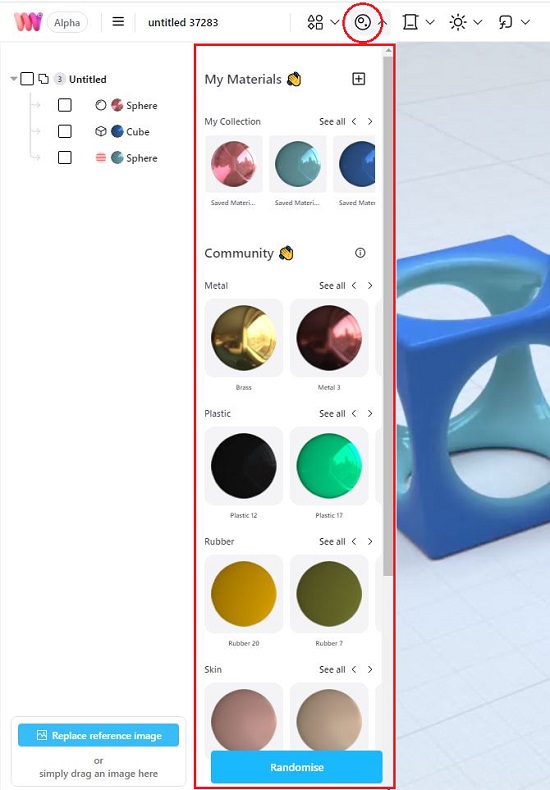
- Material: 3D models are made using an incredible goopy fluid-like 3D material. Shapes built on this material can merge and subtract with each other easily. You can also choose the material that you want to use to create your model such as Metal, Plastic, Glass, Jelly, Rubber and many more.
- Lighting: This is an experimental but highly customizable feature in Womp using which you can add upto 16 lights in your 3D scene and produce a unique environment with amazing exposure and shadows.
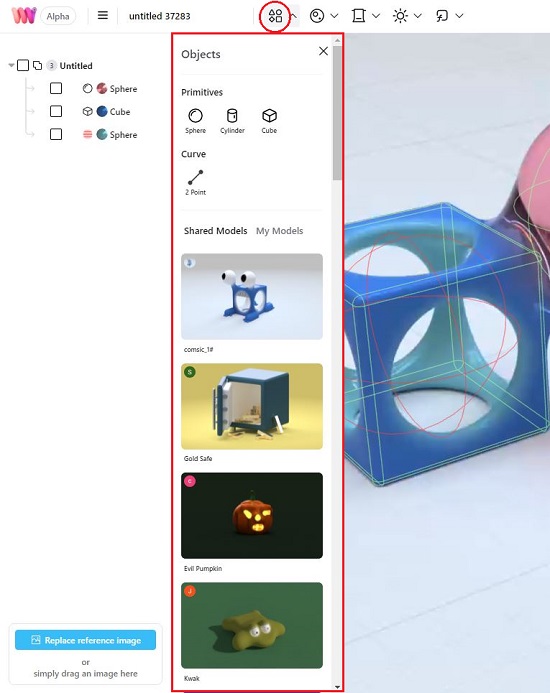
- Objects: In the Alpha version, Womp allows you to use objects such as Spheres, Cylinders, Cubes and Curves. You can use the numerous 3D handles around each object to change its size, shape, position etc along the three coordinate axes.
- Video recording: You can move around your 3D model like a walkthrough and record as a full HD video that can be downloaded to your system.
- Cloud storage: You need not worry about constantly saving your designs as all your 3D models are automatically saved in the Womp cloud
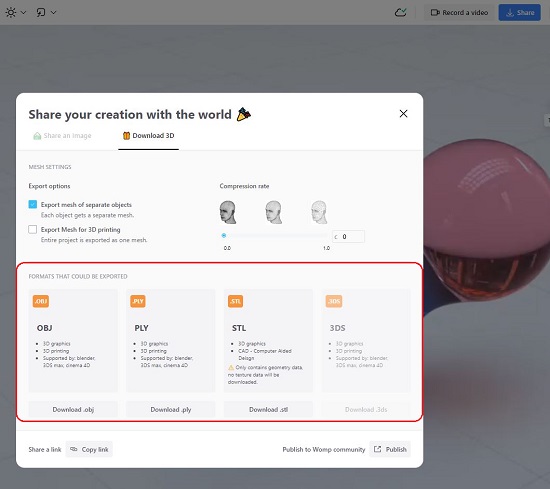
- Download: You can download your models to your system as an image (PNG, JPG, TAG, BMP format) or a 3D model (OBJ, PLYT, STL format).
Interface:
The user interface of Womp is pretty simple and intuitive and is divided into the following sections:
- Top toolbar: This is the place from where you can add objects and shared models, select the materials to be used for the model, configure the background colors, customize the lighting and environment and more.
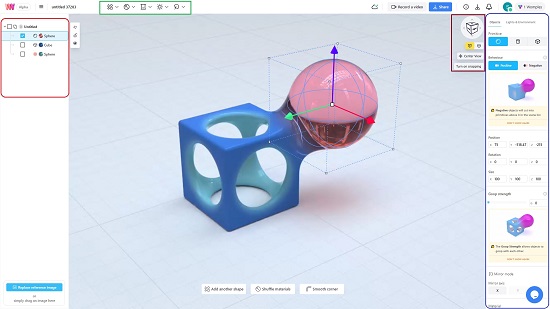
- Left panel: This panel lists all the objects that you have used in your design. You can use it to select and modify the objects, lock them to prevent any changes, make them invisible etc.
- Right panel: This is a context sensitive panel that you can use to configure virtually anything in your 3D model depending upon your selection. For example, if you click on empty space, the panel will allow you to configure the lighting and environment. Similarly, if you select any object, you will be able to customize all the numerous aspect of the object right from position, shape, roundness, goop strength, background, material characteristics and much more.
- To Rotate the model, you must click and drag using the left mouse button. To Pan, use the right mouse button and drag the cursor. Use the mouse wheel to zoom in / out.
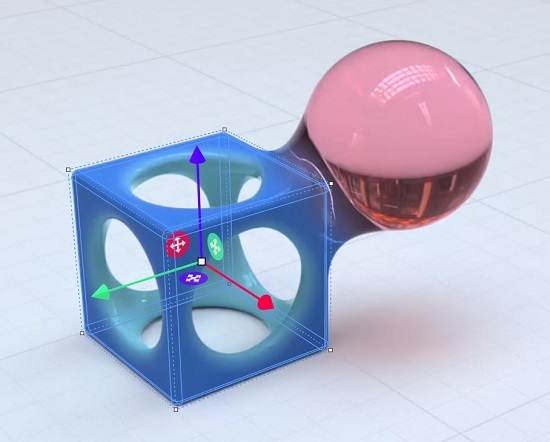
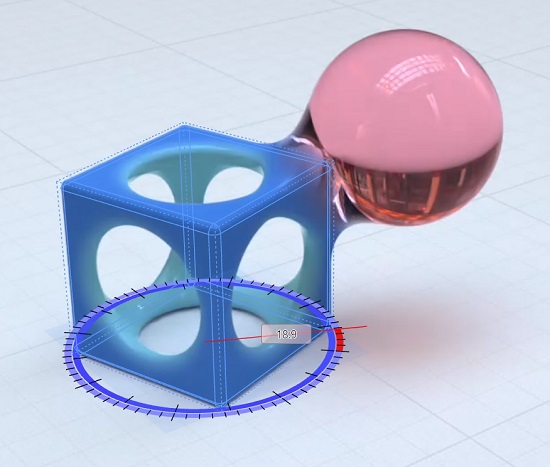
- When you select any object in your 3D design and hover the mouse around its edges and vertices, a number of object related handles will be displayed. You can use them move or resize the object along any of the coordinate axes or rotate it by any angle.
How it Works:
1. Navigate to Womp Alpha using the link that we have provided at the end of this article and sign in using your Google account. Once you login, you will be taken to the Womp Dashboard where you can browse for 3D models and objects created by the Womp community or create your own from scratch.

2. Click on ‘New File’ at the top left of the screen so start building your 3D model with a default scene.
3. Use the ‘Objects’ icon in at the top, to add the basic blocks (Primitives) of your design such as Cube, Sphere, Cylinder etc. You can also add the models that have been shared by others to your design.
4. Click on the second icon in the top toolbar to select the Materials that you want to use for the 3D objects from the available community options. Click on any object to select it and use this feature to change its material.
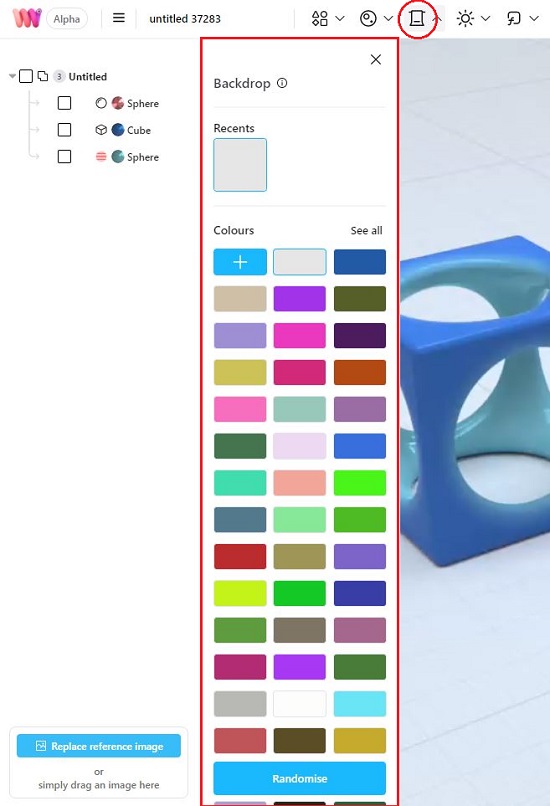
5. To change the Backdrop (background colors) of the design, click on the third icon in the toolbar and carry out the requisite changes.
6. Click on any object in the design to enable the context sensitive right panel and customize all its characteristics as per your requirement. To configure the environment and lighting of your 3D model, click on any empty space in your design and then use the right panel to try out various options. You can also click on the ‘Lighting’ icon in the toolbar at top to configure the same settings.
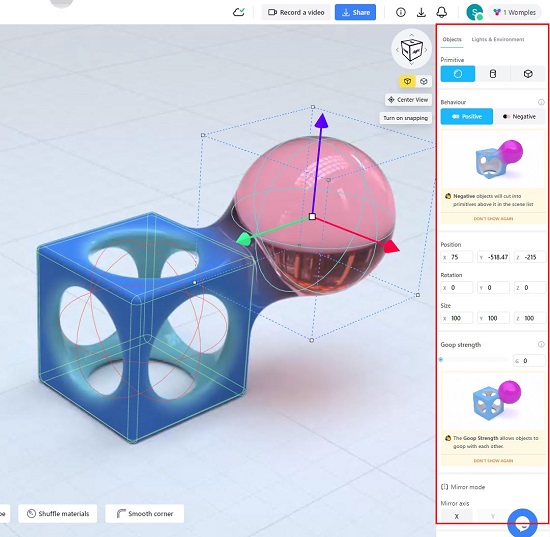
7. To modify the Shape, Size, Position, Angle etc of any object, click on the object to select it and use the various accompanying object handles to do the job. You will find that when you bring the objects close to each other they will merge, subtract etc. due to the fluid and viscous nature of the material. The goop intensity of any object can be changed by selecting it and using the right panel.
8. Once you are satisfied with your model, you can click on the ‘Share’ button at the top right of the interface and publish it to the community. You can also download the design as an Image or 3D model in various popular file formats.

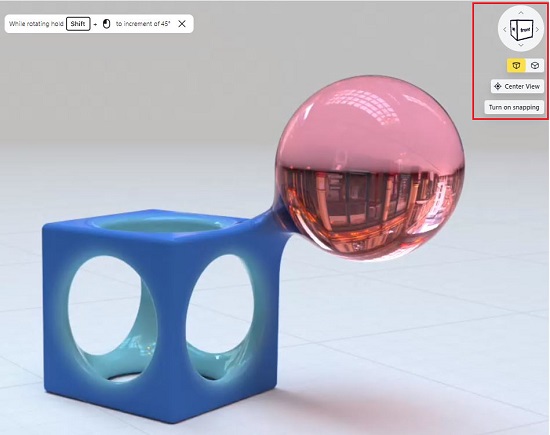
9. To toggle between the Perspective / Orthographic view, you can use the applicable buttons at the top right of the design. To bring the camera to the center of your 3D scene, click on the ‘Center view’ button.
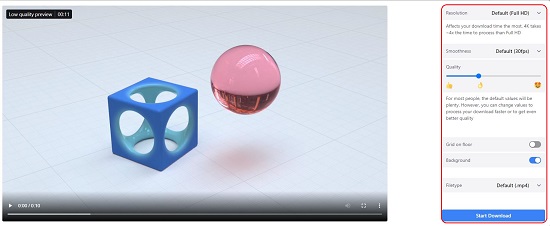
10. To record a video of your 3D design, click on the ‘Record a video’ link beside the ‘Share’ button Rotate, Pan, Zoom in / out of the design to generate the walkthrough and when you are done, click on the ‘Stop’ button. Subsequently you can configure the Resolution (Ultra HD, Full HD, Quad HD etc), Smoothness in frames per second, Quality and more and download the video to your local system. This process may take several minutes depending on the options that you have chosen.
Presently Womp is not supported by any browser other than Google Chrome.
Closing Words:
After using Womp Alpha for a while, I found it to be an amazing application that you can use for creating and rendering your 3D models easily and effortlessly. The choice of material that you can use is very impressive. I was particularly amazed with the goopy fluid material provided by Womp as it allows you to create any possible shapes and animations that you can think of. The lighting and environment effects are also fantastic, and you can use them to render awesome scenes to enrich your design.
Go ahead and click here to navigate to Womp Alpha. It will surely blow you away.