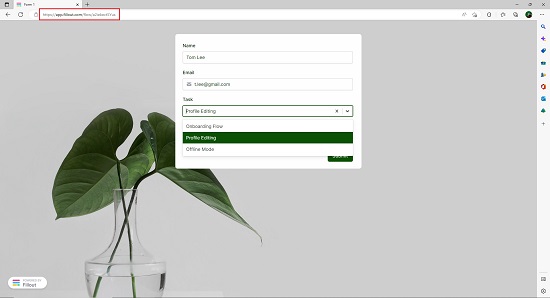
Fillout allows you to make splendid and impressive web forms that can connect and store responses in your existing Notion Tables easily without writing a single line of code. Using a powerful form designer, you can choose the exact style of the form that suits your brand and host the forms on custom domains. You can then share a link of the form or embed it on any web page.
Fillout is useful for making simple forms, on-brand forms as well as more intricate and complex multi-page forms as per your requirements.
Features:
- Form Style and Themes: You can style and configure your form to match your brand and design using Fillout Themes.
- Form Types: Fillout can help you build very simple to complex multi-page forms with Pre-filled Fields using URL including easy Login forms.
- Connect with Notion Tables: Fillout forms can connect and store responses in Notion Tables, Google Sheets, Airtable, Postgre SQL, Salesforce and more without ever writing a single line of code.
- Resume submission: Recipients never lose their way while filling forms built by Fillout. In case they get disconnected while filling, they will be returned to the same point as earlier after the connection is restored.
- Mobile Responsive: Fillout forms work seamlessly on all devices by default including mobile devices, tabs etc.
- Hosting: You can host the forms on custom domains or embed them on any website or a Notion page very easily.
- Only Human responses: To avoid any responses from bots, you can use Email, SMS, Captcha or other forms of verification to take in the responses from human beings only.
- Accessibility: Fillout forms work with screen readers giving greater accessibility to your valuable customers.
Other important features include Input validation, Email notifications, Form analytics, ability to Track in-progress submissions and the ability to design forms to update specific web pages.
How it Works:
1. Navigate to Fillout, click on ‘Get Started’ and register for a free account using your Google credentials.
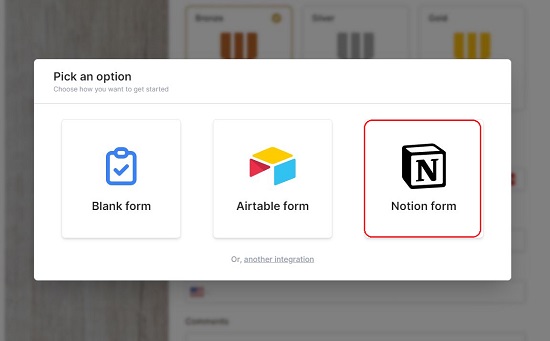
2. Click on ‘Notion Form’ and in the next screen, choose the Theme of the form and click ‘Next’. You can also choose to make your own form from scratch.
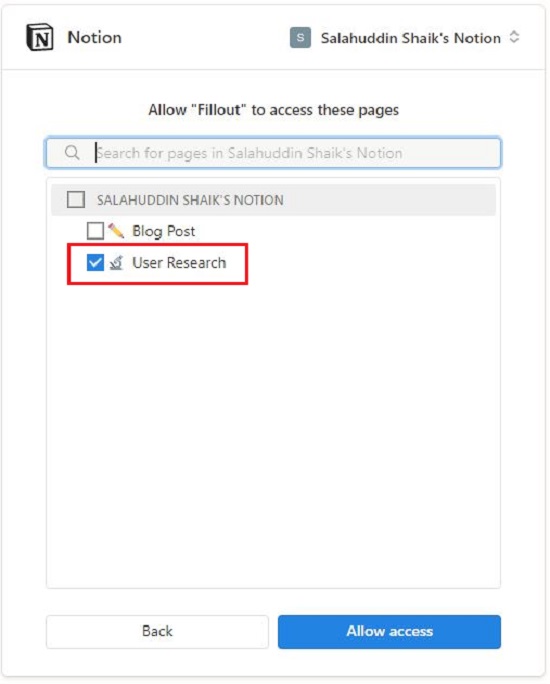
3. In the next screen, click on ‘Connect to Notion’. When prompted to permit the access to Notion pages just click on ‘Select Pages’, enable the checkbox next to all the Notion pages that you wish to grant access so that its Database can be inspected and then click on ‘Allow Access’. You must remember that the Notion pages to which you grant access should be making use of some Database (Table).
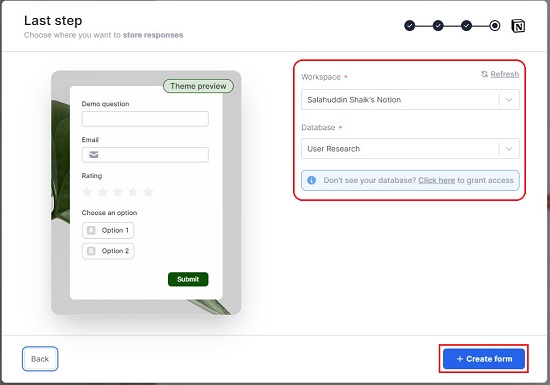
4. In the next step, select your Notion Workspace from the drop-down list, select the specific Database in the Notion Page that you wish to connect to and click on ‘Create Form’ and you will be navigated to the Form Editor.
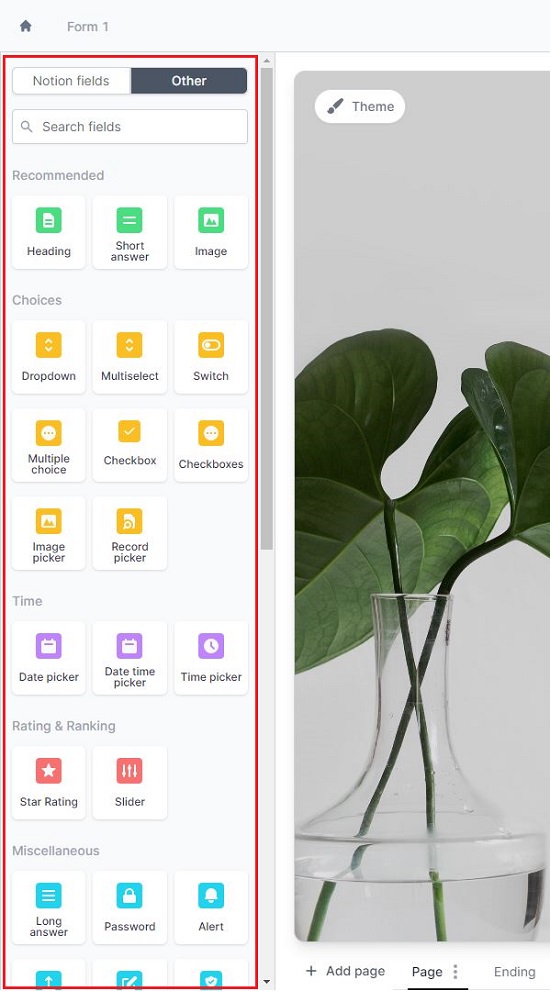
5. The left panel of the Editor contains all the Notion fields of the Table that you just connected above as well as Display Elements such as Heading, Image, Divider, Logo and more.

6. You can drag and drop any Field or Elements in workspace on the right to build the form. Additionally, you can click on the ‘Other’ tab in the left panel for more field types that you can add to the form such as Choice fields (drop-down, multiple-choice, checkbox etc) and fields related to Time, Navigation & Layout, Contact info, Number and more.
7. Once a field is added to the form or an added field is selected, a context-sensitive panel is displayed towards the right that you can use to configure the field options such as Caption, Default value, whether Required (Y / N) etc.
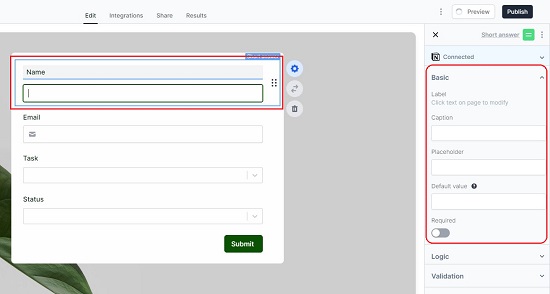
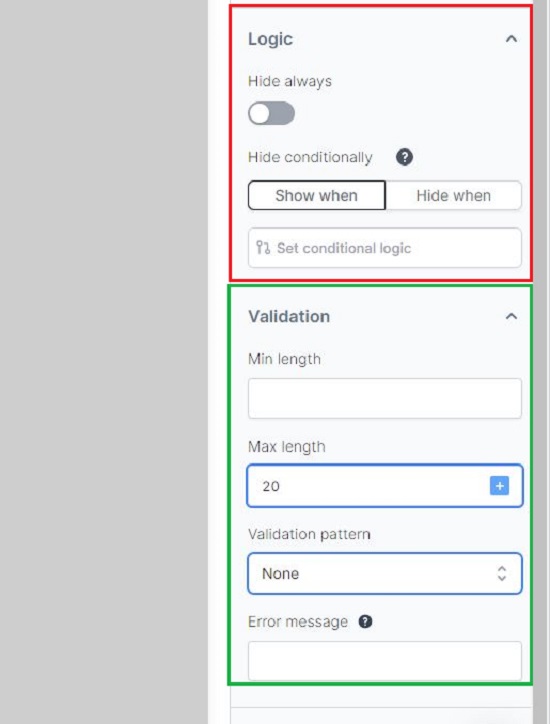
8. You can also devise the Validation and Logic options of the selected field using the required sections in the panel. You can Show or Hide relevant questions based on any condition using the Logic section.
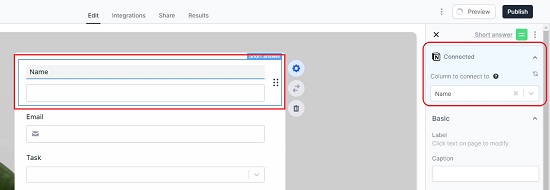
9. The ‘Connected’ section that appears at the top of the panel shows the field in the Notion Table to which the present Form field is connected to. You can click on the drop-down list and modify this connection if required. If you add a Field from the ‘Other’ tab in the left panel, you must ensure that the field in question is connected to some field in the Notion table to correctly read / write data.
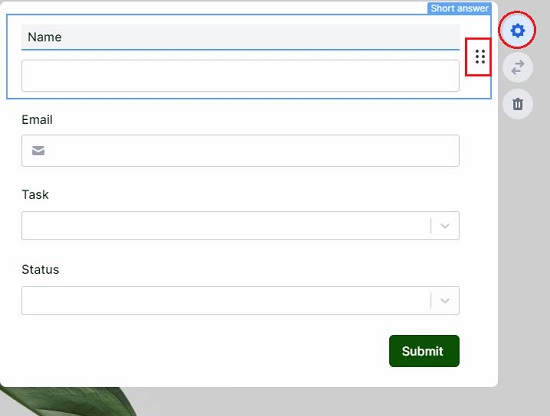
10. Click on the ‘Settings’ icon beside any field to enable or hide the panel on the right. Once the fields are added in the form, you can click on the six-dots icon at the right of the field and drag and drop it to another location to change the sequence.
11. To add another page to your form (multi-page form) click on ‘Add page’ at the bottom and design the form in the same way as above.
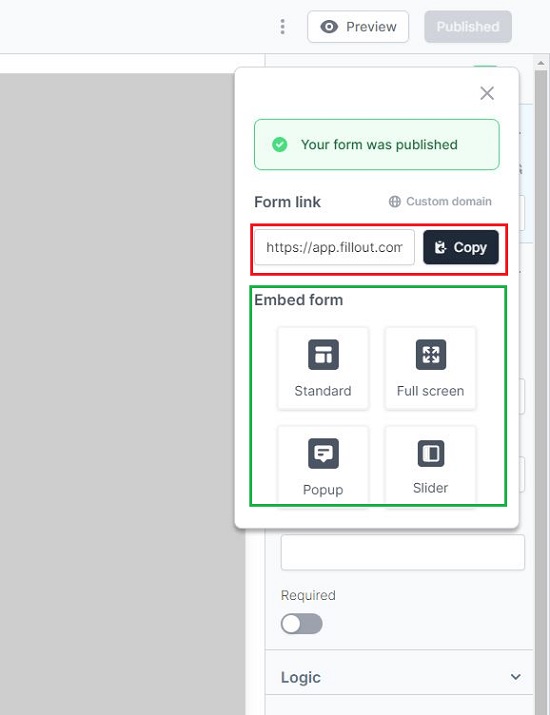
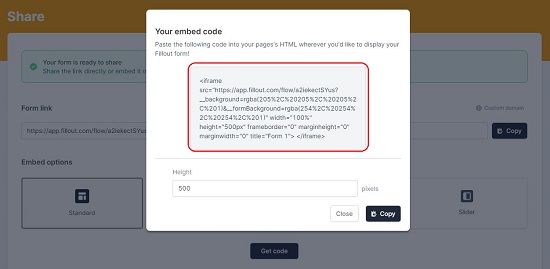
12. Once you have added and configured all the required fields, display elements etc., click on the ‘Preview’ button at the top right to have a look and feel of the form when it is published. When you are satisfied with the Form, its appearance, fields, etc. click on Publish. You can now copy the URL of the form to share it with the recipients or click on any Embed options like Standard, Full screen etc. to get the Embed code.
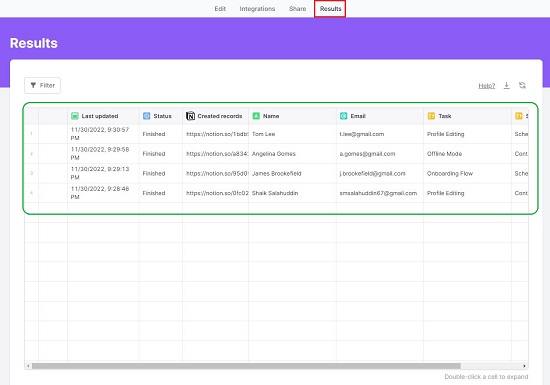
13. Once the form submission starts, the results can be viewed by clicking on ‘Results’ in the horizontal bar at the top.
The free version of Fillout allows you to build unlimited forms with unlimited questions but restricts the form responses to a maximum of 1000. To overcome this limitation, you must subscribe to their paid plans that also offer Collaboration features, Advanced customization, Form analytics and Integration with Microsoft Teams and Slack channels.
Closing Words:
Fillout allows you to make stunning forms ranging from Simple to Complex ones while storing the responses in Notion Tables. No coding skills is required to build the forms and anyone can do it very easily and effectively. I tried my hand at building a couple of forms connected to Notion tables in just a few minutes and they worked beautifully.
Click here to navigate to Fillout