Radiance is a Chrome Extension that you can use to Record your views and thoughts as voice notes, concerning something you see on the screen, perform screen recording as well as share them asynchronously with your team members directly from your browser. Each voice note / screen recording includes a Link (URL) and the screenshot of the website / web-app etc. so that the reference to the page is consistently maintained because everything revolves around it.
A vast majority of our time at work is spent on web apps such as GMail, Saleforce, Zoho, Hubspot, Word, Excel and more. Often, we come across situations where we feel the need to comment or put forward our opinions about something that we see on the screen, like for example a dashboard, visual chart, an app screen etc. It would be great if there was a way to generate voice notes without leaving the confines of the browser along with the recording of the screen that is being referred to, and then sharing this with others. This is exactly what is achieved by Radiance Chrome Extension.
It allows you to convey your opinions, comments, expectations etc. regarding any specific project that you are involved with, directly from the web application that you use and then share it via GMail or a Slack Channel. Radiance works without a webcam, and this was done deliberately so that you can feel comfortable while sharing your true thoughts with others which may also border on some criticism. Once the voice notes and screen recordings are shared, teams can start commenting or debating on the voice notes to further carry the discussion.
How it Works:
1. Download and Install the Radiance Chrome extension using the link that we have provided at the end of this article.
2. Make sure you have connected your microphone to the system and verified that it is working correctly.
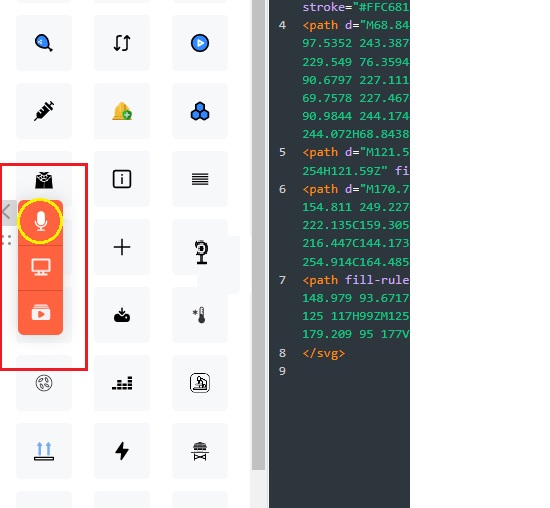
3. Navigate to the website or web application whose screen you wish to comment on and record. Watch for a tiny arrow in left side of your screen in the middle. Hover your mouse over the arrow and click on the ‘Microphone’ icon to start the Voice Recording. A count down will be displayed on the screen so that you can be ready for the process.
4. Start recording your voice notes speaking about your opinions and suggestions of what you observe on the screen. While you are clicking and navigating to the relevant pages, your screen will be recorded in real time along with your voice.
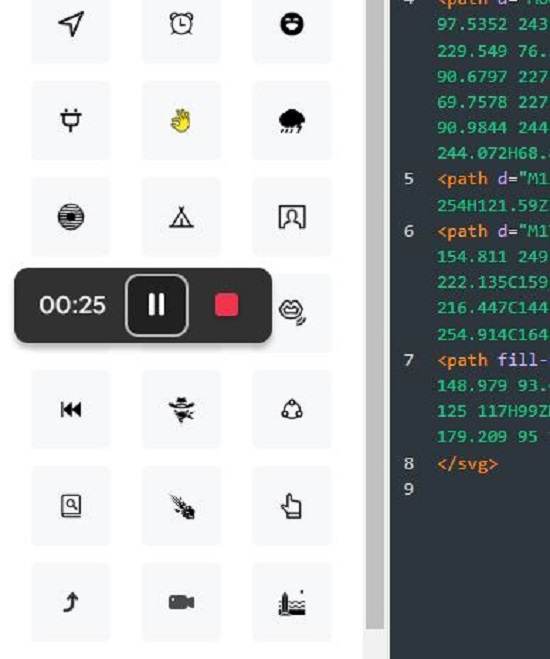
5. You can pause the recording by clicking on the ‘Pause’ button. When you wish to stop the recording, click on the Stop’ button.
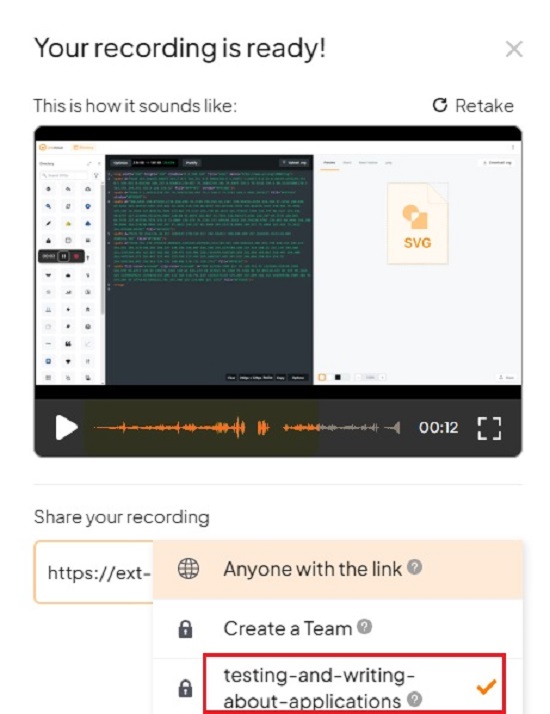
6. When you stop the recording, a popup box will be displayed where you can copy the link to your recording as well as select if you want to Share it with anyone who has the Link or Share it only with a specified Team (GMail / Slack).
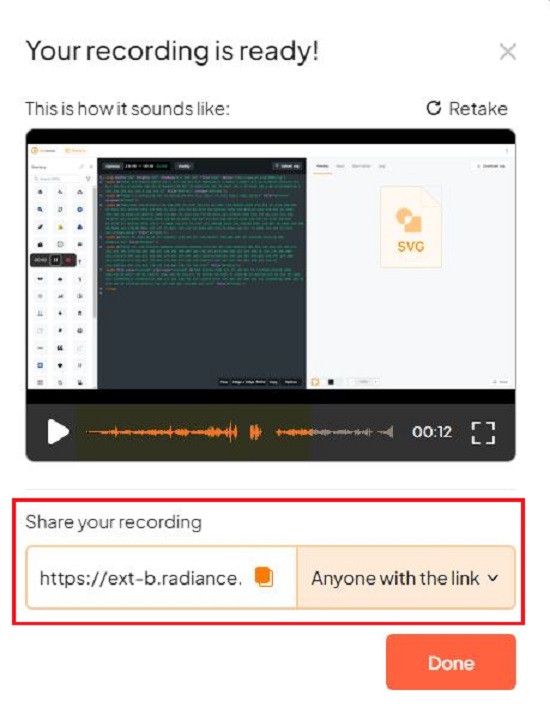
7. If you choose to share it with anyone, just copy the URL and send it across to whomever you desire. No further action will be required.
8. If you choose to share the recording with specified team members, click on ‘Create a Team’ and select either GMail or Slack. Using the GMail option, you will automatically receive an email when you post a recording to this team. You can then forward this email to whomever you desire. This option is currently not working due to issues with the Google Verification Process.
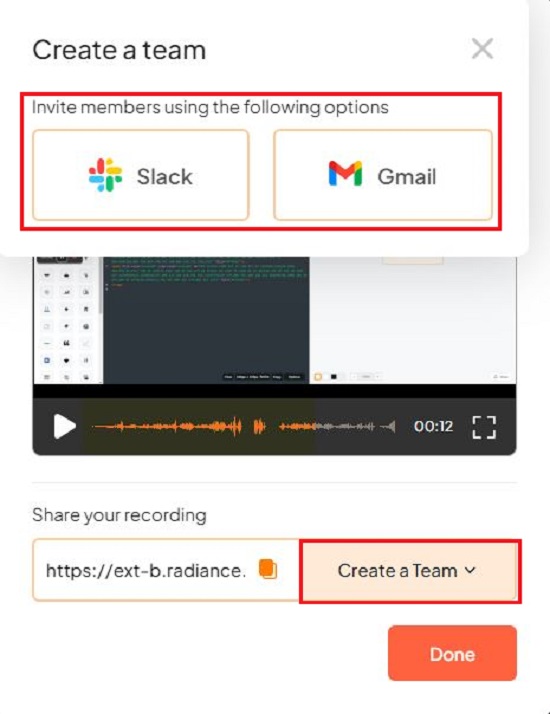
9. If you select Slack, you will be asked to login and select the required Slack channel. Subsequently, you can automatically post your recordings to the Slack channel that you added, and the channel members will be able to access them.
10. If you want to choose which part of the screen you wish to record / share, hover your mouse button over the tiny arrow as earlier and click on the ‘Screen’ icon.
11. A popup will ask if you want to share the entire Desktop, an Application Window, or a Chrome Tab. You can also choose to share System Audio by enabling the checkbox at the bottom left of the popup. Further, the process of recording voice notes and the screen remains the same as we have described above.

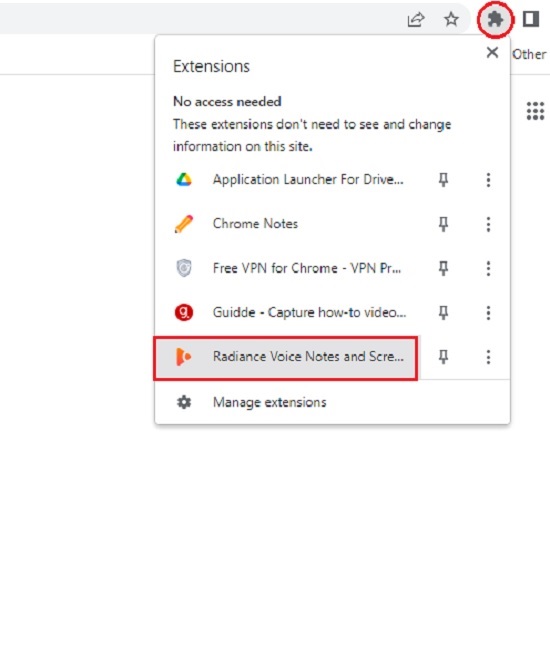
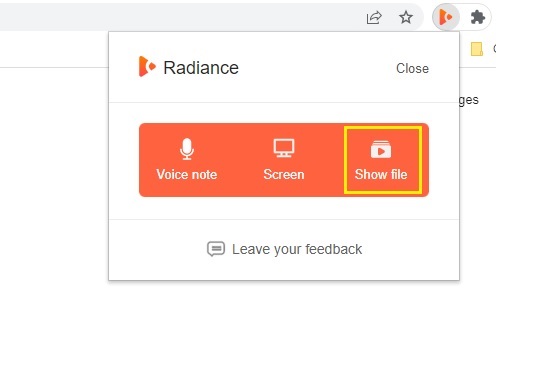
12. To view all your recordings, click on the ‘Extensions’ icon ahead of the address bar, select the Radiance extension and then click on ‘Show File’.
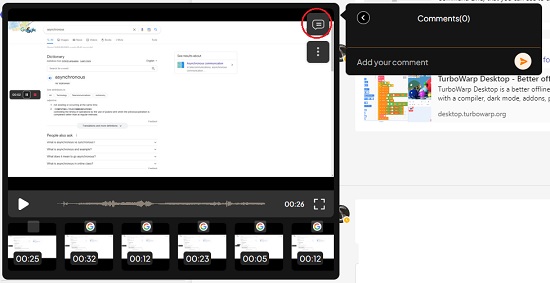
13. Your latest screen and voice recording will be displayed in a small window inside the browser itself. You can click on ‘Show all’ to view all the recordings and then play any recording that you are interested in by clicking on the ‘Play’ button.
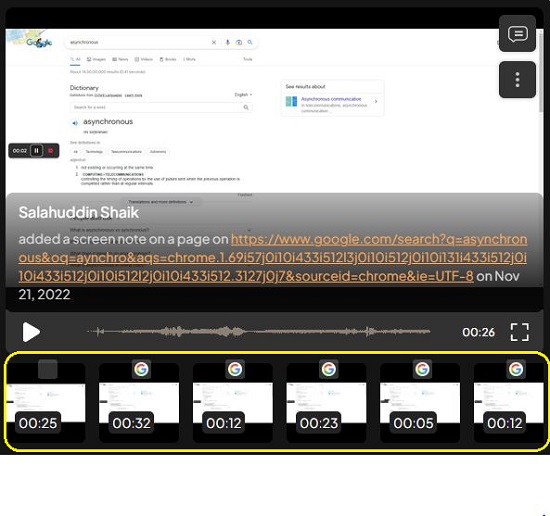
14. You can Share any recording from this window as well, by clicking on the 3-dots icon and selecting ‘Share’
15. To comment on any recording for further discussion, click on the ‘Comment’ icon at the top right of this window.
Closing Comments:
Radiance Chrome Extension is a neat tool to record voice notes of your observations and expectations on any particular part of the screen of a website, web application and more. I tested it for some time and found that it works successfully. It is extremely handy for development teams to comment on Dashboards, Login screens, Visual charts, Customer’s account screen and more while they are being designed and coded. Radiance is also very helpful for people who wish to create tutorials or instructional videos of web applications replete with voice and screen recordings. Although, the integration with GMail doesn’t work due to problems with the Google Verification Process, one can expect it to be done very soon as the Extension has still not been launched.
Click here to navigate to Radiance.