Flip is a free video discussion app from Microsoft, that can be used to create groups to share videos, connect with each other and build a community. This tool was earlier called Flipgrid and Microsoft has now changed its name to Flip and introduced a variety of innovations and new features. If you are already an existing user of Flip, you will find all your existing groups and videos in place when you sign in to Flip.
It is a great tool for Educators to build classrooms or study circles where students too can articulate their ideas through video sharing and learn from one another. Educators can also use their Google Classroom list to simplify the process of group creation.
Anyone can use it to create a peer-to-peer support group for discussions or family and friends groups to share any personal events like engagements, graduations, and more.
Even if you aren’t interested in leading a group, you can still use Flip to instantly create any video that you want and share it online from your ‘My Videos’ page. For example, you can create simple tutorial and instructional videos, your organization’s success story or perhaps a small video for your resume to stand out.
How it Works:
1. Navigate to Flip and Sign up for a Free Account. using your existing Google or Microsoft accounts.
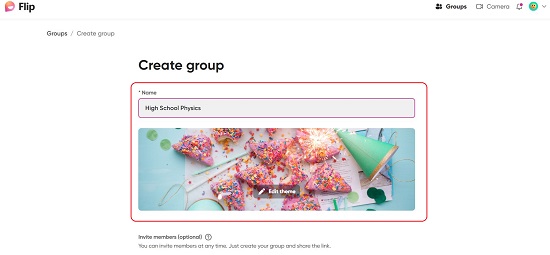
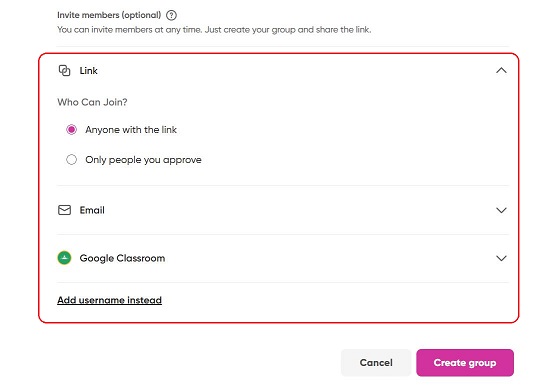
2. Click on ‘Group’ -> Create a Group and assign a Name and Theme for the Group. Depending upon your requirement, you can choose who can join the group such as anyone with the link, only people you approve, or by way of email address etc. You can also import your class roster from Google Classroom (if any) to ease this process. For this example, I will be going ahead with ‘Anyone with the link’. Click on ‘Create Group’ to finish this process.

3. In the popup that appears, click in ‘Copy Link’ and share it with the people whom you have invited to the group. You can also click on the QR Code icon and download and share the QR Code with the group link. Alternatively, you can use the icons at the bottom of this popup to share the link in Google classroom, Microsoft Teams, Twitter etc. You can also click on the Embed icon to copy the embed code and use it in your website. Close the popup once you have done the needful.

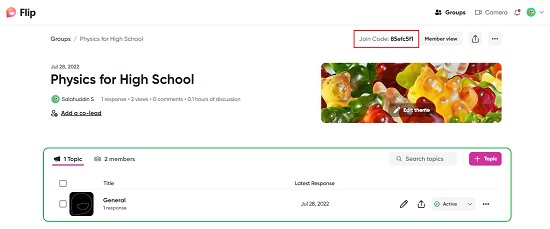
4. The Flip Dashboard will be displayed where you will be able to see the Group that you just created. You can click on the ‘Join Code’ to copy it to the clipboard and use it to join the group (if you are invited) in case you do not have the group link.
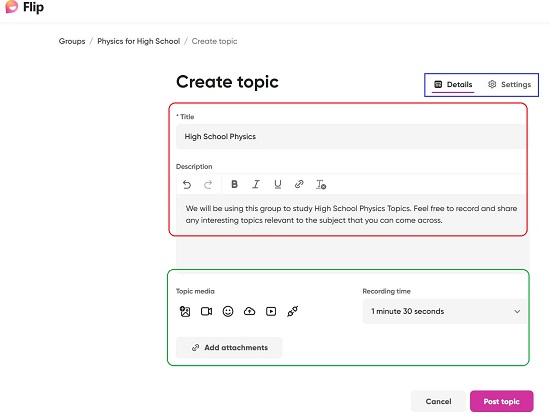
5. The next step is to add the Topics that you will be discussing in the group. A default topic named ‘General’ is added automatically to assist you. To add a new topic, click on ‘Topic’, assign a Name to it, type the Description and set the recording time limit from the available options. To add any attachments to the Topic, click on ‘Add attachments, whereas to upload any Topic media such as an image, recorded video, YouTube / Vimeo media and more use the relevant icons.
6. Click on the ‘Settings’ tab, if you wish to change or customize anything related to the Topic such as start / end date for the topic, topic status, comments moderation, response moderation, camera settings and more. Once you are satisfied with all the Topic details and settings, click on ‘Post Topic’ and it will appear on the Flip Dashboard.

7. Click on the name of the Topic to view the Video Responses, Comments etc from the members once you have shared the link and they start responding.
8. You can use the icons beside the Topic to Edit the details or Share it in a way similar to how you shared the group in the steps above. You can click on the 3-dots icon to duplicate / delete the topic, move it to another Group and more.
![]()
9. Anyone who is invited to the group can use the Group link copied above in their browser or use the Group code. To join, you must sign in using your Microsoft or Google account.
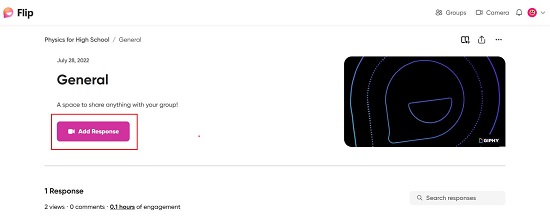
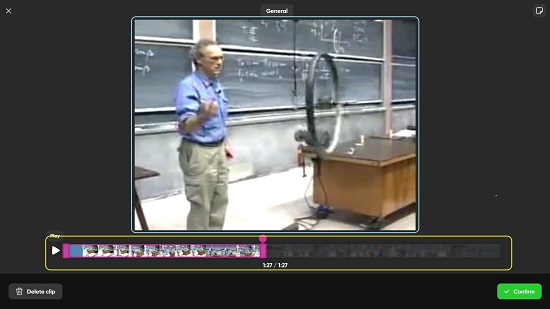
10. Click on the topic name and then click on ‘Add Response’ to record your video and take part in the topic discussion. You can also import a pre-recorded video (.mov, .mp4, webm format) from your local disk if required. You can trim your recorded or uploaded videos by dragging the handles to make them smaller in case they are above the designated time limit.
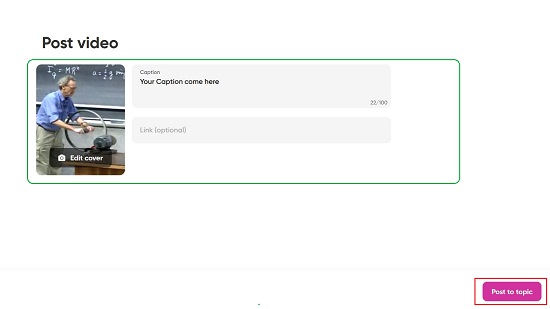
11. Click on ‘Next’, provide the Caption if required and choose the Cover image of the video. You can select any frame from the video, upload a photo, add a name tag etc. to be used as the cover image for the video. Once you have finished, click on ‘Post to Topic’, to submit your Response.
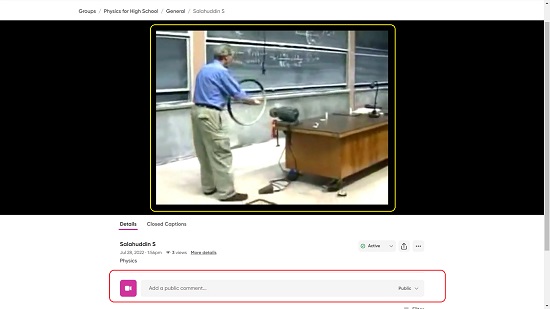
12. Once a Video Response has been submitted, group members can view it by navigating to the Topic under which it has been posted. Additionally, members can add a Public / Private comment about the Response that can be read by all or only a certain member.
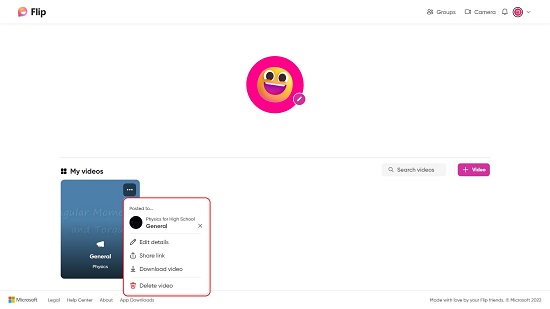
13. Members can access all their Video Responses from the ‘My Videos’ section on their Profile page and download / share their videos. They can even record / upload new videos directly from the same page by clicking on the ‘Video’ icon.
Final Comments:
I tested Microsoft Flip extensively and found it to be an awesome tool to create groups and shared video responses with one another so that a community can be built. It’s a great boon especially for educators and team leaders to engage and be in touch with their students / team members. The integration with Google Classroom is really handy and helps users to utilize the best of both the applications. Go for it and reap the benefits of Flip.
Click here to navigate to Microsoft flip and start building an interactive community.