Taskatom is a free web application that allows you to Manage and Track your Projects and Tasks. With Taskatom, it becomes very easy for you to track the time across multiple projects quickly. It also supports client access, automated invoicing and the provision of creating unlimited workspaces and projects grouped as per your requirements.
Let us briefly go through all the built-in features provided by Taskatom.
Features:
- Track multiple projects: With Taskatom, you can create, manage, and track unlimited projects with user and group level permissions. Users and teams can be assigned to projects to log the hours. Also, when working on a project you can track billable as well as non-billable hours.
- Task Monitoring: You can easily create tasks with no time limits and track them. Users are allowed to log hours for all the tasks executed by them. Tasks can be grouped with tags, job codes and projects to run custom reports. Task log can be viewed for custom date ranges.
- Invoice billable hours to clients for direct payment: You can create Unlimited Invoices that can be quickly generated and sent to customers for payment through Stripe integration. You can schedule the invoices or send them manually with payment reminders and invoice tracking.
- Manage multiple contracts and businesses from a single account: The Workspaces concept of Taskatom allow you to manage multiple clients with multiple projects. You can easily group your projects and invite clients to join the workspaces with easy workspace reporting.
- Optional client access: You can optionally create client accounts with access to easy project status updates, automated reporting, and notifications.
- Email and Push notifications: With Taskatom you can get notified at certain important events like when your project is crossing budgets, nearing expenditure, dropping revenues etc. These notifications and emails help you to always be on top of things so that you can focus more on the project execution rather than its health.
- One-click import of users: Taskatom allows you to import users through CSV format files in just a few clicks. If you are switching from Toggle or Clokify, you can get started using the one-click feature and continue from where you had left off.
Let us now briefly understand the working of Taskatom.
1. Click here to navigate to Taskatom and sign up for a free account using your Google credentials. You need to activate your account using the email sent to your inbox.
2. This will take you to the Taskatom dashboard from where you can accomplish all your works.
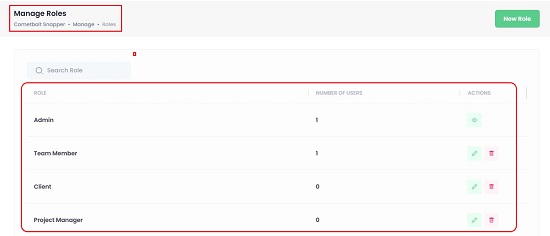
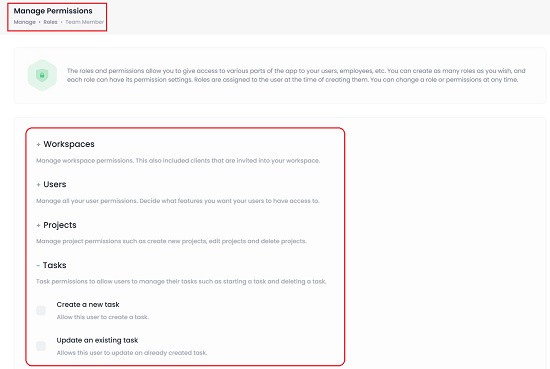
3. At the outset, click on ‘Manage’ in the toolbar at the top and choose ‘Roles and Permissions’. Observe that four roles have been defined by default – Admin, Team member, Client and Project manager. To create new roles, you can click on the corresponding button at the top right. To view and manager the permissions for any roles, click on the ‘Pen’ icon under actions and then click on any section like Workspaces, Projects, Tasks, etc to configure the permission for it.
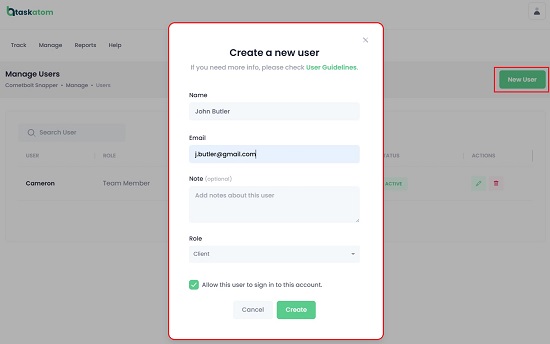
4. To add Users, click on ‘Manage’ in the toolbar at the top and choose ‘Users’. Click on ‘New User’. Fill the Name, Email and specify the Role using the dropdown list and click on ‘Create’. You can also choose to allow the new user to sign in using the account you created from the email address.
5. Now is the time to go ahead and create your workspaces. Click on Manage | Workspace and then click on the button ‘New Workspace’ to create it.
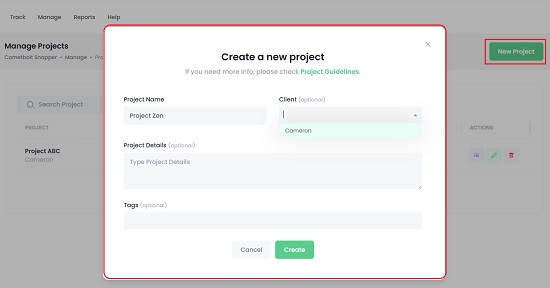
6. Next, click on Manage | Projects and create a new project by clicking on the button at the top right. You must type the Project Name, optionally fill the Details and Tags for it and finally click on ‘Create’. You can use the Client dropdown to assign a client for the project. Once a Project is created, it appears on the screen under the list of projects.
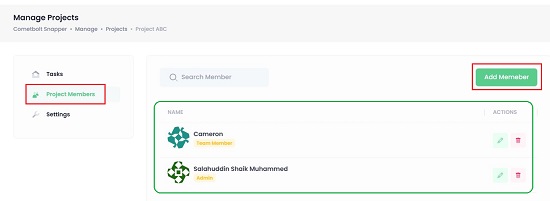
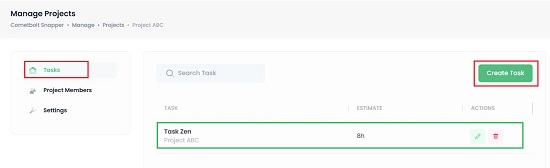
7. To manage the project such as adding Project Members, creating Tasks and more, click on the hamburger icon under Actions.
8. Click on ‘Project Members’ and then click on ‘Add Member’ to invite people to collaborate on this project.
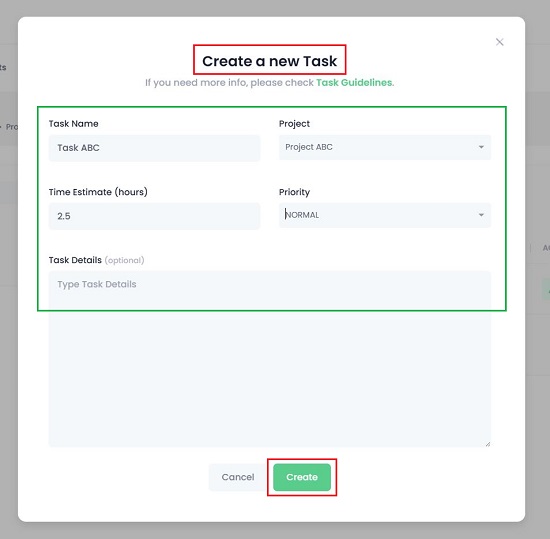
9. Next, click Task | Create Task and input the Task name, Estimated time (in hours) Task details, choose the Project and Task priority using the respective pulldown menus and click on ‘Create’.
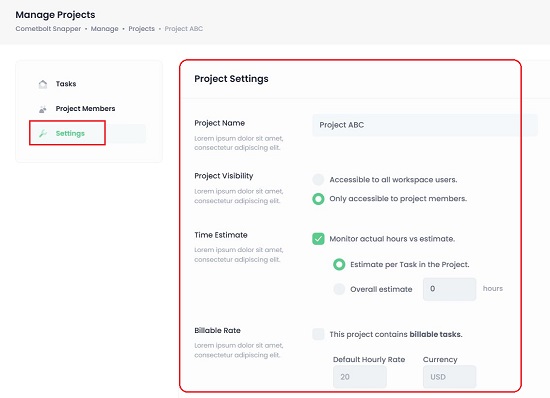
10. Click on ‘Settings’ to configure the settings related to the Project such as Project visibility, Billable rate, Time estimate (actual vs estimated hours) and more.
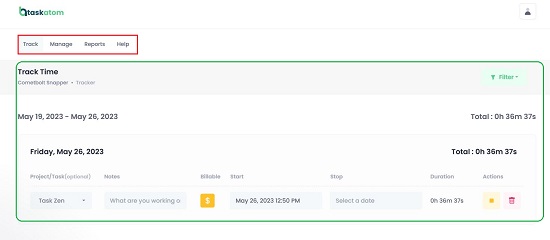
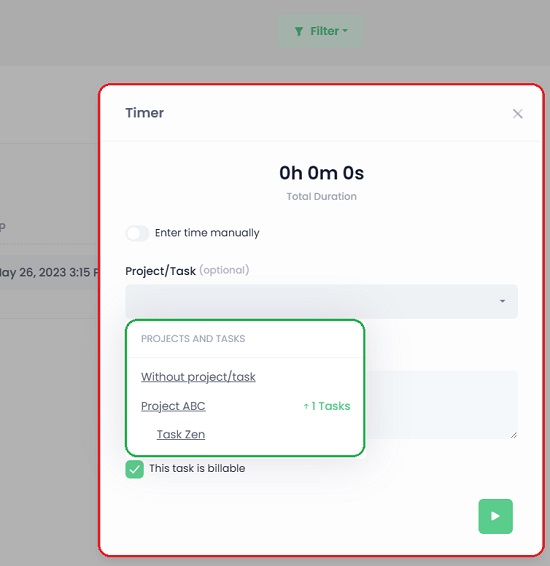
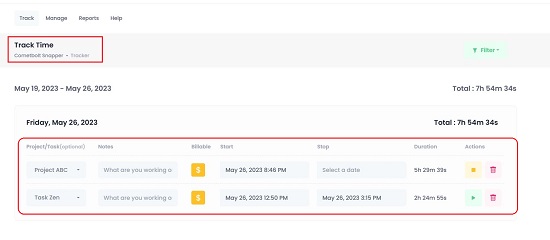
11. Now click on ‘Track’ on the toolbar at the top and then click on the ‘Timer’ button at the bottom right. Use the Project / Task dropdown to choose the Project or Task that you wish to track, choose if the task is billable and finally click on the ‘Run’ button at the bottom right to start tracking. Additionally, you can use the toggle ‘Enter time manually, and specify a Start and Stop date for the task. The task being tracked will now be visible on the page. Repeat the same process for all the tasks that you wish to track.
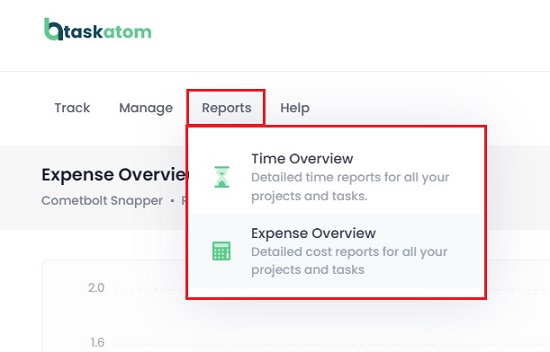
12. To generate reports, click on ‘Report’ in the toolbar and choose the type of report such as Time overview or Expense overview.
Closing Comments:
Taskatom is a web application that can be used to track the time across multiple projects and tasks easily and quickly. You can group your projects is different workspaces as per your needs and also generate some handy report to overview the Time and Expenses parameters. It is great that such a tool has been given forever free to users. Go ahead and try it out and let us know what you feel about it.
Click here to navigate to Taskatom.