Scribble Maps is a free website to edit, draw, and share maps. The website makes it really easy and fast to edit the maps and make them even more useful for sharing with others. You can easily draw on maps, annotate them, show routes, place markers to highlight important places, add information about places, and much more. The website provides you with different types of place markers so that you can use the one which highlights your purpose the best. You can also choose the map provider. The available options are Google, MapBox, White Board, Open Street Map, ESRI, and Night Sky. It provides with an easy to use toolbar which includes all the important tools which you will need when it comes to editing maps.
You can save the maps and share them with anyone you want. You can save them as an image, KML file, and GPX file. As for sharing, you can share via Facebook and email along with the option to embed the edited map on any website and blog. The website has some paid options as well that let you do even more cool stuff, like, make your maps private, remove ads from map, save maps as PDF and SHP, and some more features. For most of the purposes, though, free version should just work fine, and that’s what I am going to talk about henceforth.
Editing and Creating Maps Using Scribble Maps:
Scribble Maps website doesn’t force you for registration for letting you access its features. You will get access to all the features of the free account even if you’re not registered, but all your activities including maps will be saved as anonymous.
Now, let’s start creating our own map. For that, click on Create Map button. This will take you to the main interface of Scribble Maps, and this is where all the magic happens. I especially like the interface and the way all the tools and options have been nicely tucked in there.
In the main interface, you will see a big map (it’s a map maker service; what else would you expect ;)). You will see the map editor with the tools at the top and option to choose the map provider at the bottom right (choose from Google Maps, Map Box, Open Street Maps, etc.). You can also switch between Hybrid, Satellite, Road, and Terrain
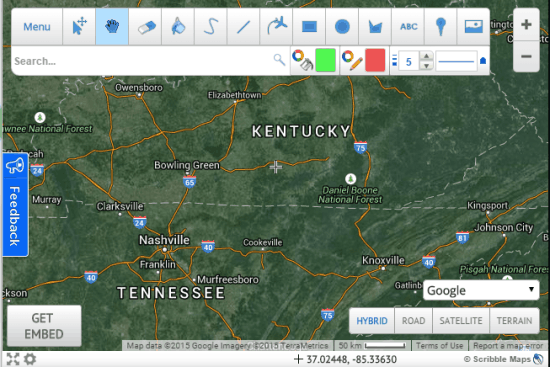
Once you have the map area open, you can start making your own map. All the tools that you need for that are in the toolbar that is floating on top of the screen.
The toolbar has 13 tools for helping you edit the maps fast and easy.These tools are: Move & edit overlay, Move the map, Erase an overlay, Change color of overlays, Scribble on map, Draw a flight line, Draw a rectangle/circle/polygon, Place a text label, Place a marker, and Place an image. To use any of the tools, you simply have to click on that particular one to select it.
If you have ever worked with MS Paint, you can use this map maker; it’s that easy.
So to create a map, the first thing you would want to do is to move the map to the location that you want to play with. For that, either you can keep zooming / panning the map. Or, simply enter the address in the search bar at the top. I did that, and the map was immediately centered around that address. You would probably need to zoom in to get a better view of the area you are trying to map.
Once you’ve found the location of your interest, it’s time to mark it. To do so, click on the Place a marker tool, which will give you various categories of markers. Choose the one which suits your need.
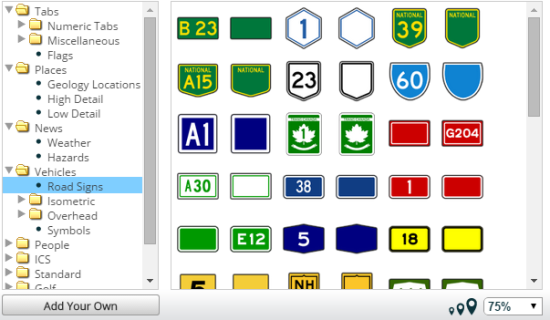
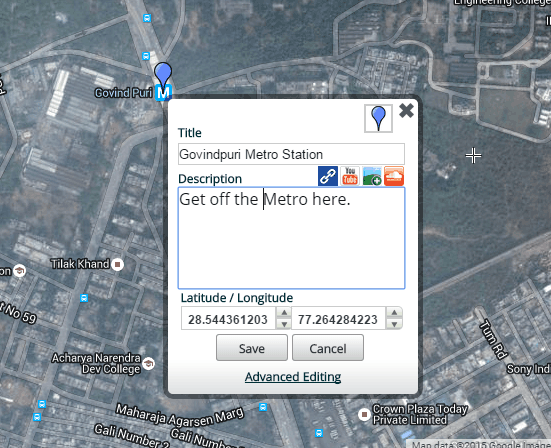
Since I only have to pinpoint the nearest metro station, so I will go with the simple marker. While placing the marker, you can also choose to provide the title and details about it. It will help the map viewers know why you’ve put the marker there.
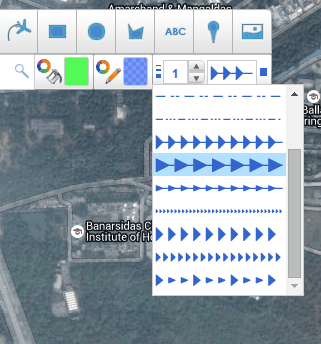
Now, I want to show the route to my home. To do this, there are various types of lines available. Choose the one you like and start dragging the mouse from the point of location in the direction of the route.
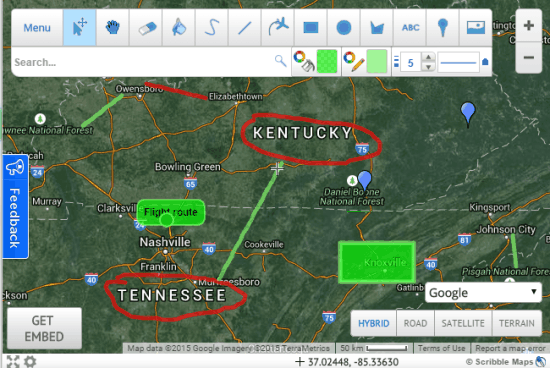
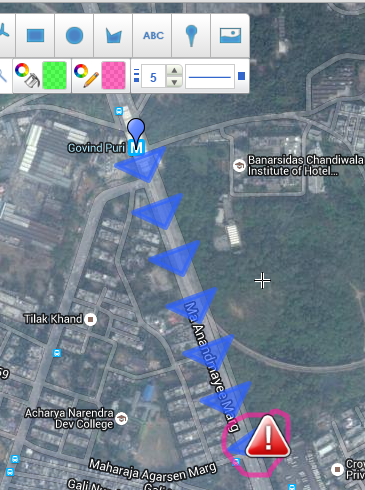
As for my route, I have chosen the one shown in the screenshot below. But on the route, there is a roadblock which has caused the traffic to slow down a little. So I want my friends to be aware of that. So, let’s just put a big circle there along with the road sign. To put the circle, you can choose the shape tool or simply scribbling tool for the free-hand drawing. And for the road sign, you again need to go to the place a marker tool and choose the appropriate marker.
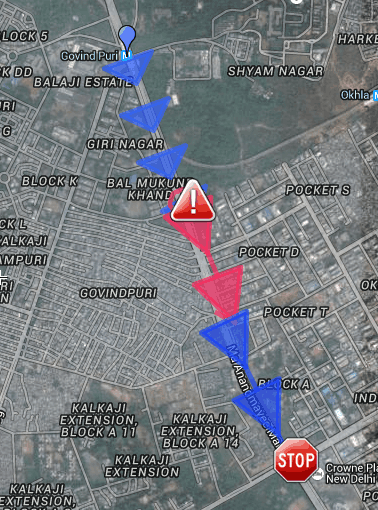
Now I also have to mark the length of the route which is running slow, I can use different ways like another marker at the place where it get backs to normal. But, I will just show that specific length of traffic with a different color. You can choose the color from the color picker tool. You can see that I used a different color for showing the slow traffic and went back to the original to show when the traffic will get back to normal speed. At the end of the route, I have again put a mark to signify the destination, my home. I have used the Stop mark from the markers, but you can use any marker you want.
You saw that I used different tools and lines to show the route. Each of the lines and markers that are visible on the map is known as an overlay. You can easily move or delete any of the overlay and even change the color of it using the corresponding options available in the toolbar.
So my map is complete and I can now save it and share it with my friends. To do this, I will click on the Menu button from the toolbar. It gave me the pop-up shown below. You can see that the options are categorized under 3 sections: Scribble Maps, Export Map, and Share.
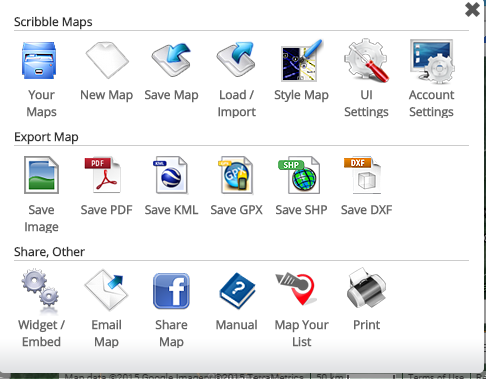
- Scribble Maps: You can access the settings related to your account from here. You can save the map, browse saved maps, create new map, load/import map, etc.. There are also UI settings which let you choose the measurement unit, length unit, area unit, etc..
- Export Map: As the name suggests, here you will find the options to export the map. The free version supports only Image, KML, and GPX.
- Share: Choose your favorite medium of sharing from here. Embed on website or share via Facebook/email.
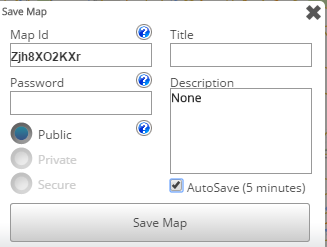
When you will choose the save the map, the Scribble Maps will ask you to fill in a few details. These are Map ID, Password, Title, and Description. The Map ID is automatically generated by the website, but it can be changed. However, the ID chosen by you must be unique. As for the password, you can choose to leave it blank if you’re logged into your account. Otherwise, you have to provide a password so that no one else can edit your map. There is also an option for enabling the auto-saving of maps (every 5 minutes).
So you saw, how easy and quick it is to create and share maps with anyone you want.
You may also like: 4 Free Software to Download Google Maps for Offline Use.
Final Verdict:
Scribble Maps is an awesome website to create, draw, edit, and share maps. I really loved using the service as it is really easy to use its tools. There are no complexities whatsoever. The support for KML file makes it even better. Do give it a try, you will like it.