Servicejoy is a free online invoice generator with options to accept payments via PayPal, Authorize.net, and Stripe. If you’re looking for a simple but powerful invoicing application, then “Servicejoy” is probably one of the best option. It lets you easily create and send professional looking invoices to your clients. You can add separate items on a single invoice and describe them with photos, emojis, and text (with smart formatting) to make them more effective. Apart from that, it also allows you to create recurring invoices and send them to specific clients automatically. If you want some assistance while creating invoices, then it also has the option to invite other users for collaboration.
Similar to other online invoice services such as Tinyinvoice, ZipBooks, and Invoice Ocean, it makes your client invoicing process much easier. Servicejoy is not limited to invoicing, as it also allows you to add & track expenses, create & assign tasks, create estimates, set late payment reminders, set recurring invoices, and view reports.
Note: The free version is limited to 300MB file storage, 1 account owner, and only 5 clients. These limitations can be removed by upgrading to the premium version of Servicejoy.
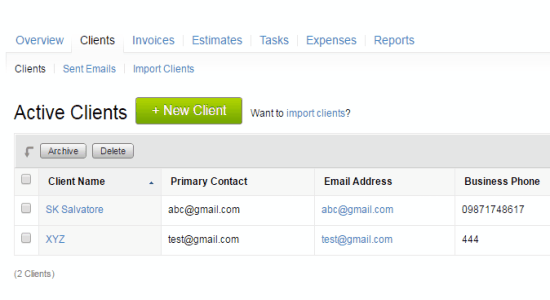
Let me explain how to create and send invoices along with other features of this service. When you sign into Servicejoy, you will see various tabs at the top named, Overview, Clients, Invoices, Estimates, Tasks, Expenses, and Reports.
How to Add and Manage Clients:
Step 1: The first thing you need to do before creating invoices is to add clients. The free version allows you to add and manage only 5 clients to whom you can send invoices or assign tasks.
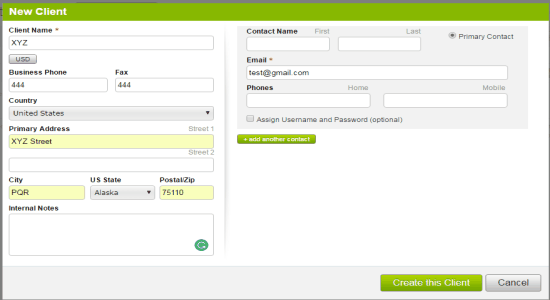
Step 2: Go to the “Clients” tab and click the “New Client” button to start adding clients. A window popup will appear where you can enter the client’s name, phone number, address, email id, etc. After filling the details, simply click the “Create this client” button.
Step 3: If you don’t want to add clients manually, then you can also import CSV or VCF files to add clients. All the added clients and their info will be visible on the “Clients” tab, as shown below.
How to Create and Send Invoices to Clients:
Step 1: Browse the “Invoices” tab and click the “New Invoice” button to start creating new invoices for your clients. After that, simply select a specific client from the “Client” drop down menu.
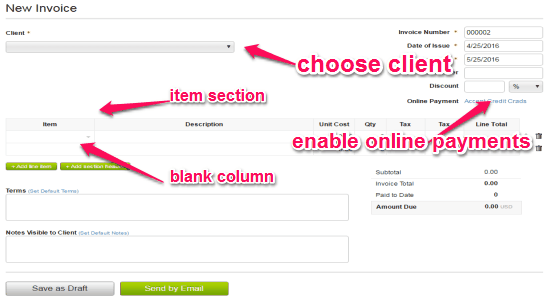
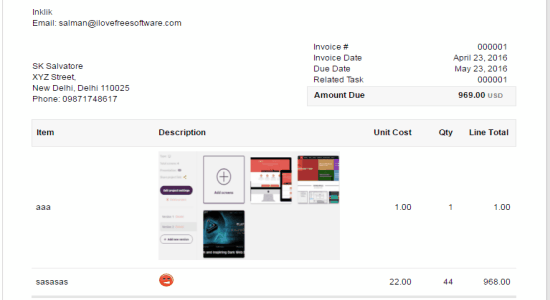
Step 2: Then you can proceed and enter the invoice number, issue & due date, PO number, discount, add items, define terms, and add notes. Add as many items as you want in a single invoice with photos, emojis, and smart text. Additionally, you can also enable the option for accepting online payments by connecting your PayPal, Authorize.net, and Stripe accounts.
Step 3: In the item section, click on the blank column and select the option “Add New Item”. After that, you can enter the item’s name, define unit cost, quality, taxes, and add a description.
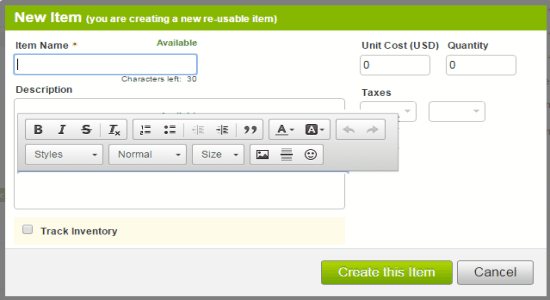
Step 4: As soon as you click on the description field, a toolbar will appear with all the rich text formatting options. You can type anything in the description field with various text styles such as subtitle, special container, marker, computer code, deleted text, inline quotation, etc.
Step 5: It even has the option to add images and emojis in the description field of any item. Adding images and emojis helps you make your invoices more interesting for clients. Once you’re done with adding items and other details in the invoice, you can simply save it as a draft or send it directly to your clients using the “Send by Email” button.
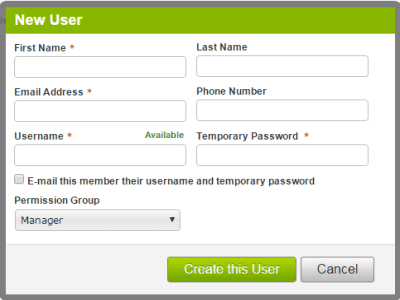
Step 6: If you want help from others to create an invoice, then you can invite them for collaboration. Go to the settings and select the option “Users & Permissions”. Click the “Add User” button and fill in details like name, email address, phone number, set permission (either as a manager or limited user), and assign a temporary username and password to the user for accessing your invoices.
How to Set Up Recurring Invoices:
Step 1: Servicejoy also allows you to set up recurring invoices such that the same invoices are sent automatically to the respective clients after a particular time period.
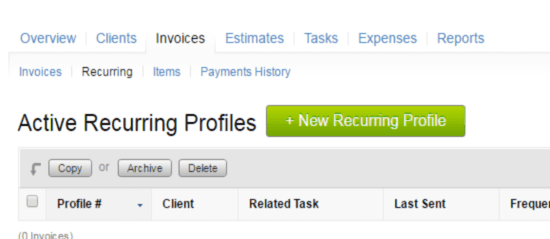
Step 2: To create a new recurring invoice, go to the “Invoices” tab and select the option “Recurring” from the sub-menu. Then hit the “New Recurring Profile” button to proceed and add a new recurring invoice.
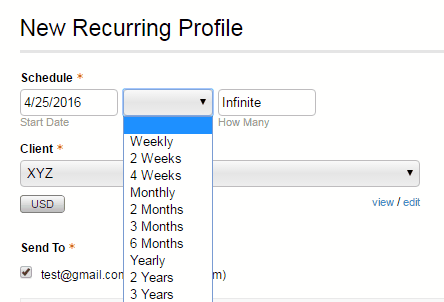
Step 3: To create a new profile, the first thing you need to do is define the schedule by selecting a start date, and other entities like “How Often” and “How Many”. In the “How Often” menu, you can select the time period either as weekly, 2 weeks, 4 weeks, monthly, 2 months, 3 months, 6 months, yearly, 2 years and 3 years for recurring invoices. Whereas the “How Many” menu lets you define the amount of invoices you want to send.
Step 4: When you’re done with scheduling the recurring profile, you can create the invoice in the same way as mentioned in the above section of “How to Create and Send Invoices”. After selecting a client and creating the invoice, click the “Start Recurring” button at the bottom. That’s all, the assigned client will start receiving the invoice after the selected time period automatically.
How to Add and Track Expenses:
Step 1: Go to the “Expenses” tab in order to start adding and tracking your expenses. Click the “New Expense” button and a popup will appear, where you can enter the expense details like amount, date, vendor’s name, expense category, and add notes.
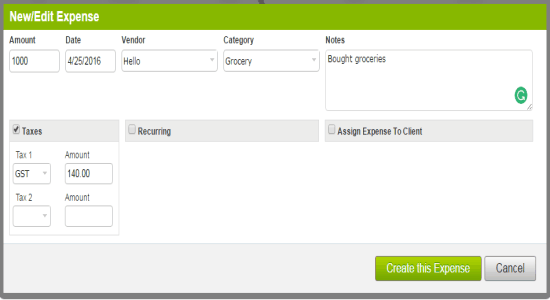
Step 2: You can create new vendors and expense categories by simply clicking on the associated menus. It even has the option to add taxes, set the expense as a recurring expense, and assign the expense to any of your clients. After that, click the “Create This Expense” button to save our expense. You can keep track of your expenses in the “Overview” tab or in the “Expenses” tab.
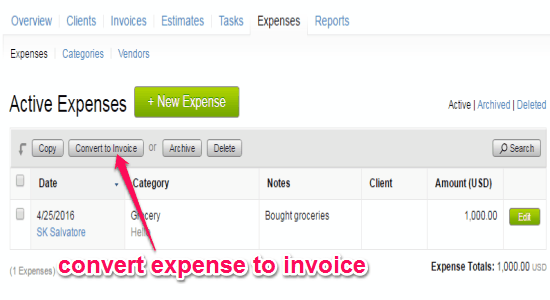
Step 3: Another great feature of Servicejoy is that you can convert all your expenses into invoices directly. For this, you have to first assign a client for each of the expenses which you want to convert into invoices. After that, in the “Expenses” tab select the expenses and click the “Convert to Invoice” button as shown below.
How to Create and Assign Tasks to Clients:
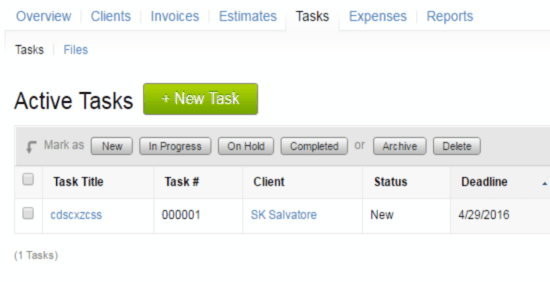
Step 1: Servicejoy also comes with an option to create and assign tasks to your clients. To create a new task, simply go to the “Tasks” tab and click the “New Task” button.
Step 2: In the new task window, simply choose a client first to whom you want to assign the task. Then you can enter the task title, task number, description, deadline, and set the status of the task. It also has an option to attach files like images and documents.
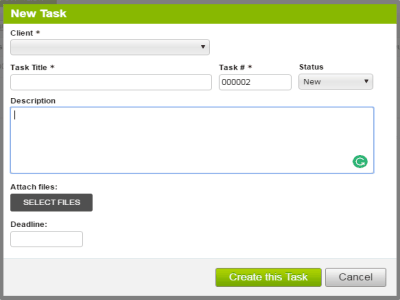
Step 3: When you’re done, hit the “Create This Task” button and the task will be assigned to selected client instantly. You can track all your active tasks in the “Overview” tab as well as in the “Tasks” tab.
How to Create and Send Estimates:
Step 1: Another great feature of this service is that it allows you to create and send estimates to your clients.
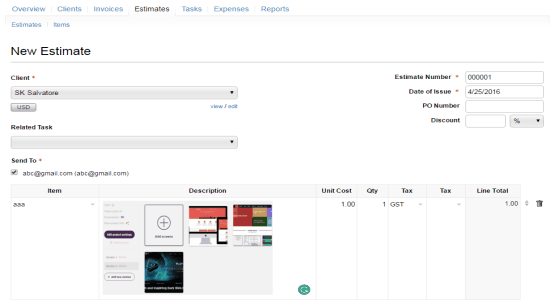
Step 2: To start creating estimates, simply go to the “Estimates” tab and hit the “New Estimate” button. As soon as you do that, the editor will open up where you can select a client for sending the estimate, enter the estimate’s number, date of issue, PO number, discount, add items similar to invoices, set terms, and add notes.
Step 3: After that, you can either save the estimates as drafts or directly send to your clients. Similar to the tasks, you can also convert all your estimates into invoices directly. Select any estimate from the list and click the “Convert to Invoice” button, that’s all.
How to Set Late Payment Reminders:
Step 1: Using this service, you can also set up late payment reminders such that if a client fails to pay then he will start receiving reminder emails prior to the due date assigned by you. To set up a reminder, got to the “Overview” tab and click the option “Set up late payment reminders”.
Step 2: You can set the number of days prior to the due date after which you want to send the reminder. After that, you can add a subject, write your message in the email body, and insert various email variable like the invoice number, invoice link, current balance, company name, and the client’s name.
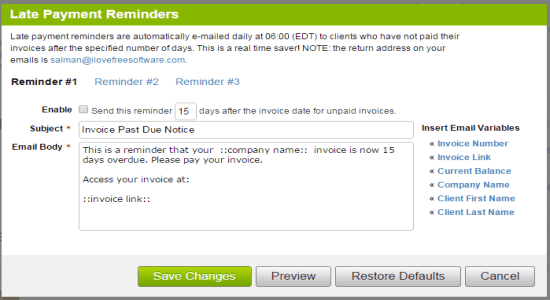
Step 3: It allows you to set 3 reminders with different dates for a single late payment reminder. That means you can create 3 different reminder emails with separate dates and messages. Remember, as soon as the client reaches the assigned dates, Servoicejoy will start sending reminder emails to the client daily at 06:00 EDT.
My Final Verdict:
Are you not in a position to purchase professional invoice services, then do not worry as Servicejoy comes to the rescue. You can use this service to create and send unlimited invoices to clients absolutely free. The catch is that the free version allows you to add and manage only 5 clients. If you’re dealing with a large number of customers, then I suggest you upgrade to the paid version.
The money which you’ll spend is definitely going to worth it, as apart from creating invoices you can also create & assign tasks, create & send estimates, enable online payments, add & track expenses, convert expenses or tasks to invoices, set late payment reminders, and much more.