Almost thirteen months after releasing Windows 8, which brought a huge change in the way Microsoft Windows OS used to look and feel; Microsoft officially released a newer improved version of Windows, Windows 8.1 on the 17th of October 2013. This Windows OS covered up various points and features that were lacking or were missing in Windows 8, so that the users can connect more to the newly released Windows 8.1 and use it with more ease and efficiency.
As Windows 8 was completely changed and was more focused for the touch device users. But Microsoft forgot that many of it’s users are still using the traditional medium that is the Desktops and Laptops, so there were various issues with Windows 8, for example missing Start Button, no option to customize Start Screen and apps etc. So, this forced Microsoft to release a newer and better version of Windows OS: Windows 8.1. And here is a good reason, why you should upgrade your Windows 8 PC to Windows 8.1.
So, this article is a simple Windows 8 tutorial on “How to upgrade Windows 8 to Windows 8.1”. There are various ways using which you can upgrade your Windows 8 to Windows 8.1. The best way is to go to the official website of Microsoft, that is www.microsoft.com or visit the official Windows Store website, that is www.windowsstore.com. If you don’t want to visit any of the sites, simply open the Windows Store app and upgrade your Windows 8.
Microsoft is giving out this Windows 8.1 as a free upgrade to Windows 8 users, whereas, people who are using Windows 7 or Windows XP, need to buy this Windows.
Here’s a how the Windows 8 users can upgrade to Windows 8.1:
1. Before proceeding make sure that you backed up your personal data. Though they won’t get removed, but it’s always good to have a back-up.
2. Check your PC has enough space, because the Windows 8.1 upgrade itself is of 3.63 GB.
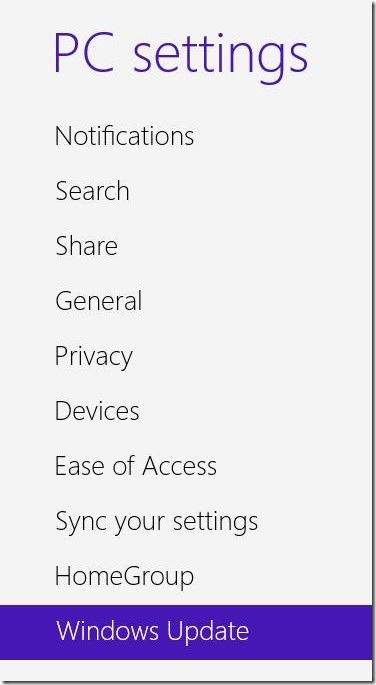
3. Make sure that your PC has all recent Windows updates. If you are using Windows 8 regularly, then probably your system is up to date. But, if you are not updated then open Windows 8 Settings Charm by pressing Win + I keys, and click on Change PC Settings.
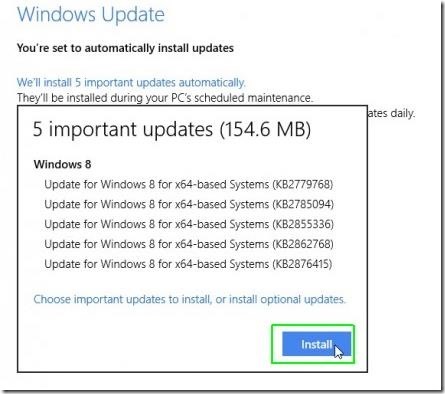
4. This opens PC Settings app; simply click on Windows Update. Click on Check for updates now button.
Once the updates are found, simply click on Install button.
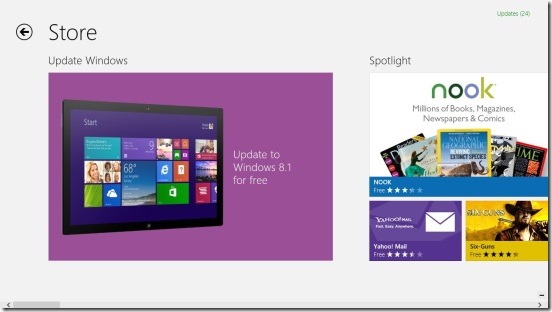
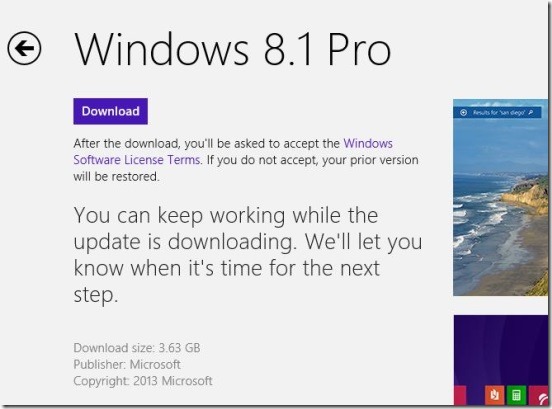
5. Now, open Windows Store app from Start Screen, and click on Update to Windows 8.1 for free button.
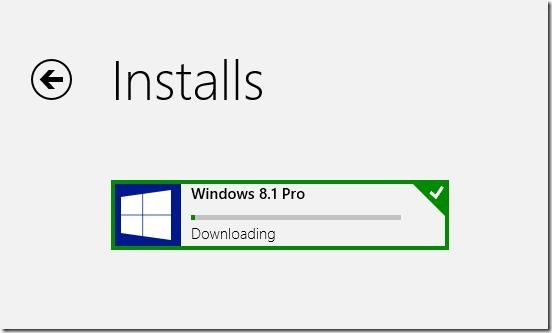
6. Click on Download button, to start downloading. It might take a while to download the upgrade, because of the size. But, the good thing is that you can keep working on what you were previously working, because this upgrade downloads just like any other Windows 8 app.
7. Once the download is complete, you’ll be prompted to restart, simply click on Restart Now button. The computer will then take time and at least one reboot to complete installing Windows 8.1.
8. Once the necessary files, drivers gets installed, you’ll be presented with Microsoft License terms, click on I Accept button to continue.
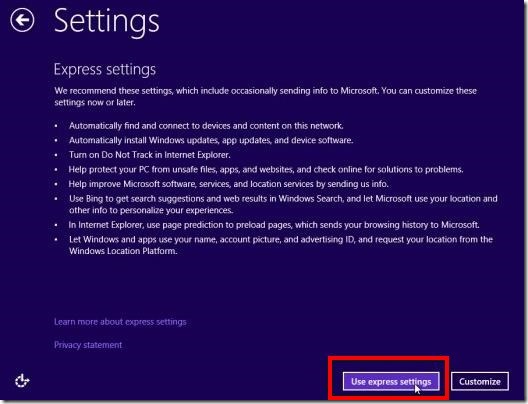
9. Then you’ll be presented with an option to either choose Custom Settings or Express Settings. The Express Settings installs all the requisite default settings in your computer. Whereas the Custom Settings gives you power to custom install the settings. Well, the Express Settings works well with most of the Windows users, so click on “Use Express Settings” button.
10. Then you’ll get next screen asking you to Sign in to your Microsoft Account. Simply sign in with any valid Microsoft account.
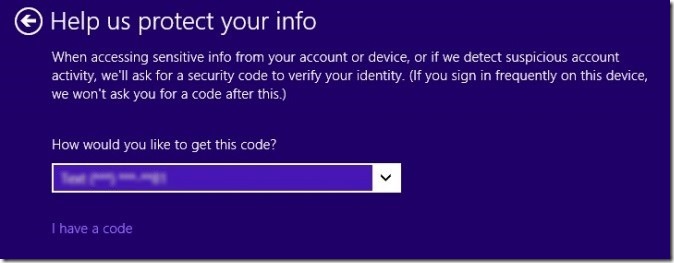
11. Allow Windows to send you a security code to your phone or email id. You can choose to skip this, but it’s better if you don’t.
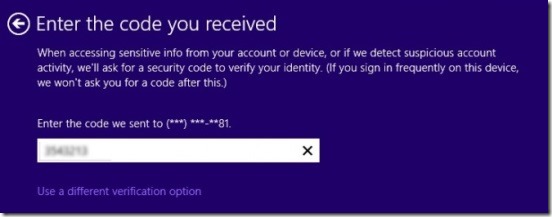
12. Enter the code that you received in your phone or email id, that you provided in previous step.
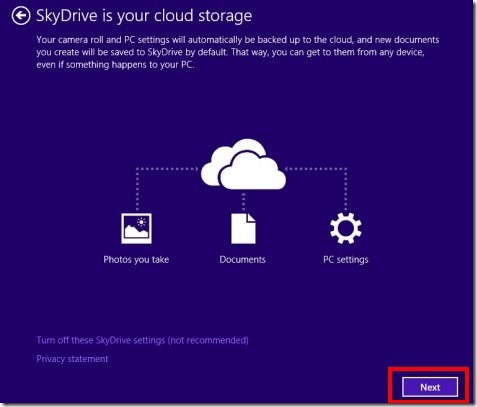
13. Click on Next button on the Skydrive screen.
You’ll be then asked to wait for a while, as Windows 8.1 is getting installed. Meanwhile you’ll get some messages in the screen that says the Windows is setting up and installing apps. After few minutes you’ll get the Windows 8.1 Start Screen, and you are ready to get started.
Conclusion on this Windows 8 tutorial:
So, that’s how you can upgrade your Windows 8 OS to Windows 8.1, and then start using the services of Windows 8.1.
You might also like this Windows 8 Tutorial on How To Group And Name Groups Of Tiles In Windows 8.
