Tame is a free online event manager with various useful features like event website, tickets, speakers, tasks, program, and more. You can use it to create unlimited events online and manage them by collaborating with your team. Apart from letting you simply create events, it also allows you to create tickets for the events, add speakers, organize program sessions, create and assign tasks related to the events, and much more. One of the best features is that for each event you create, it will automatically generate a website using the information from your events. Not just that, the people with whom you shared the event website will be able to buy tickets for the events from the website.
You will also find many other useful features like file management, summary dashboard, order & attendee management, etc. There are many other online event managers available, but none of them exhibits the features provided by Tame. So, if you ask me which free event manager I would use to organize an event, then “Tame” would be my answer for sure.
Using this Free Online Event Manager:
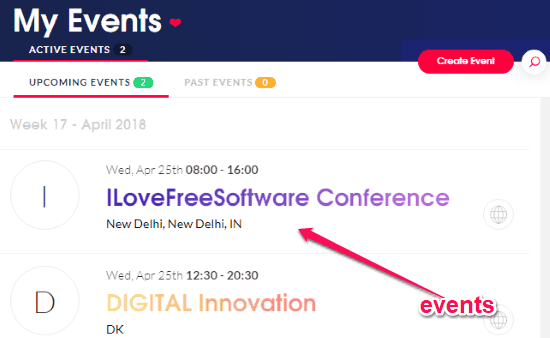
To get started, visit the homepage of Tame and then sign up for an account. After that, you can simply proceed and start creating events, tasks, programs, adding collaborators, speakers, and more. So, let’s see how to use the features offered by this feature-rich event manager.
How to Create an Event on Tame:
To get started, simply click on the “Create Event” button at the top of the “Events” window. After you do that, it will open up a popup window on which you would need to enter event details. It will ask you to enter the name of the event, event description, select timezone, date & time of event, location, and room information.
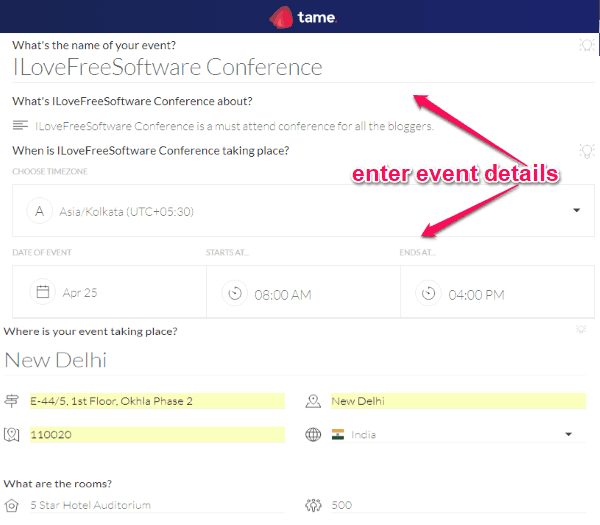
As soon as you’re done entering all these details, simply click on the “Create My Event” button at the bottom. This will create the new event and you can proceed to start creating tickets, adding speakers, programs, etc. You can create as many events as you want for free.
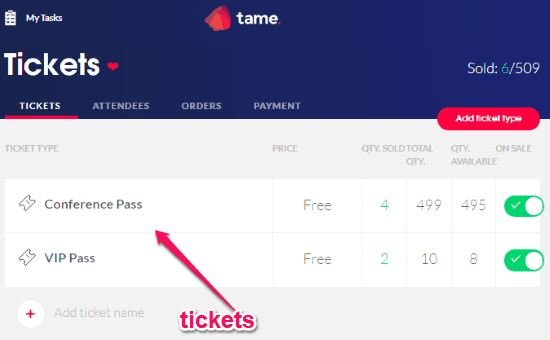
How to Create Tickets for Events:
After you have created an event, it will open up the event dashboard. Now, it will ask you to create tickets for the event. To do that, simply select the “Tickets” tab on the left panel and then hit the “Add Ticket Type” button. Once you do that, a slider window will open on the right on which you can enter the ticket information. You can enter a name for the ticket, add its description, choose price, enter available quantity, and then put it on sale.
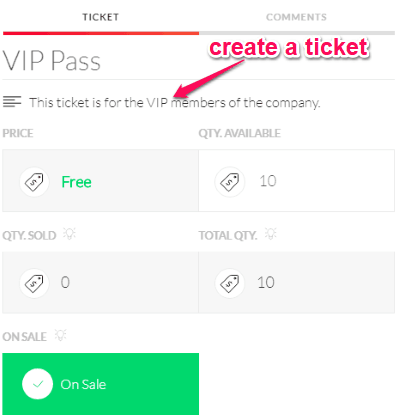
Then the ticket will be created for others to buy. There is no limit on the number of tickets that you can create. Do note that the free version of tame allows you to create only free tickets. For paid tickets, you would need to upgrade to the pro version. After creating tickets, you can go ahead and start adding event speakers and programs.
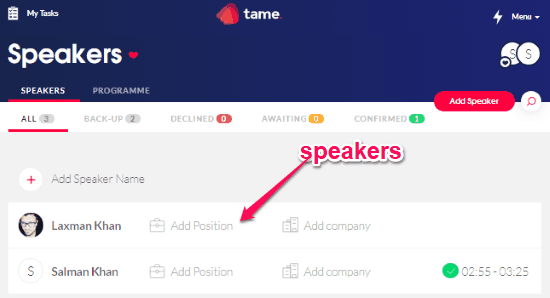
How to Add Speakers for Events:
To add a speaker, click on the “Speakers & Programme” tab on the left. After that, click on the “Add Speaker” button under the “Speakers” section. As soon as you do that, a slider window will open on the right and you would need to enter the speaker details. You can enter the speaker bio, last contacted date, the person responsible for the speaker, and add attachments (if any like presentations, travel tickets, etc.).
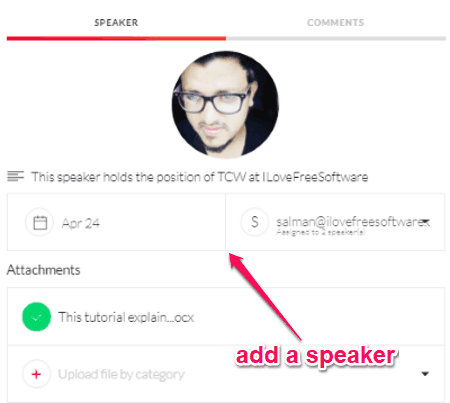
After that, it will ask for the contact information (like name, company, phone number, email, etc.) and social information (like Skype id, LinkedIn profile, Facebook, Twitter, etc.) of the speaker. Once done, the speaker will be added to your event. You can add as many speakers as you want.
When you have added a speaker, you can proceed and assign the speaker to any session of the event. For that, you would need to create programs first.
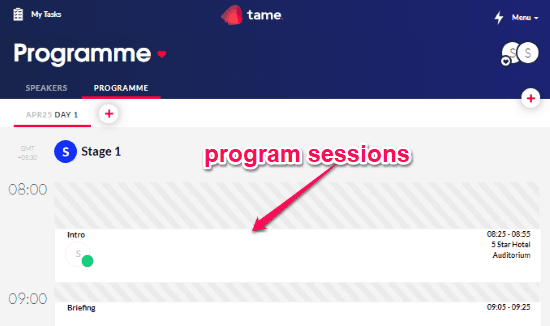
How to Create Event Programs:
On the right of the “Speakers” section, you will see the “Programme” section under which you can create programs for the entire event on time basis. To add a program, simply click and select the start time and the end time of the program on the timeline. After that, it will add a session which you can edit just by clicking on it.
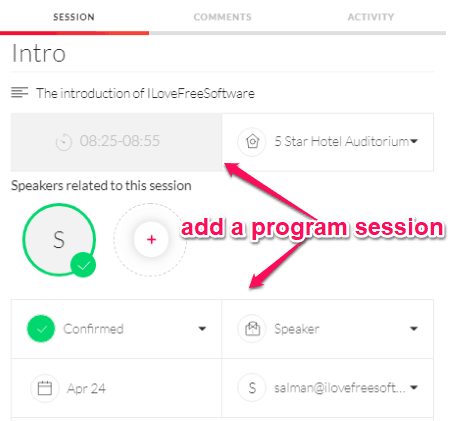
You can enter the session name, choose the room where it will be held, select which speaker will host the session, enter speaker’s (contact & social) information, etc. This way you fill the entire event timeline with program sessions of your choice. It also comes with an additional option to add more timelines for the current day or add more event days.
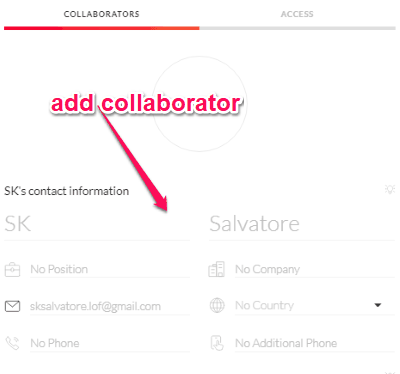
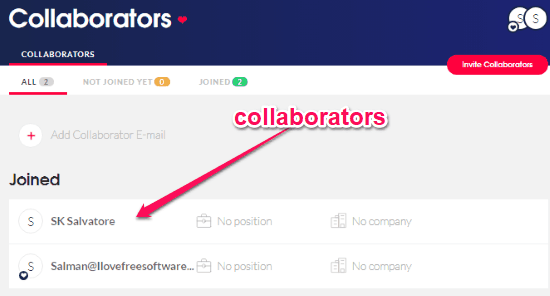
How to Add Collaborators to Events:
One of the useful features of this online event manager is that it allows you to invite collaborators to the events for helping you manage the events seamlessly and in time. To invite a collaborator, simply go to the “Collaborator” tab on the left and then enter the email of the collaborator. After that click on the added collaborator to edit other details. The details can enter are contact and social information like name, email, Twitter profile, Skype id, and so on.
This way you can invite unlimited collaborators to your events. The users can simply use the invitation email and join for collaboration in creating and managing events.
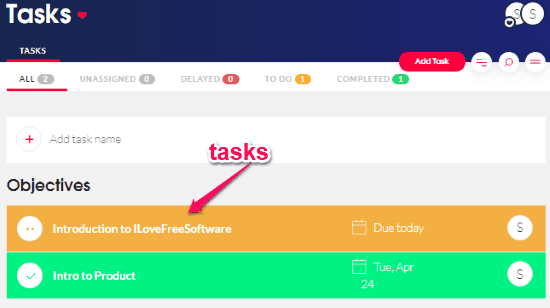
How to Create Tasks and Assign Collaborators:
Another useful and interesting feature is that you can create and assign tasks (related to the events) to the collaborators. To create a new task, click on the “Task” tab on the left panel and then select the “Add task” button. After that, you can see a slider window on the right on which you would need to enter the task name, add notes, set task status, add due date, and choose a category.
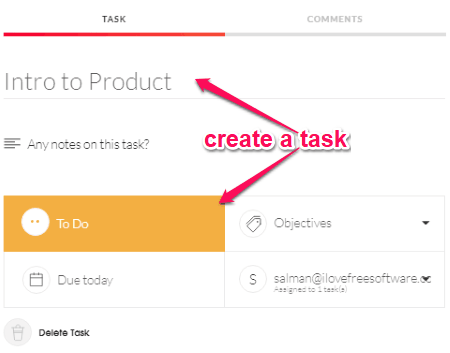
After that, you can proceed and finally assign the task to any collaborator you want. There is no limit on the number of tasks which you can create and assign to others for completion. The status of the tasks can be changed to “Completed” manually by the assignee.
How to Access the Event Website:
Once you’re done with all the entities of events explained above, you can proceed and access the event website. It automatically creates a website for every event that you create on Tame. You can find the event website URL from “Event Settings” at the bottom of the left panel or simply click on the “Web” icon. When you select the “Event Settings”, you will also see some option to customize the event website like enable/disable speakers, programme, add social media profiles of the event, add tags, change brand color, and do more.
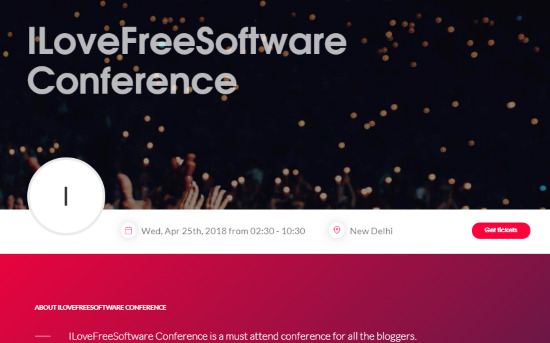
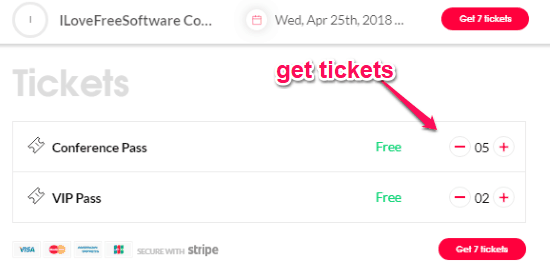
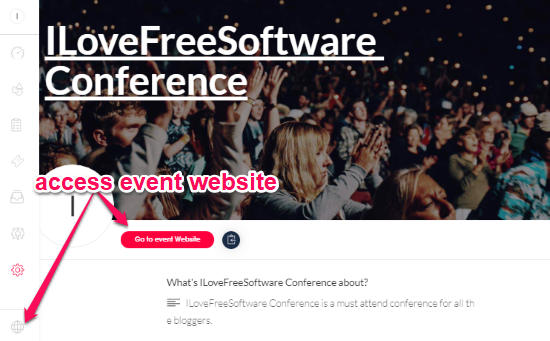 Now, you can simply click on the “Go to Event Website” button to browse the website. You can also share the website URL to others such that they can buy tickets and attend the event. You can see all the information you have enabled on the website along with the option to buy tickets. To buy a ticket, the users would need to go to the “Tickets” section and then choose the number of tickets they want to buy and hit “Get tickets” button.
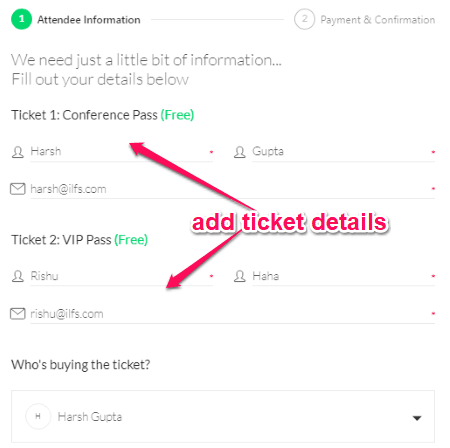
After that, a popup window will open and it will ask you to enter the ticket attendee information like the person’s name, email, and the user who is buying the ticket. After that, proceed and buy the tickets. The ticket will be sent to the email address of the person who bought the tickets.
Some other useful features of this online event manager are:
Attendees: Once people buy tickets from your event website, they will show up as attendees on your event dashboard. You can see the attendees on the “Tickets” tab. You can also edit various information of the people manually like the attendance status, contact information, etc.
Orders: The order will show up the tickets purchased, buyer information, price, and order number. The orders can also be seen under the “Tickets” tab.
Dashboard: It comes with a simple but useful dashboard which will show you a graph of tickets sold, ticket breakdown, and also the status summary of speakers, tasks, and collaborators.
File Manager: It is another useful feature which allows you to upload and manage files related to the events. You can upload important documents, images, videos, and much more. The file manager can be accessed by clicking on the “Files” tab on the left panel.
Closing Words:
Tame is no doubt one of the most useful and feature-rich online event manager which makes it pretty simple for you to create and manage events. What I like most about this service is that it covers almost all the aspects required for staring an event and up until finishing it seamlessly. So, if you’re planning to have an event, then you got to try Tame. And yes, it is completely free to use.