Here you will learn how to track time spent on GitLab issues automatically. To do that, you can use some free time tracking websites like Toggl, Clockify, etc. These websites let you integrate them with GitLab with the help of a browser extension for Chrome and then enables you to track time on issues without leaving your GitLab workspace. They can automatically track time you spent on individual issues and log the details to their respective dashboards. You can see the time entries by opening the dashboards online.
After installing the extension, they add a small button to GitLab issues that you can click to start/stop the time tracker. Almost all these websites have no limitations in the time tracking duration or the quantity of issues in which you can track your work hours.

We have also covered detailed tutorials on how to track time spent on Asana tasks, Trello boards, and Slack automatically.
Let’s get started with the services.
Toggl:
Toggl is probably the best free websites that can help you easily track time spent on GitLab issues automatically. To do that, it requires you to install a Chrome extension so that it can integrate with GitLab and let you directly track time. You can track as many GitLab issues as you want for free without any limitation on the tracking duration for each session. All the logged time will be visible on the Toggl dashboard.
How to Automatically Track Time Spent on GitLab Issues with Toggl:
Step 1: To start, simply open Toggl homepage and register for an account. Once done, you can proceed and install the Chrome extension to integrate Toggl with GitLab. After that, a new window will open on your browser, where you need to simply check the small box associated with “GitLab”.
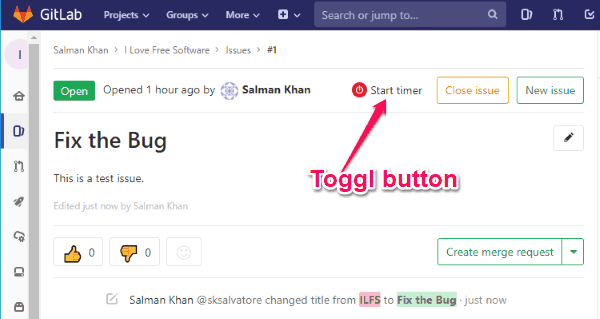
Step 2: After that, whenever you open an issue on GitLab, you can see a new button named, “Start Timer”. Now, to start tracking time on that issue simply hit this button. Then it will automatically keep tracking the time you spent on that issue until you manually stop the timer.
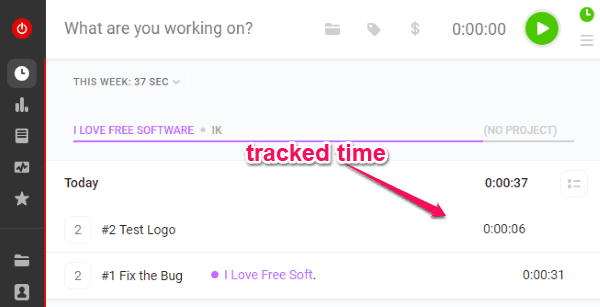
Step 3: The tracked time will be added to your Toggl account and you can see the time entries on the dashboard. For every GitLab issue, it will create a separate time entry and will also show the total work hours on all issues.
Clockify:
Clockify is another free website that can help you track the time you spent on GitLab issues. For that, all you need is to integrate it with GitLab through the Chrome extension. Then you can start tracking the time spent on any issues directly from GitLab. There is no limit on how many issues you can track the time for or in the session duration. The logged time will be added to the dashboard on Clockify as time entries.
How to Track Time Spent on GitLab Issues Automatically using Clockify:
Step 1: First, sign up for a new account on Clockify and then integrate it with GitLab. To do that, you can simply install the Clockify Chrome extension, click on the extension icon, and sign in to your account.
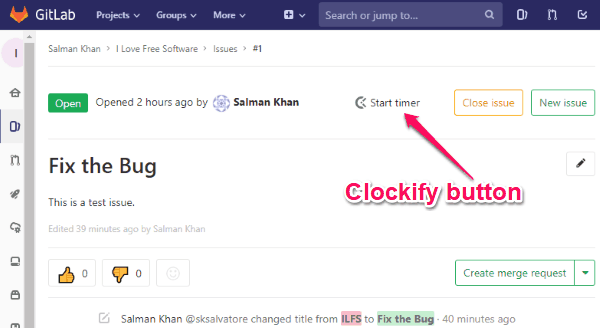
Step 2: After that, it will integrate with GitLab and you can see a Clockify button when you open any issue. Now, to start tracking the time you spent on that issue, all you gotta do is click the button and the timer will begin. After you’re done with the issue, simply stop the timer.
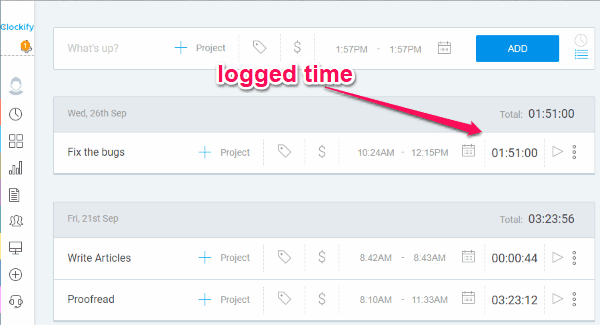
Step 3: Now, it will log the time you spent on that task to your dashboard automatically. You can simply open your Clockify account to see the logged time whenever you want. Apart from showing the time spent on individual issues, it will also display the total work hours.
Timeneye:
Timeneye can also be used to track time spent on GitLab issues automatically. This website lets you track time on unlimited issues for free and also doesn’t put any limit on the time tracking session duration. You can easily integrate Timeneye with GitLab by installing its Chrome extension. Then you can directly track your work time on different issues from GitLab. It logs the tracked time to the online dashboard.
How to Track Time Spent on GitLab Issues Automatically using Timeneye:
Step 1: First open the Timeneye homepage and create an account. After that, install the extension on your Chrome browser. Now, login to your account by clicking on the extension icon and it will get integrated with GitLab. Then you can proceed to start tracking time on issues.
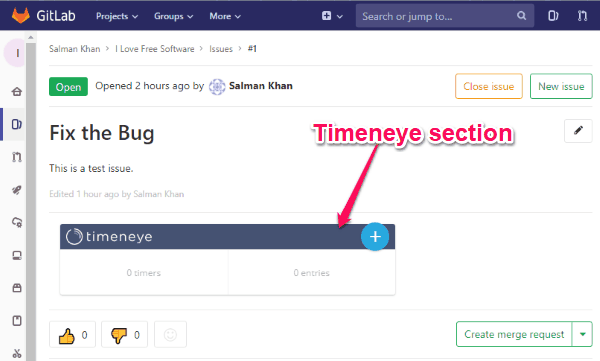
Step 2: Open any GitLab issue and you will see a new section named “Timeneye” added to the issue. Now, to start tracking time on that particular issue, simply press the “+ button visible on the new section. Then you can select a project, project phase, and start the timer.
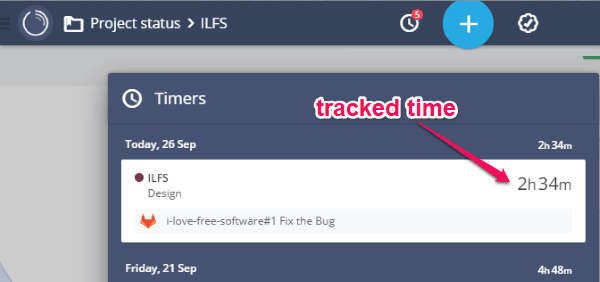
Step 3: After you’re done working on the GitLab issue, you can manually stop the timer. Now, it will log the tracked time to your Timeneye account dashboard. You can open it and see the time tracking details for individual and total issues. The time entries can be seen on a calendar or under the “Projects” tab in detail.
TMetric:
TMetric is also a free website that makes it quite simple for you to track and log the time you spent on GitLab issues. For that, you would need to simply integrate it with GitLab by adding the Chrome extension. After that, you can automatically track time on issues directly from GitLab. There is no limit on the time tracking duration or the number of issues which you can track. It also has a simple dashboard where all the time entries will be logged.
How to Track Time on GitLab Issues Automatically with TMetric:
Step 1: To get started, you would need to open TMetric and register for an account. After that, install the Chrome extension so that TMetric is integrated with GitLab. Then only you can start tracking time on issues directly from GitLab.
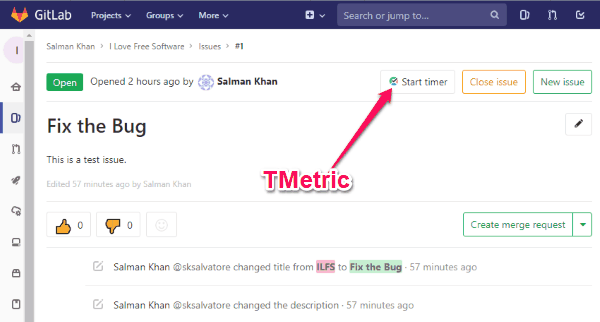
Step 2: Whenever you open any GitLab issue, you can see a new “Start Timer” button at the top. Now, you can press that button to start tracking your work time automatically on that issue. When you are done, you can simply stop the time tracker and it will log the time entry to the TMetric online dashboard.
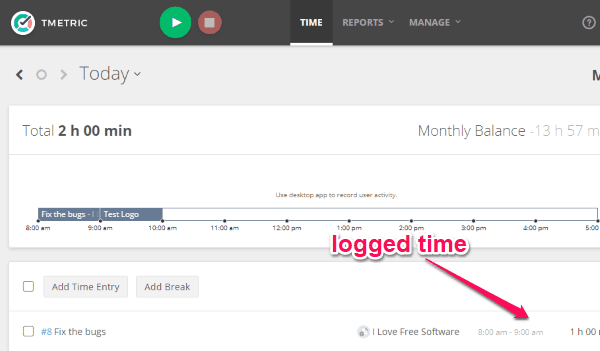
Step 3: It will create a separate time entry for every GitLab issue which you track. When you open the dashboard, you can see all the logged time on individual issues and also the total work time on all the GitLab issues.
TrackingTime:
TrackingTime is the last website which can help you easily find out how much time you spent on GitLab issues automatically. To do this, you would need to use the Chrome extension provided by this website. The extension will help you integrate TrackingTime with GitLab and track time on issues. The tracked time gets logged to an intuitive dashboard. It doesn’t have any limitation on the time tracking duration, but the free version has certain limitations in terms of active projects (only 3) and associated issues (up to 100) which can be tracked simultaneously.
How to Automatically Track Time Spent on GitLab Issues using TrackingTime:
Step 1: After creating a TrackingTime account, you would need to install the Chrome extension. Then a new window will open where you have to enable GitLab from the list of supported services. Once you do that, TrackingTime will integrate with GitLab.
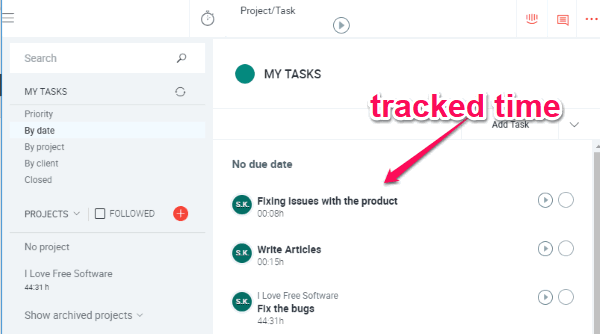
Step 2: Now, to track time on any issue, simply open it and then you will see a small “Timer” icon, as shown below. Click on that icon and it will start tracking the time you spent on that issue automatically.
![]()
Step 3: After you have completed working on the issue, you can manually stop the time tracker. Then it will add the time entry to the TrackingTime dashboard. You can simply open TrackingTime and view the tracked time under the “Tasks” tab.
Closing Words:
So, these are some of the best methods to track work hours on GitLab issues automatically and for free. The websites explained above make it very simple for you to do that. They can track time on issues and log them into an intuitive dashboard without much effort. What I like most about these websites is they enable you to track time directly from your GitLab workspace.
Try them and leave your feedback below.