Chat is a free Windows 8 app that allows you to manage multiple chat accounts from within one app. This app is really useful for users who have accounts on multiple websites, and are looking for an intuitive app to help them to manage all their chat accounts from right within one window. The interface is really smooth and well designed and optimized for Windows 8. The app works perfectly, and setting up multiple accounts inside the app isn’t difficult at all by any means whatsoever. The app interface is minimalistic, leaving all the unnecessary clutter of options aside, and this is what makes the app stand out from the rest of the crowd of apps that perform the same function.
Chat is available for free via the Windows App Store.
Candid features of this app:
Chat is a neat little tool which allows users with Windows 8 to manage their multiple chat accounts on various websites like Facebook, Google etc. with a lot of ease. The app is designed in a gorgeous manner, and being minimalistic, it is very easy to set up your chat accounts on this app.
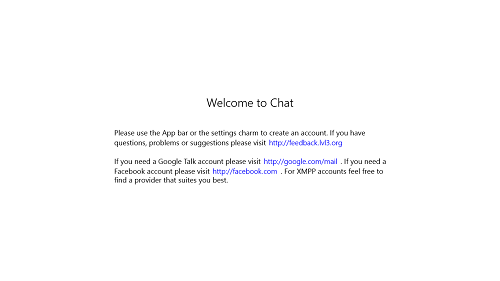
To install this app on your Windows 8 device, simply head over to the Windows App Store and download the app. Once the app is downloaded, it will be installed automatically and be visible on your Start Screen. To launch the app, simply click on the app icon on the start screen, and performing this action will fire up the Chat application. If it’s your first time using the app and you haven’t yet configured any account on this app, the window that will appear on your screen should look like the following screenshot.
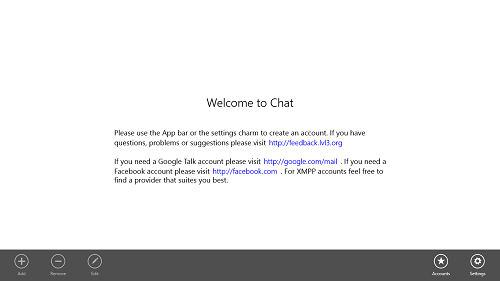
You will see a Welcome message, and some tips to adding new account to the app. To add a new account to this app, simply right click on any empty area inside the app, and it should bring up a control bar from the bottom of the screen. This control bar looks like the following screenshot.
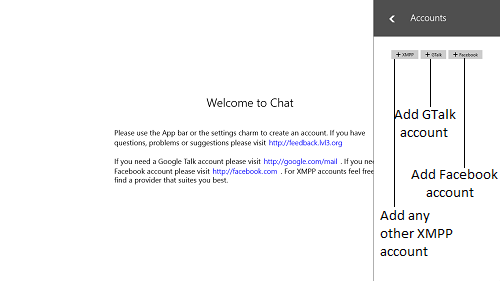
The control bar has a variety of options. To add a new account, click on the Accounts button towards the right side of the control bar visible at the bottom of the screen. When you click on the Accounts button, the following menu will fly in from the right side of the screen. (see below screenshot)
As you can see in the above screenshot, I have illustrated the functions of the various buttons in the menu. To add a Facebook account, simply click on the + Facebook button, which is the rightmost button.
When you click on the + Facebook button, you should get a prompt that looks like the following screenshot.
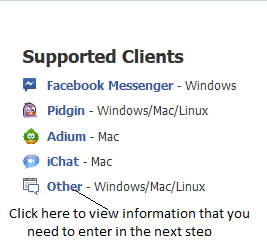
According to this prompt, you should head over to http://facebook.com/sitetour/chat.php while you are logged in to Facebook. When you do so, you will be taken to a window where you will be able to see your Facebook credential details that you have to enter in the app in the next step. To view these credentials, simply head over to the link mentioned above and you will be able to see a webpage in which you will be able to see the column shown below. (note that the below screenshot is a crop of the column which you have to actually scroll down and see)
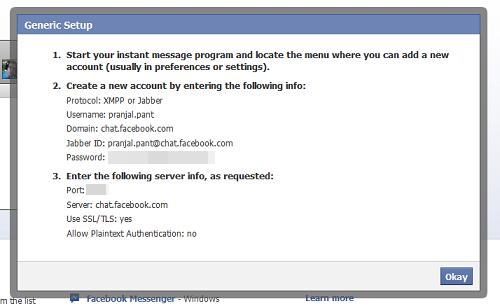
You have to click on Other button to view information about the credentials that you have to enter in the next step. When you click on this button, you will be able to see a popup from Facebook, just like the below screenshot.
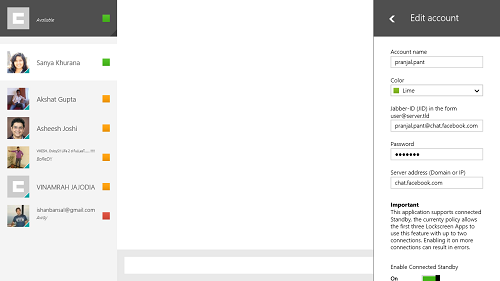
In the above Window you will be able to see all the necessary information that you will be required to use. Now, head back to Chat app, and go back to adding a new account. When you get the prompt for visiting the Facebook website to view information (screenshot already shown above), this time, simply click on the Ok button on the prompt. Now you will be taken to a screen that looks like the following screenshot.
As you can see in the above Window, simply use the information from the Facebook chat page into the Edit account field. When done, scroll down and click save at the bottom.
This is all that you need to know to start using the Chat app. Oh, and in case you are wondering how to configure Gmail chat, the process is very similar, and in fact, it does not require any complex entering of data. Just click on the +Gmail button at the menu from where we had selected the + Facebook button, enter your Gmail username and password, and you will be good to go. In the screenshot above, my Gmail was already linked to chat, and you can see my online contacts and away/busy contacts in the left pane as well. If you link multiple accounts, you will be able to see all your contacts in the left pane.
That’s all. Hope you enjoy using this app!
My take on this app?
Although the app is slightly complex to set up initially, when it’s been configured, it becomes really easy to chat with your friends. The best part of the app is its ability to manage all chat accounts from just one place, and also the fact that it is very fluid, and is ad free at the same time.
Chat is a great app to have on any Windows 8 device.

