This tutorial describes how to connect to a Wi-Fi network in Windows 10. Just like its predecessor, Windows 10 also includes the modern style UI design elements, blended with the traditional desktop UI that every Windows user has known and loved for long.
While the modern UI design elements do make up for a visually striking user experience, they also mean that some common OS functions are effected a bit differently. One such function is connecting to Wireless (or Wi-Fi) networks in Windows 10. But is it difficult? Absolutely not. Head past the break, and find out how to connect to a Wi-Fi network in Windows 10.
How To Connect To A Wi-Fi Network In Windows 10?
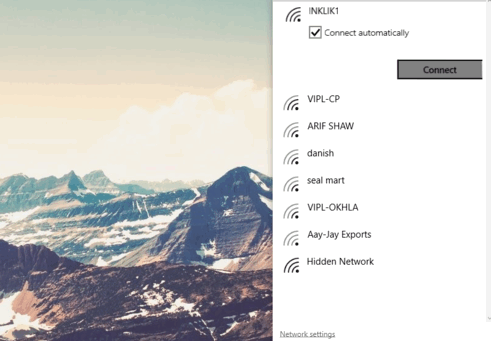
Step 1: Click on the Wireless Network indicator icon in the system tray to bring up the list of the available Wi-Fi networks.
 Step 2: From the Wi-Fi networks listed, click on the one that you want to connect to, and hit the Connect button. If the network is secured with a password, you’ll be prompted to enter the same. You can also check the Connect Automatically option. Check the screenshot down below:

And that’s everything that’s required on your part, fellas! You’ll now be connected to the selected Wi-Fi network. Fire up your favorite browser, and hit the web to start browsing. Simple as pie!
Also See: Set Data Bandwidth For Live Tile Updates In Windows 10
Conclusion
Due to the modern design language based UI elements of Windows 10, a number of simple OS actions (such as connecting to a Wi-Fi network) are effected with a twist. But they are still as simple and intuitive as ever, as seen above. Guess change isn’t that bad. After all, it’s the only constant in the world!