Here is a short tutorial that explains how to create system restore point in Windows 8 and restore system in Windows 8.
System Restore is an useful feature of Windows, which lets you revert back your system to a particular previous point. It is generally done to recover the system, if any problem/malfunctions occurs. System Restore revert backs system files, system settings, installed applications, and Windows registry (learn how to backup and restore Windows 8 Registry).
Creating Restore Point In Windows 8 Manually:
For creating System Restore point and to restore your system, you don’t need to add any additional software. Just follow the steps mentioned below:
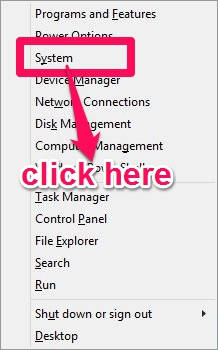
Step 1: The very first thing that you need to do is navigate to the “System” folder. To do so, press Windows Key + X from your keyboard, else right click on the Windows icon to pop hidden Power User Menu of Windows 8 (explore more useful hidden features of Windows 8). From the Menu, click on “System”.
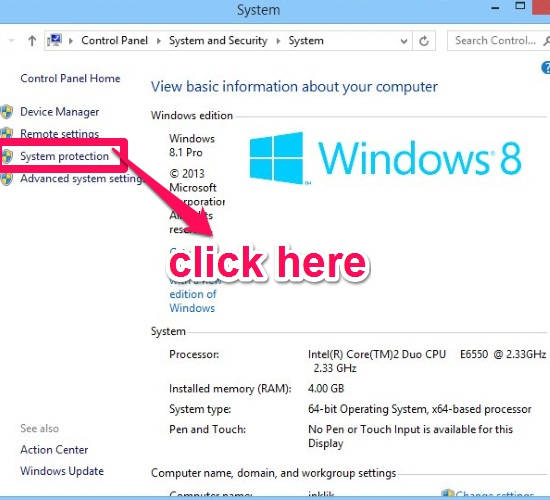
Step 2: It will open the System folder in a new window, from where you can change various System settings. On the left panel, you will see “System protection” option. Click on it to open “System properties” .
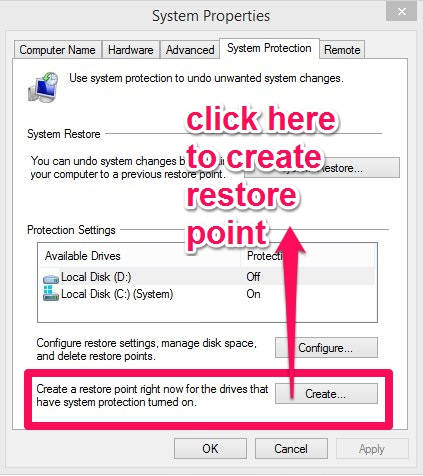
Step 3: On the bottom of the window, you will find a Create a restore point button. Click on “Create” button to create a restore point of the system.
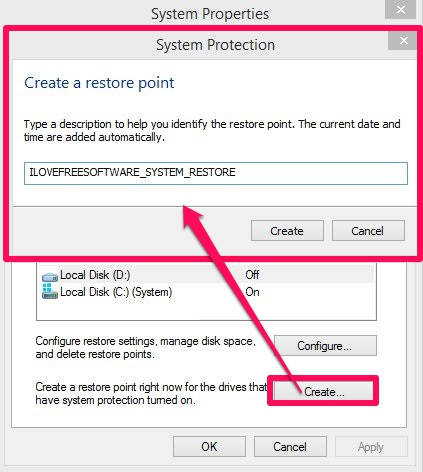
Step 4: In the next window, give a name to your Restore point as per your preference. You don’t need to mention date and time, as date and time appears by default. After giving name, click on “Create”.
It will create a restore point quickly, and when it is done, you will get a message box that the restore point has been created.
Create Restore Point In Windows 8 Automatically:
So, we saw how to create System Restore Point in Windows 8 manually. But won’t it be great if this could happen automatically? Thankfully, it can.
To create restore points automatically, follow the steps mentioned below:
Step 1: Open “Run”. In run, type taskschd.msc to open Task Scheduler.
Step 2: In Task Scheduler, navigate to System Restore, by following the below mentioned path:
Task Scheduler Library\Microsoft\Windows\System Restore
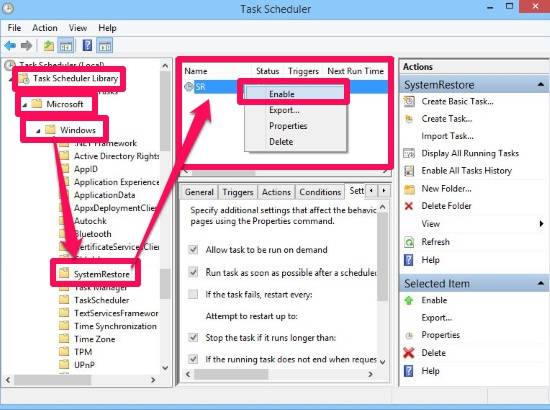
Step 3: Click on System Restore. In the middle panel, you will find SR. Right click on SR and then click on enable option to enable this task. You can disable it any time, by clicking disable option. To change the setting of the properties, click on properties from the list. Click on “Run” option to run the task.
How To Change The Frequency For Creating Restore Point Automatically:
After enabling the SR task, the System will create restore point automatically. By default, the tasks creates regular system restore points at the time you run it.
However, you can set the frequency to create the system restore point. To change the frequency as per your preference, right click on the SR and then on properties.
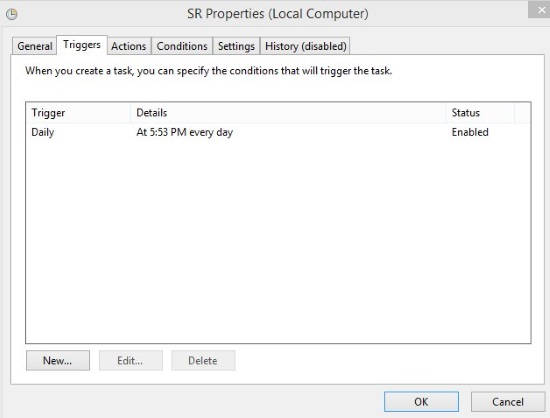
It will open SR Properties in a new window. Click on Triggers at the top panel. You will find that the Trigger section is empty. Click on “New” button in the Trigger Section.
In “New Trigger” window, navigate to “Begin a task” and choose “On a schedule” from the drop down list.
In Settings, choose the frequency from provided 4 options: One time, Daily, Weekly, and Monthly. After choosing frequency, choose the date and time as per your preference. You can even choose an “Expire” date to stop creating System Restore Points from that date.
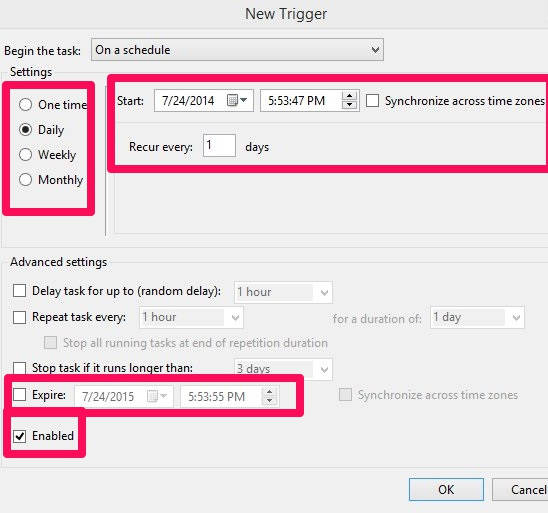
Before clicking on “OK”, make sure that Enabled check box is checked. Click on “OK” and exit the scheduler.
Now you don’t need to worry about creating System Restore Point manually. Your System Restore will automatically create the restore points.
How to Restore Windows 8 To a System Restore Point?
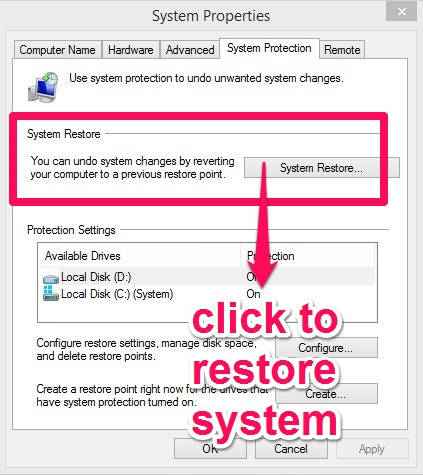
To restore your system, go back to the “System properties” (follow Step 1 and Step 2 within Creating Restore Point In Windows 8 Manually).
In the System properties, you will find System restore button. Click on the restore button to restore your system.
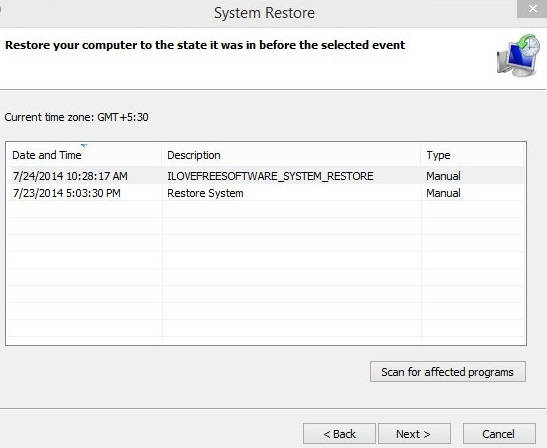
In the next window, it will give you a list of restore points that you have created. Choose a restore point to revert your system to a previous state/point.
Your need to reboot your PC to apply the changes.
When the rebooting is done, you will see that your PC has restored to a previous state.
Also learn how to restore files in Windows 8.