This tutorial is all about how to set a password protected volume limit on PC. Here comes a free tool for Windows “Volume Limiter” which lets you set custom volume limit and lock it with a password. You can use this tool to resolve volume controller malfunction or to restrict your children from turning up the volume high which can cause hearing damage. Define a custom volume limit and protect it with a password such that others will not be able to change that particular limit. If you don’t want to assign a password then simply set a limit and lock it.
You might have used many volume control software, but the password protection feature of “Volume Limiter” make it distinct. The custom volume limits, lock/unlock status, and password data are automatically stored to the registry. You can also minimize the tool into the system tray and it will continue running in the background.
Note: This is a lightweight tool and compatible with Windows 32 and 64 bit systems.
How to Set Custom Volume Limit with Password Protection:
Step 1: After you install the tool, simply open it up to start setting custom volume limit.
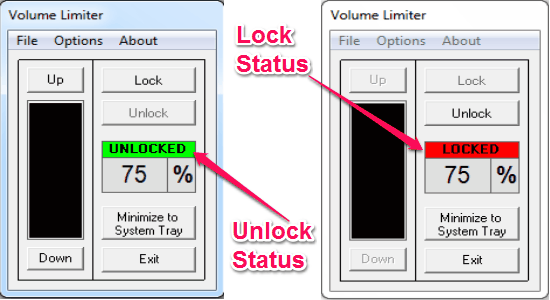
Step 2: The tool interface is pretty simple and you can easily set a limit and then lock/unlock it. Below the “Lock” and “Unlock” buttons, you will be able to see the status and limit of the volume. When in unlock mode, enter or set any percentage for volume and then lock it.
Step 3: To set password protection, simply go to the “Options” bar at the top and select the option “Set or Change Password”. By default, the password is “Blank” which means you have to simply press “Enter” on the “Password Entry” pop-up and create a new password.

Step 4: After assigning a password, whenever someone tries to unlock the volume limit, it will ask to feed the password for access.

Step 5: As we have already discussed that the lock/unlock status, volume limit and password data are stored automatically on the Windows registry. You can add this tool to the group of tools that automatically starts up when PC is started.
Step 6: One of the useful features of this tool is that it offers various shortcut keys for different options such as Ctrl+P to set a password, Ctrl+M to minimize to system tray, Ctrl+L to lock, and Ctrl+U to unlock.
My Final Verdict:
Volume Limiter is an interesting tool for Windows to set custom volume limit with password protection. Use the shortcut keys to perform actions instantly. You can also minimize the tool to the system tray in order to keep it running in the background.
Get “Volume Limiter” from the link here.